Most recent release information 26.1.0.x
This topic describes the enhancements added to version 26.1.0.x of OSS-ESPA which is the most recent OSS-ESPA release.
-
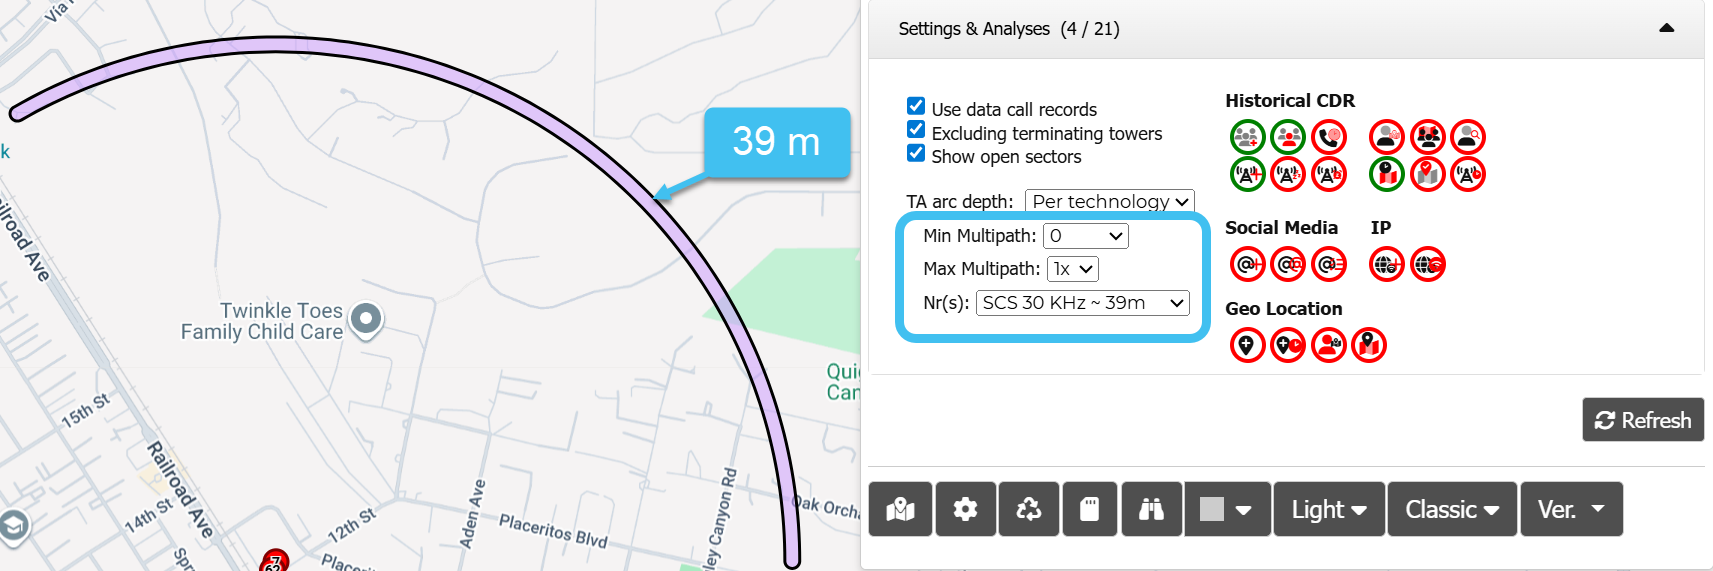
The TA arc depth per technology settings have been enhanced.
Previously you could only set the theoretical minimum distance displayed, and the maximum displayed distance was always the same. Now you can additionally set the maximum distance. What was the Multipath setting is now named Min Multipath and the behavior remains the same. A new Max Multipath setting has been added, where:
-
1x: the maximum distance = distance + (1 x technology depth). This is the default.
-
2x: the maximum distance = distance + (2 x technology depth).
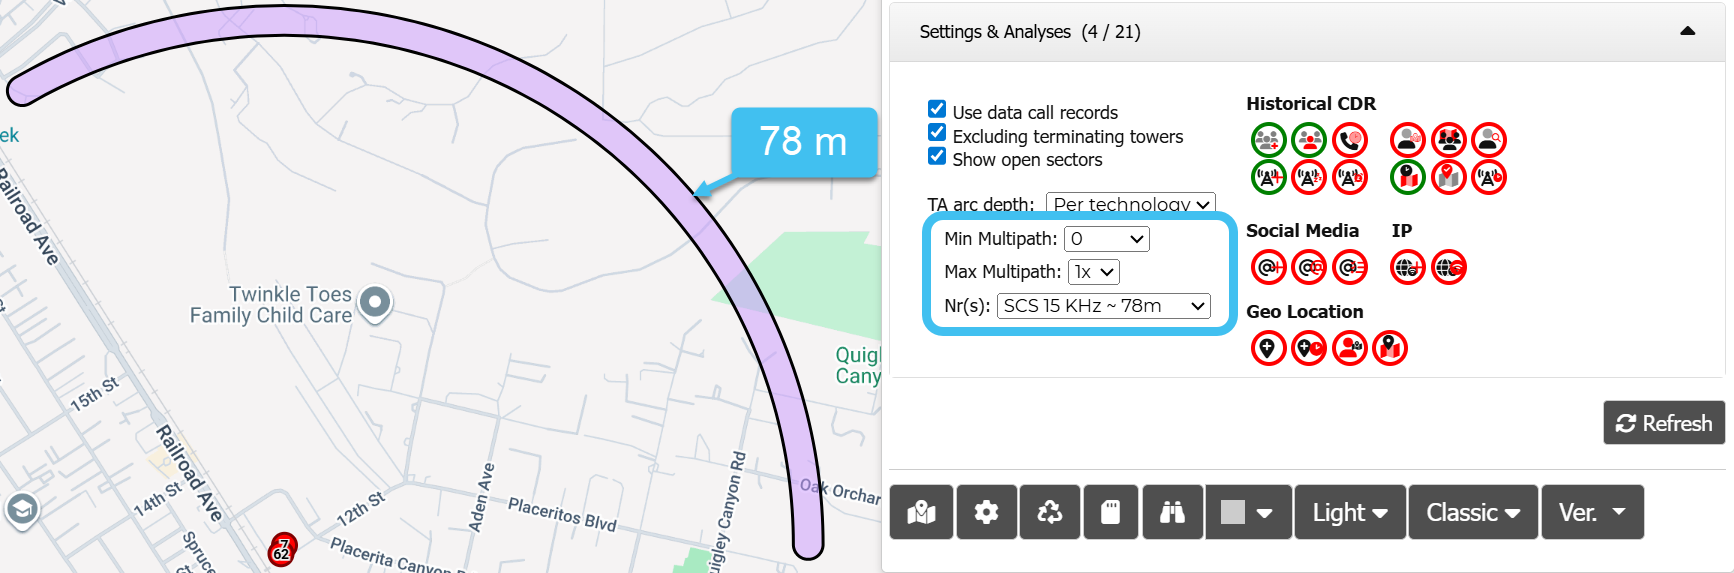
A new NR(s) setting has been added to support 5G NR (New Radio) where the arc depth is based on the subcarrier spacing (SCS). The default is set to SCS 15 kHz which is 78 meters. The other arc depths are: SCS 30 kHz is 39 m, SCS 60 kHz is 19.5 m, SCS 120 kHz is 9.8 m and SCS 240 kHz is 4.8 m.
The following three graphics give examples of how these settings display:

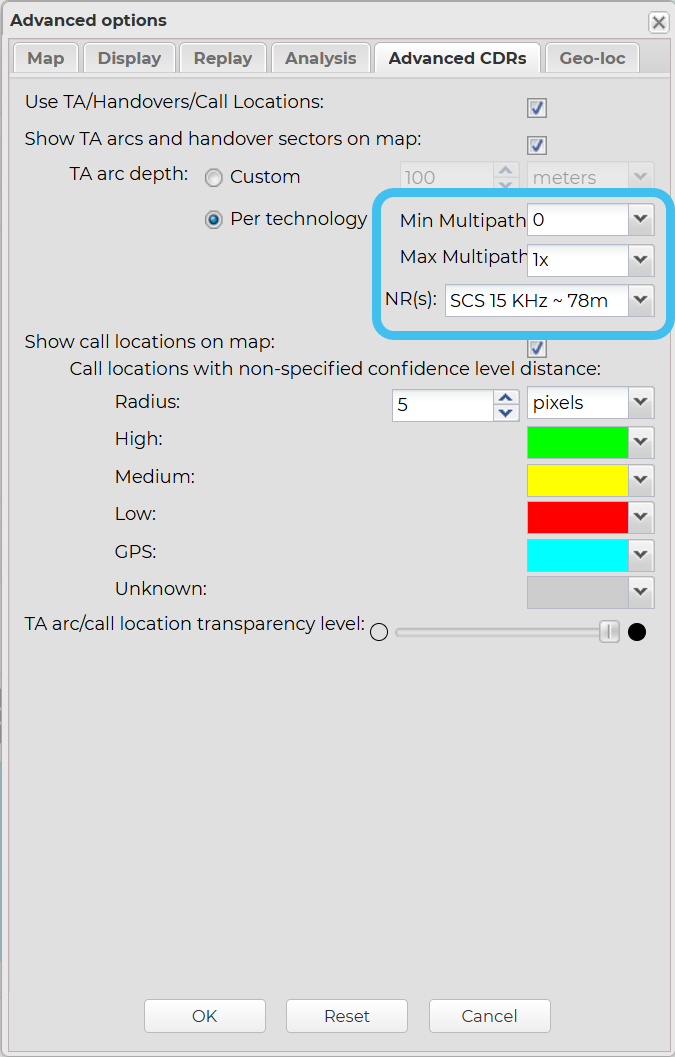
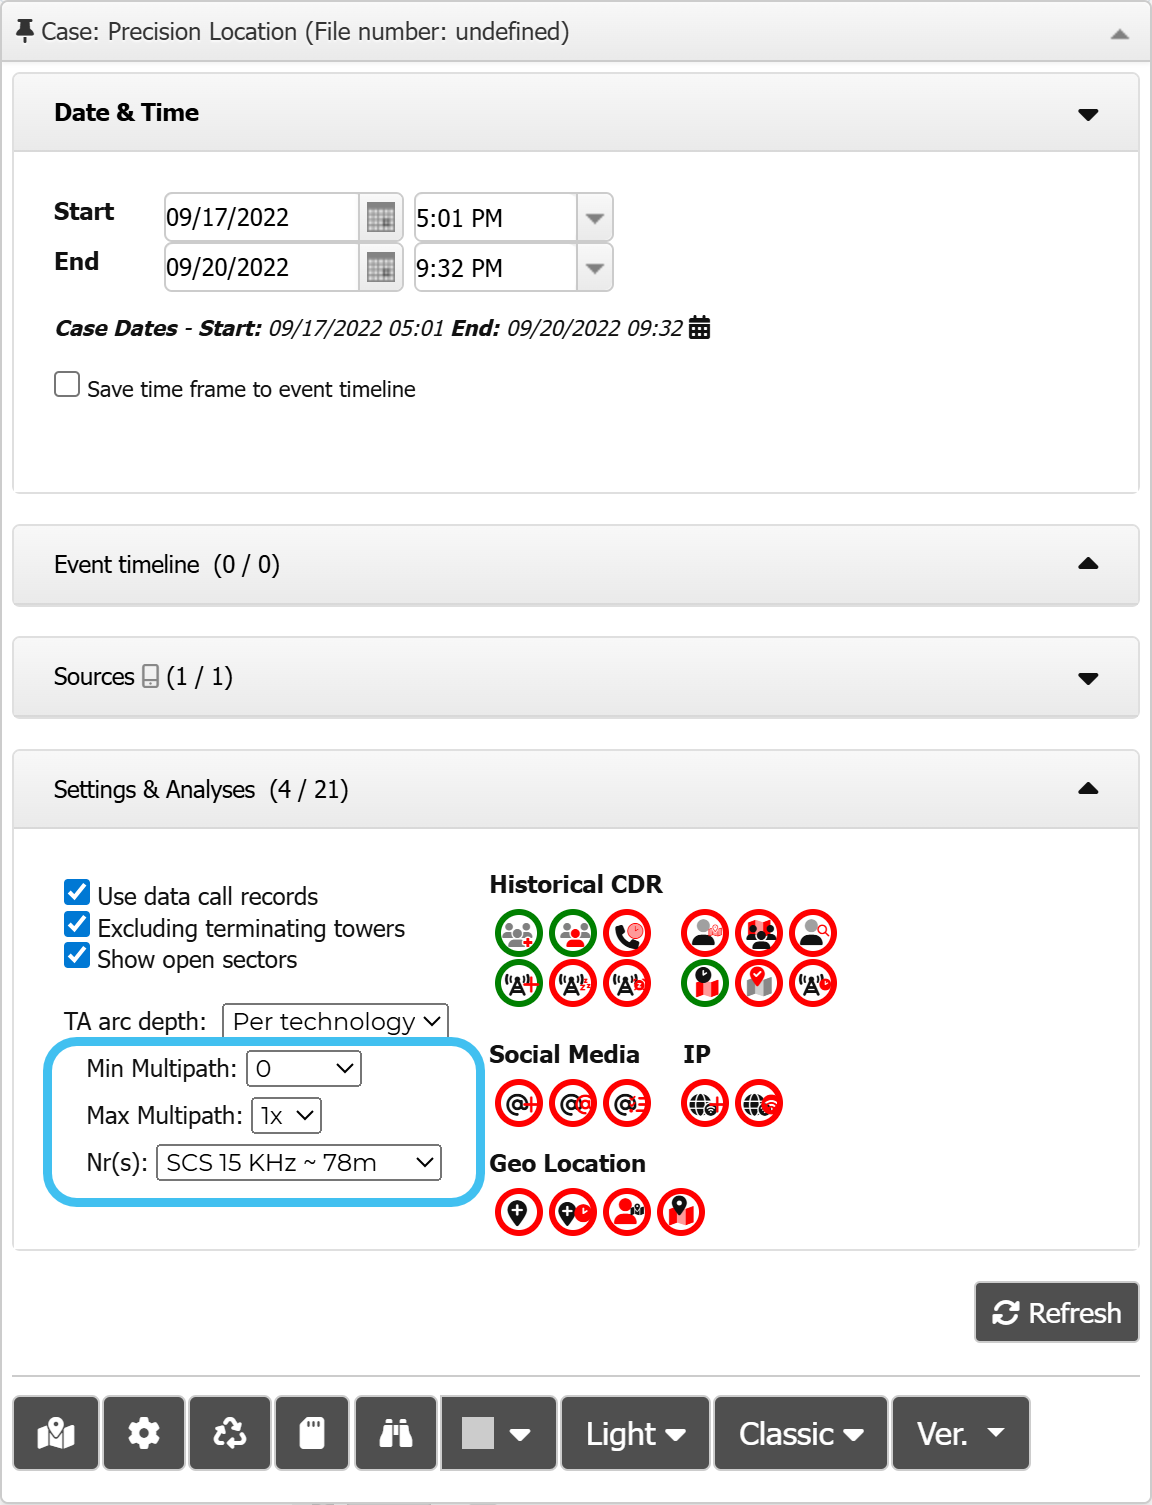
These settings are available in two locations:
-
Advanced CDRs tab of the Advanced options dialog box.
-
Settings & Analyses group on the Input and settings view.
-
-
A Codes column has been added to the CDR data tab to detail any available service codes.

-
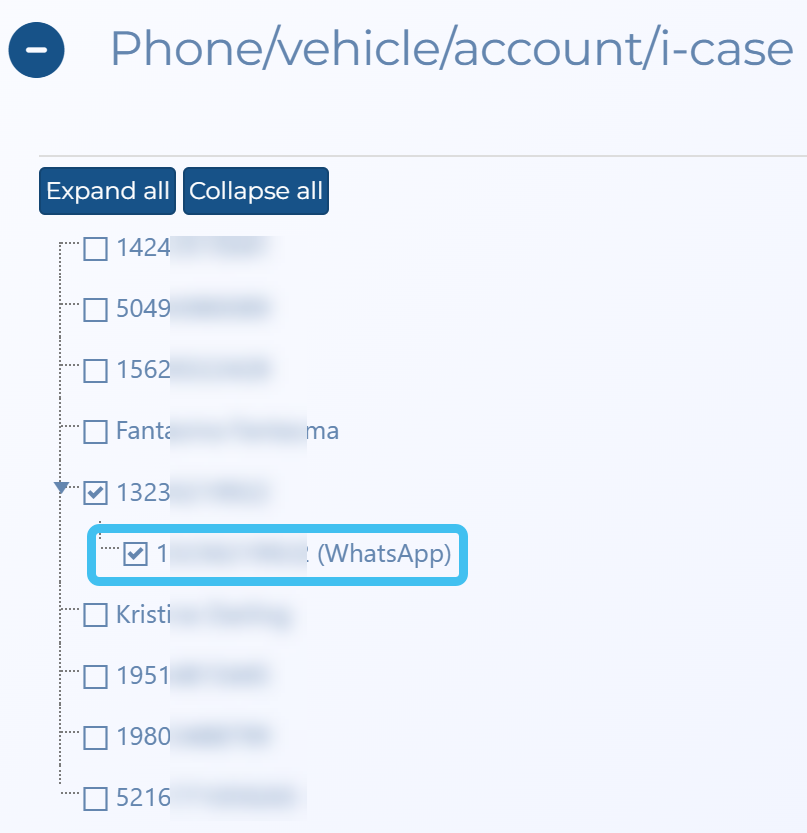
Social media data (Facebook, Instagram and WhatsApp) can now be included in the IP – International target IP, IP – Specific target IP and IP – Target IP change alerts. To include the social media data you must select it in Phone/vehicle/account/i-case on the Smart Track alerts & notifications screen.
-
You can now enable Smart Track for US Cellular as GPS data is now available through the T-Mobile network.
-
If you are sharing data with other OSS-ESPA accounts and you create an LIID (CASEID) which exists in another account then the X-Case alert pop-up that informs you of the duplicate LIID (CASEID) now also displays the account name.

-
When you are entering WhatsApp account identifiers, it is now optional whether or not you include the + at the start of the Account identifier.

-
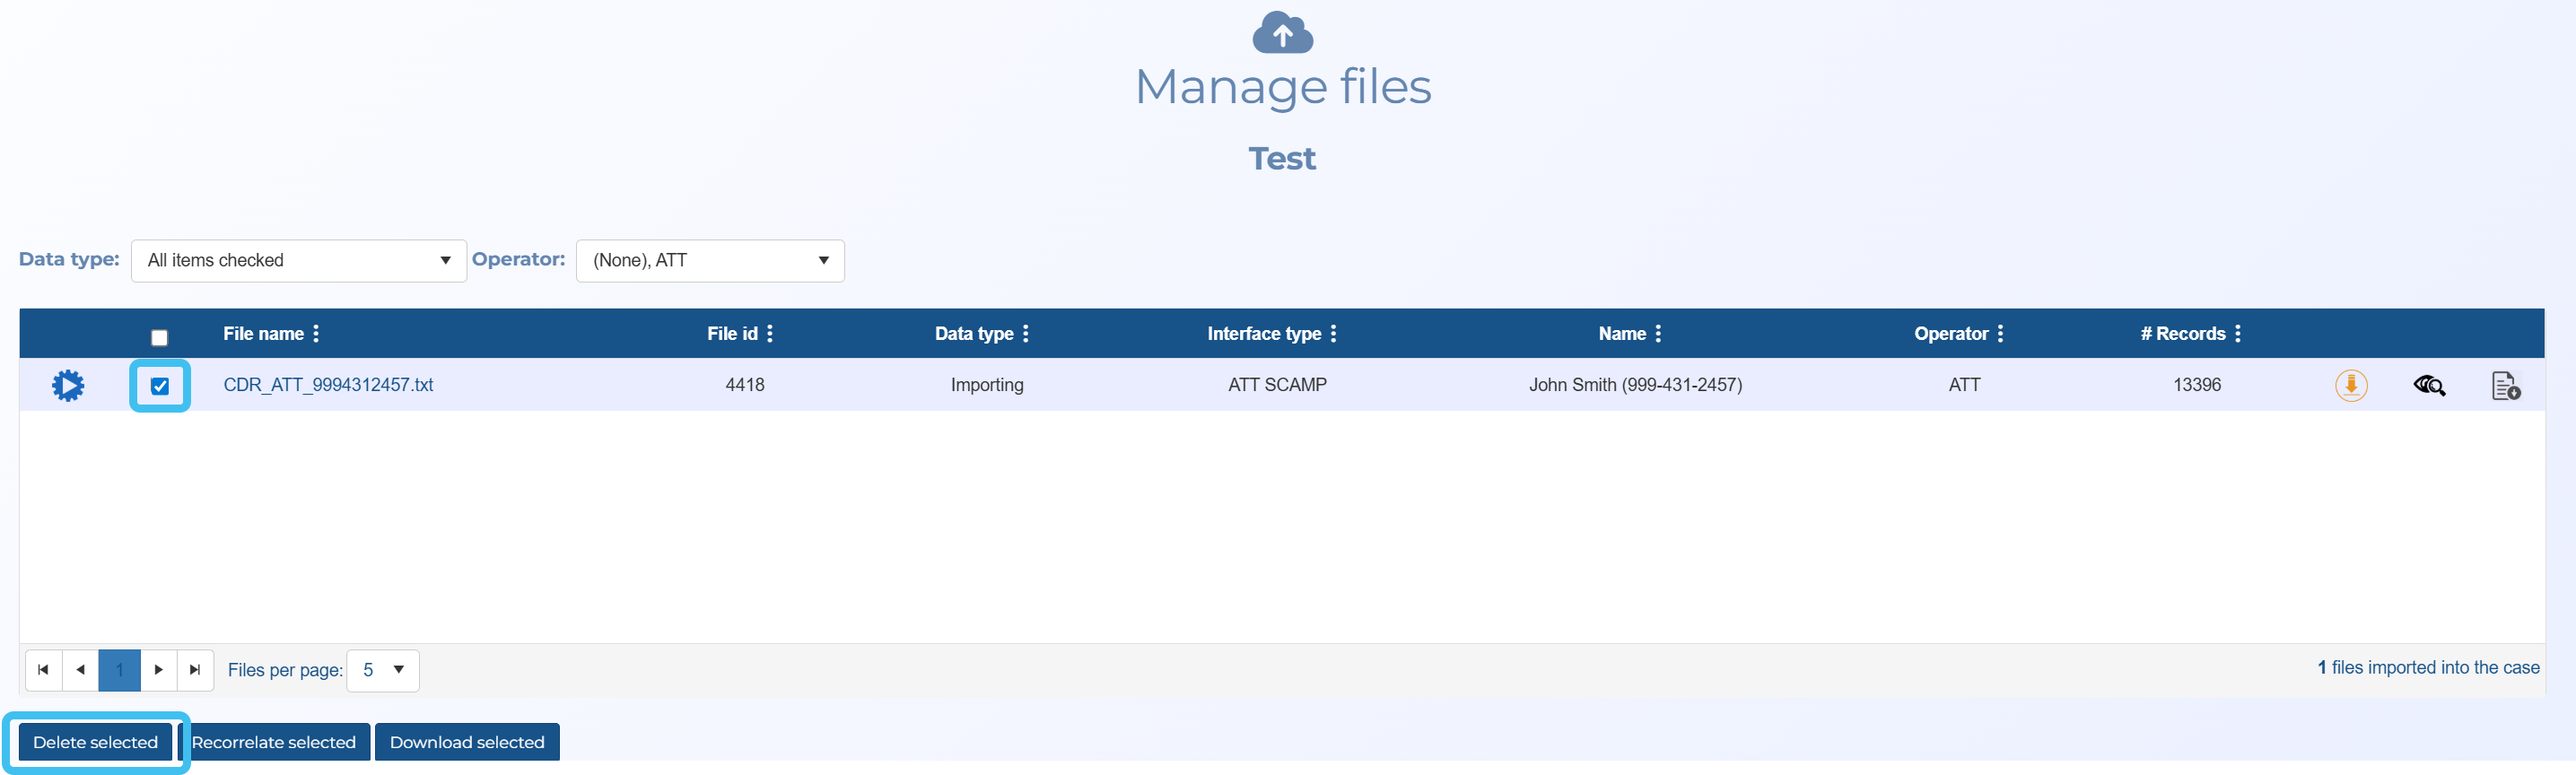
If you need to delete a file which is still importing you can now select the check-box alongside the file name and click Delete selected in the same way you would delete an already imported file on the Manage files screen.
-
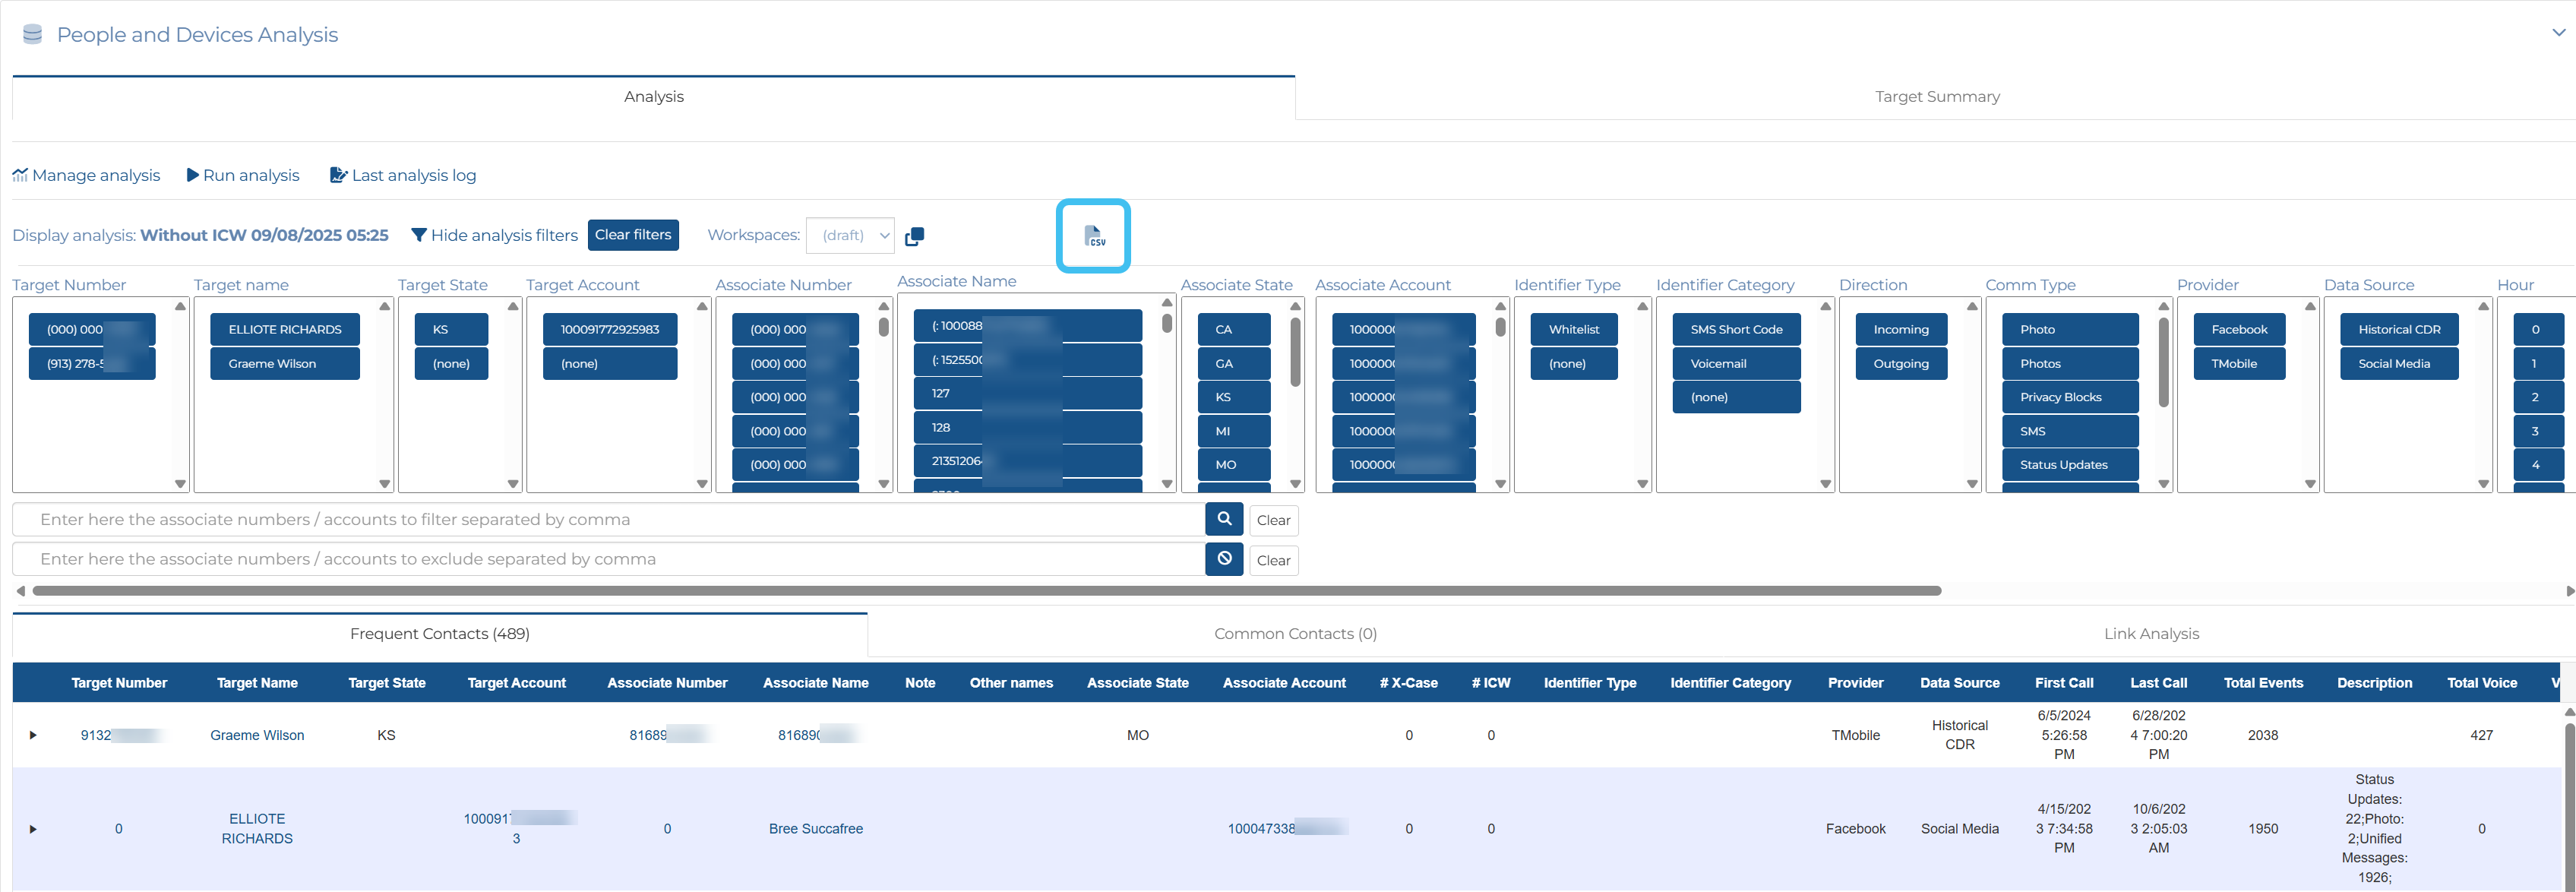
You can now export a .csv file of the Frequent contacts analysis that is currently displayed on the People and devices screen which includes any filters you have applied. To do this click
 .
.
-
A number of new key data types have been added:
-
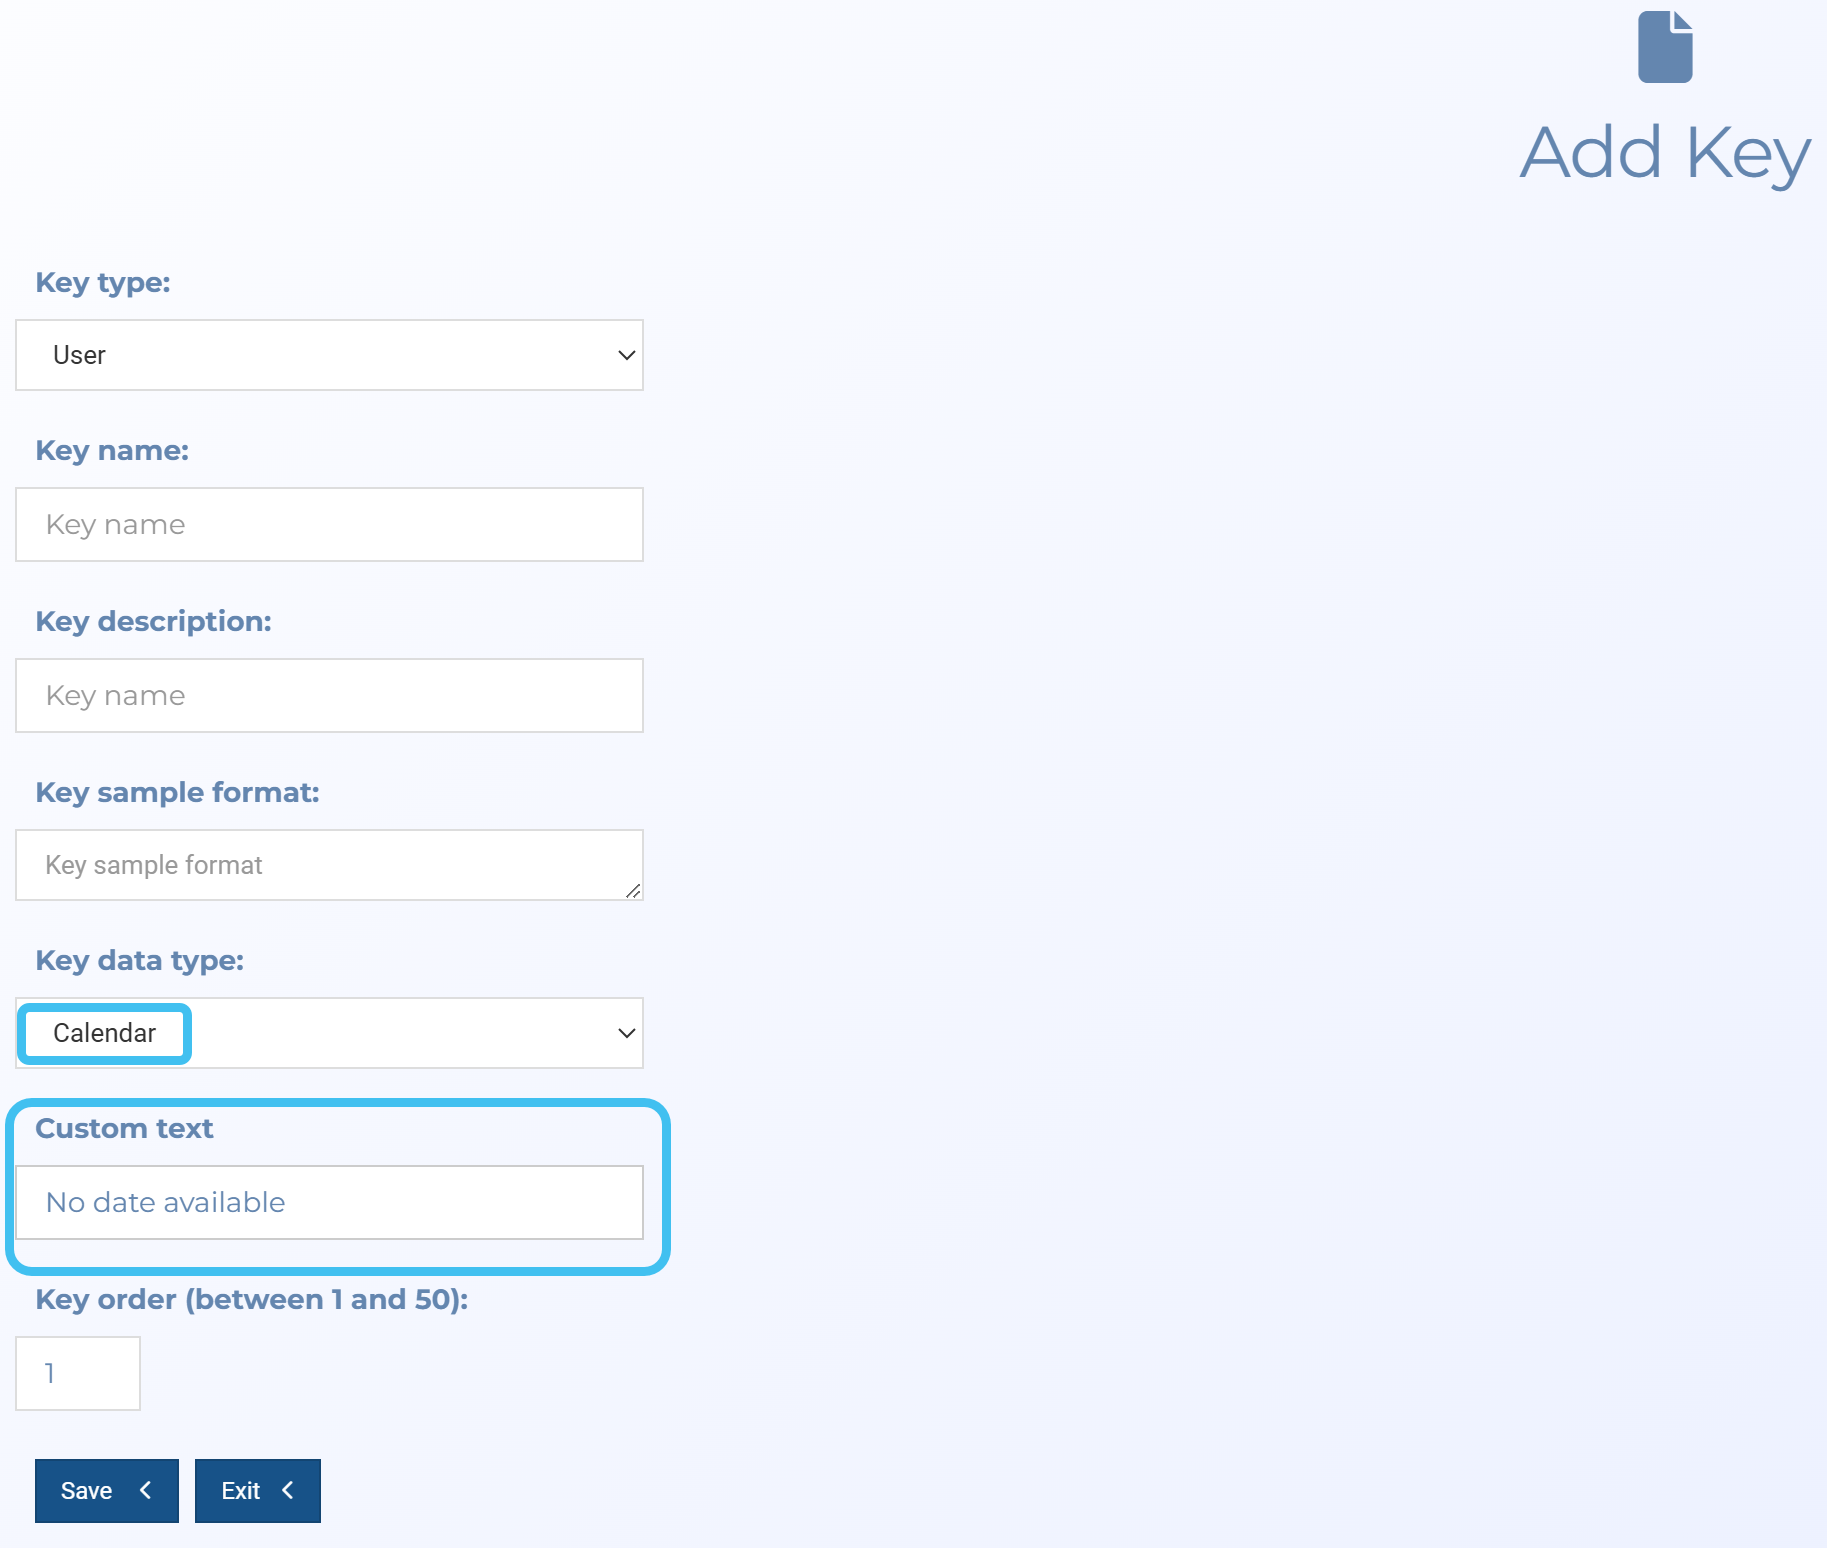
If you want to add dates to your templates you can use the new calendar key. To support this option:
-
On the Add/Edit Key screen a Calendar option has been added to the Key data type menu. When selected a new Custom text setting is displayed which can be used to add text to display when no date is selected.
-
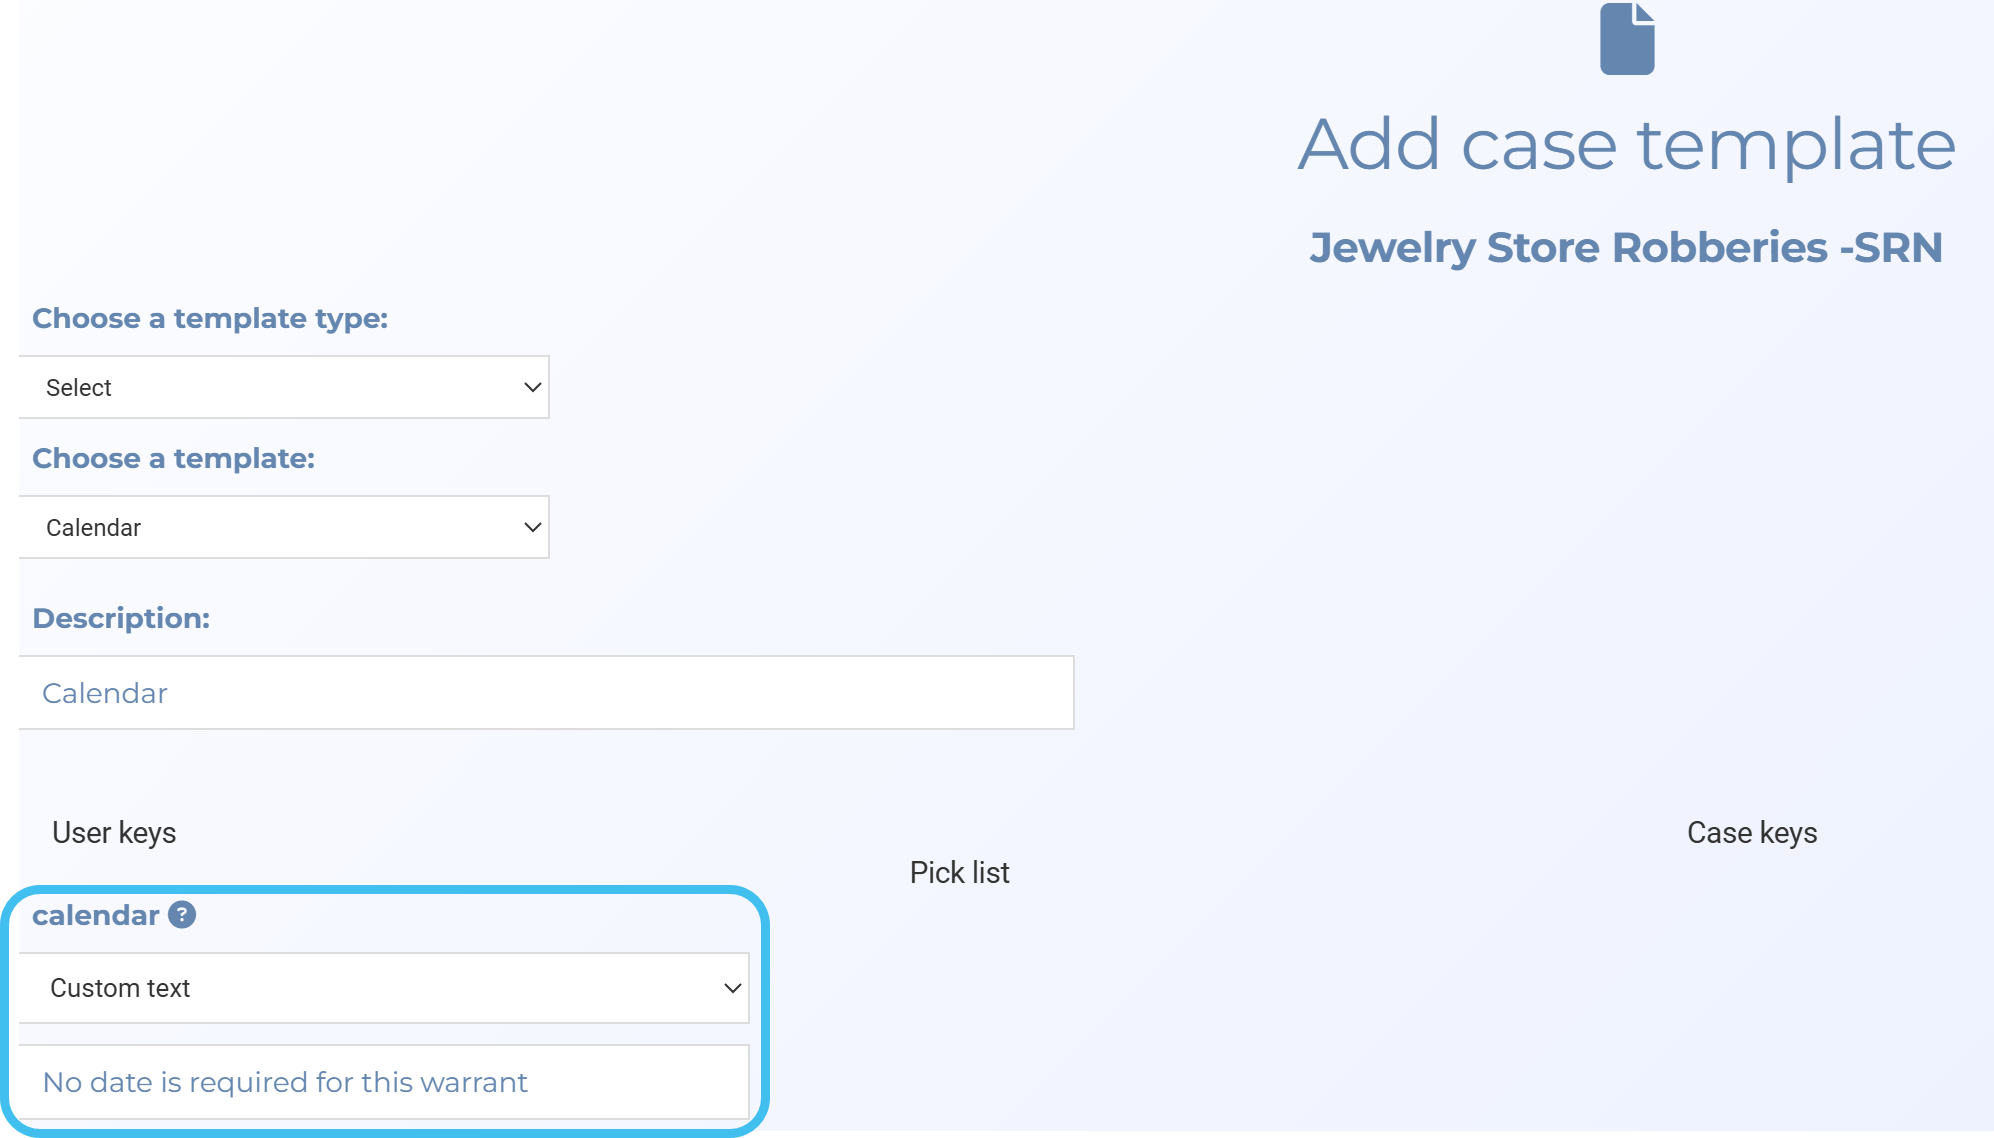
On the Add case template screen the Calendar key allows you to select between two options; either Custom text or Calendar. You can either edit the custom text or select a date from the calendar.
-
-
If you want to add checklist boxes to your templates so that the user can select the appropriate check-boxes and the output lists the check-box items one after the other, separated by a defined character you can use the new Check list with separator key. To support this option:
-
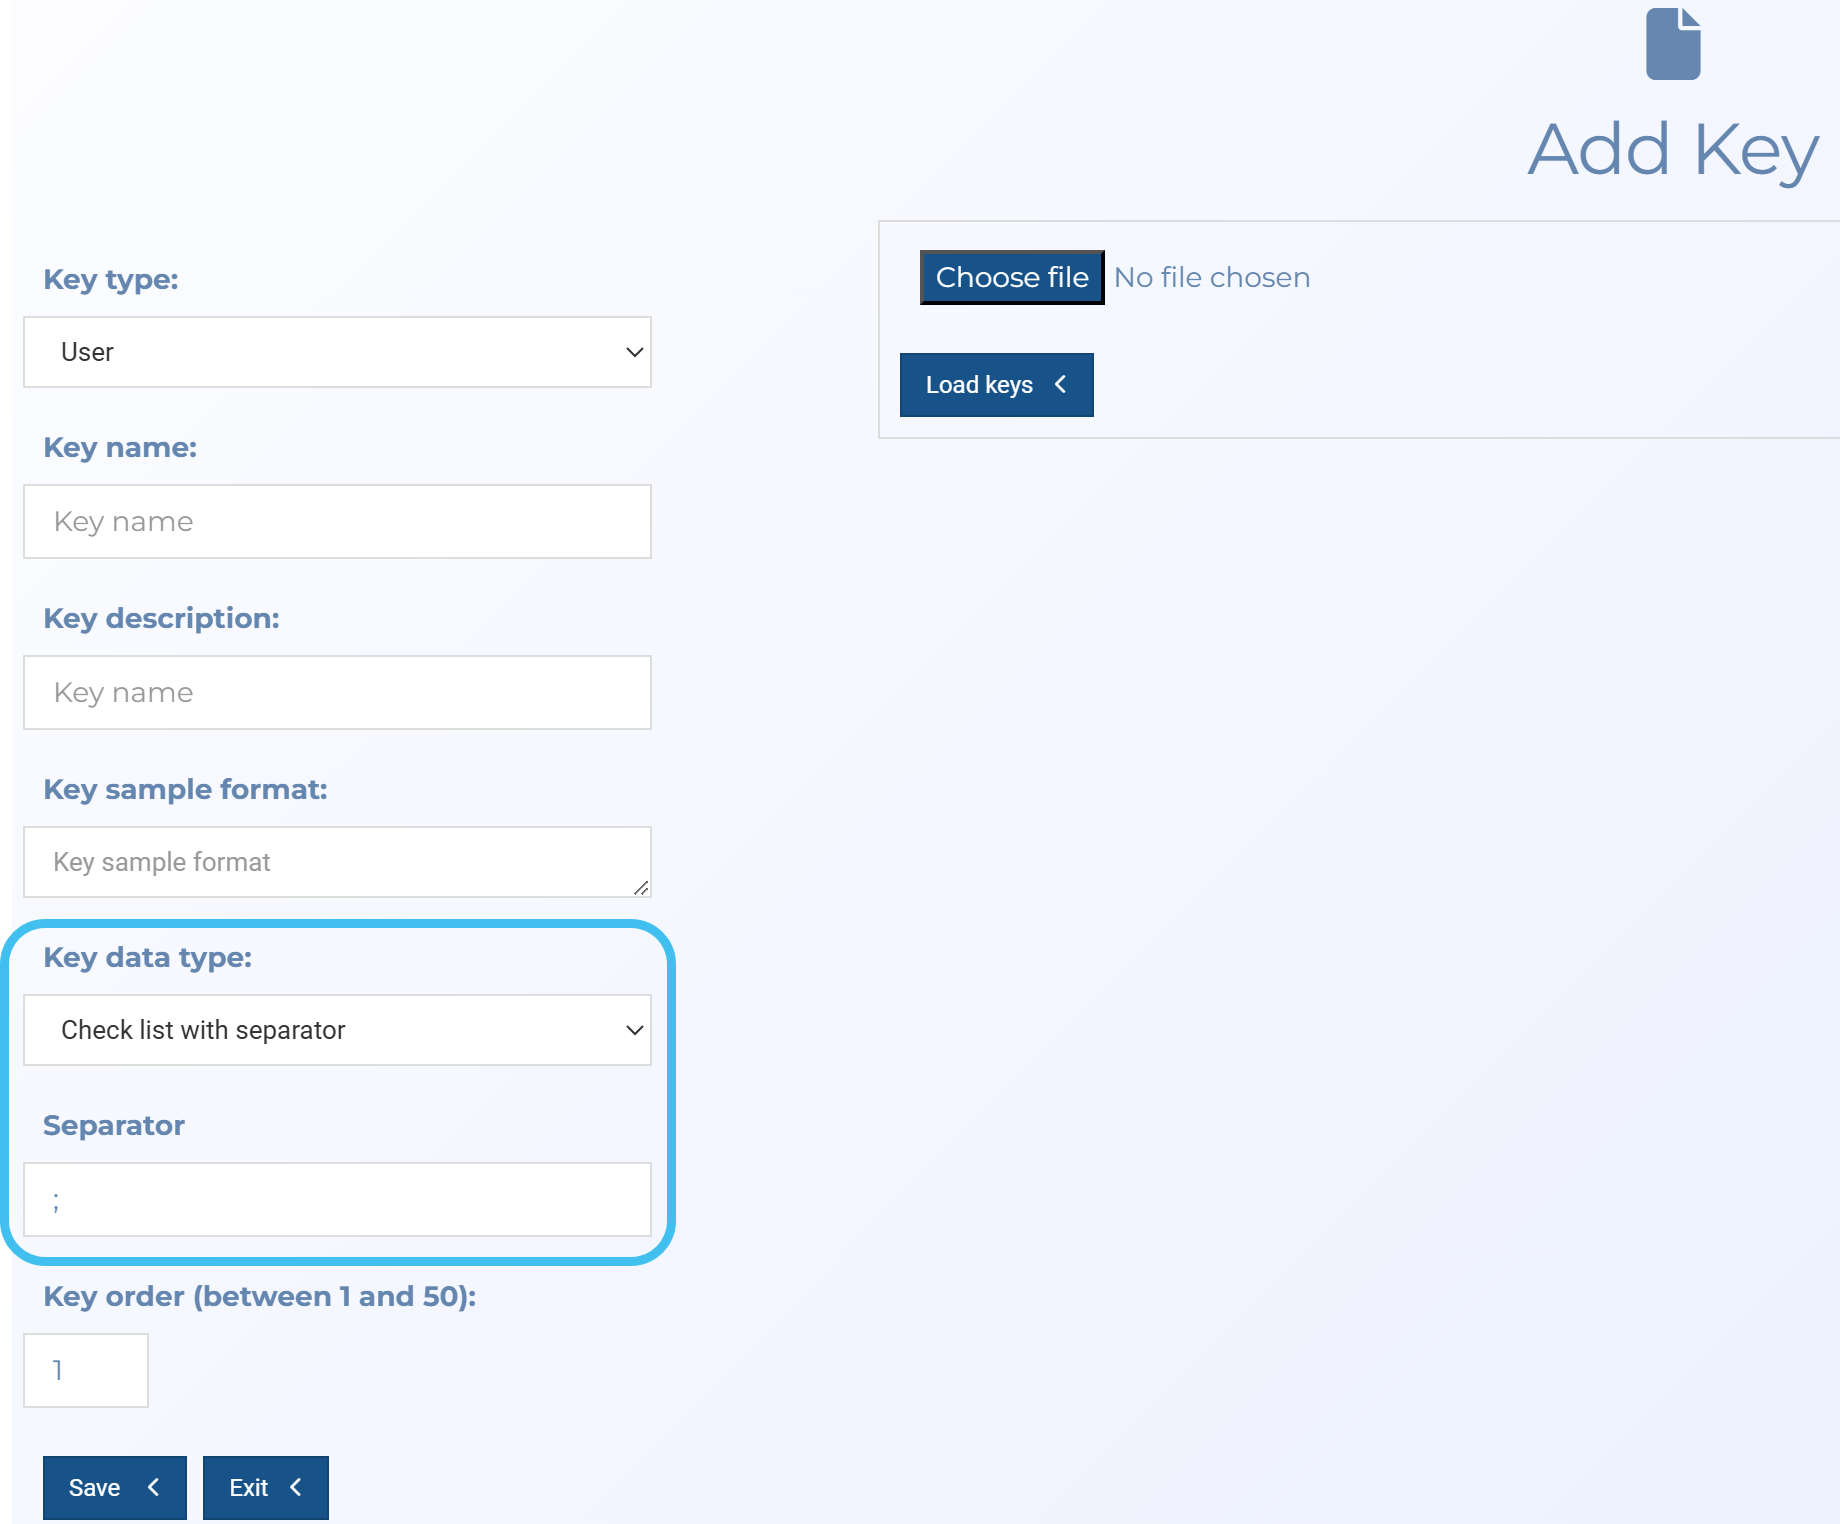
On the Add/Edit key screen a Check list with separator option has been added to the Key data type menu. In the Key value you must then enter the character that you want to use to separate the information, for example a colon, semicolon and comma.
-
On the Add case template screen the Check list with separator key allows the user to select the required check-boxes.
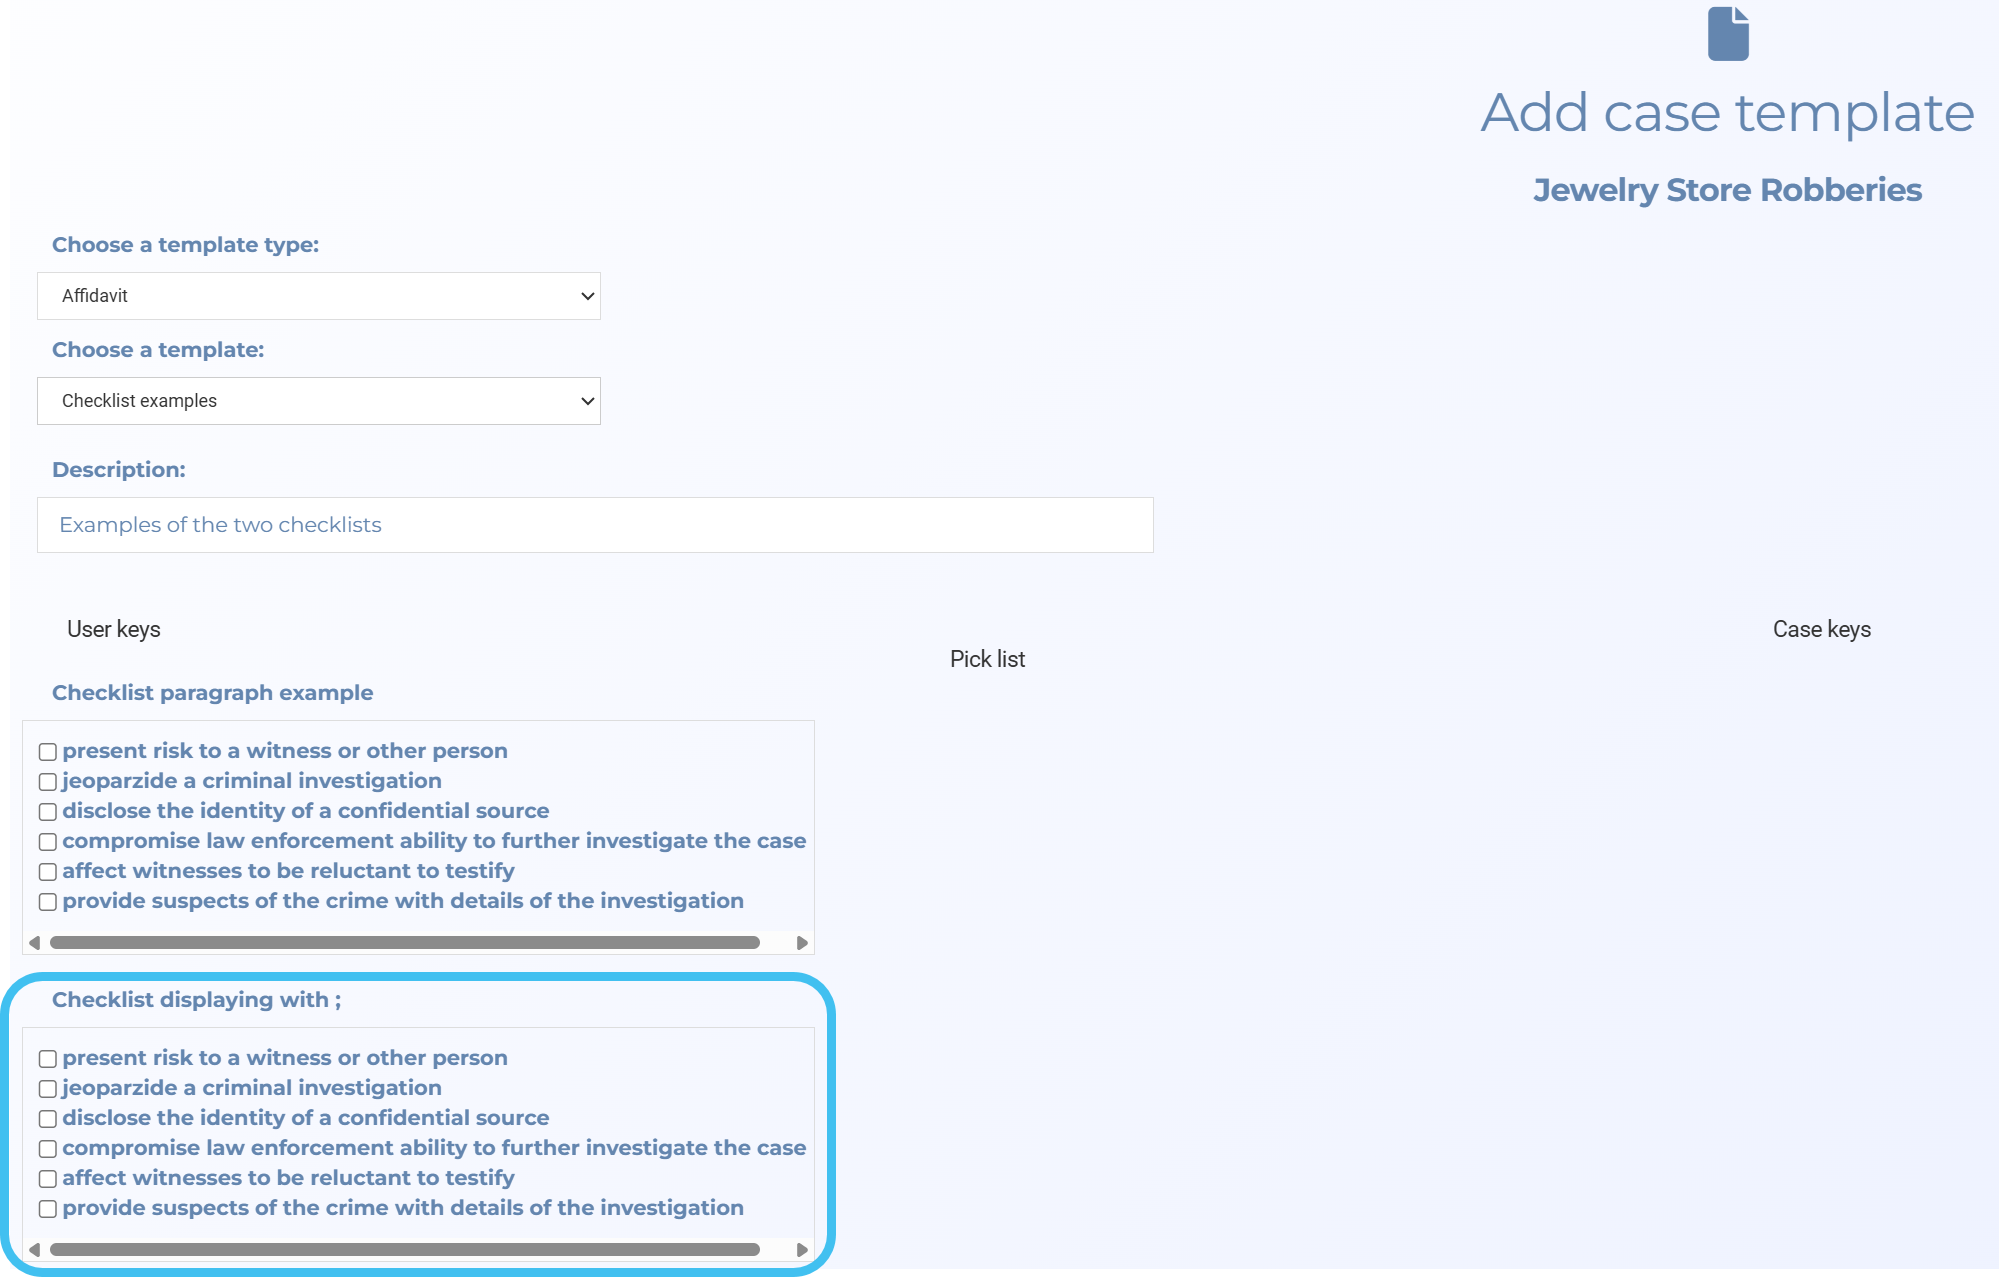
This outputs as:

-
-
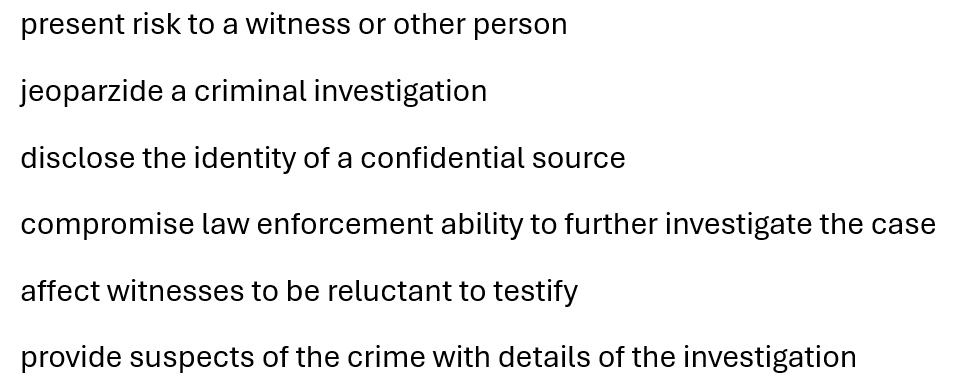
If you want to add checklist boxes to your templates so that the user can select the appropriate check-boxes and the output lists each item on a new row then you can use the new Check list paragraph key. To support this option:
-
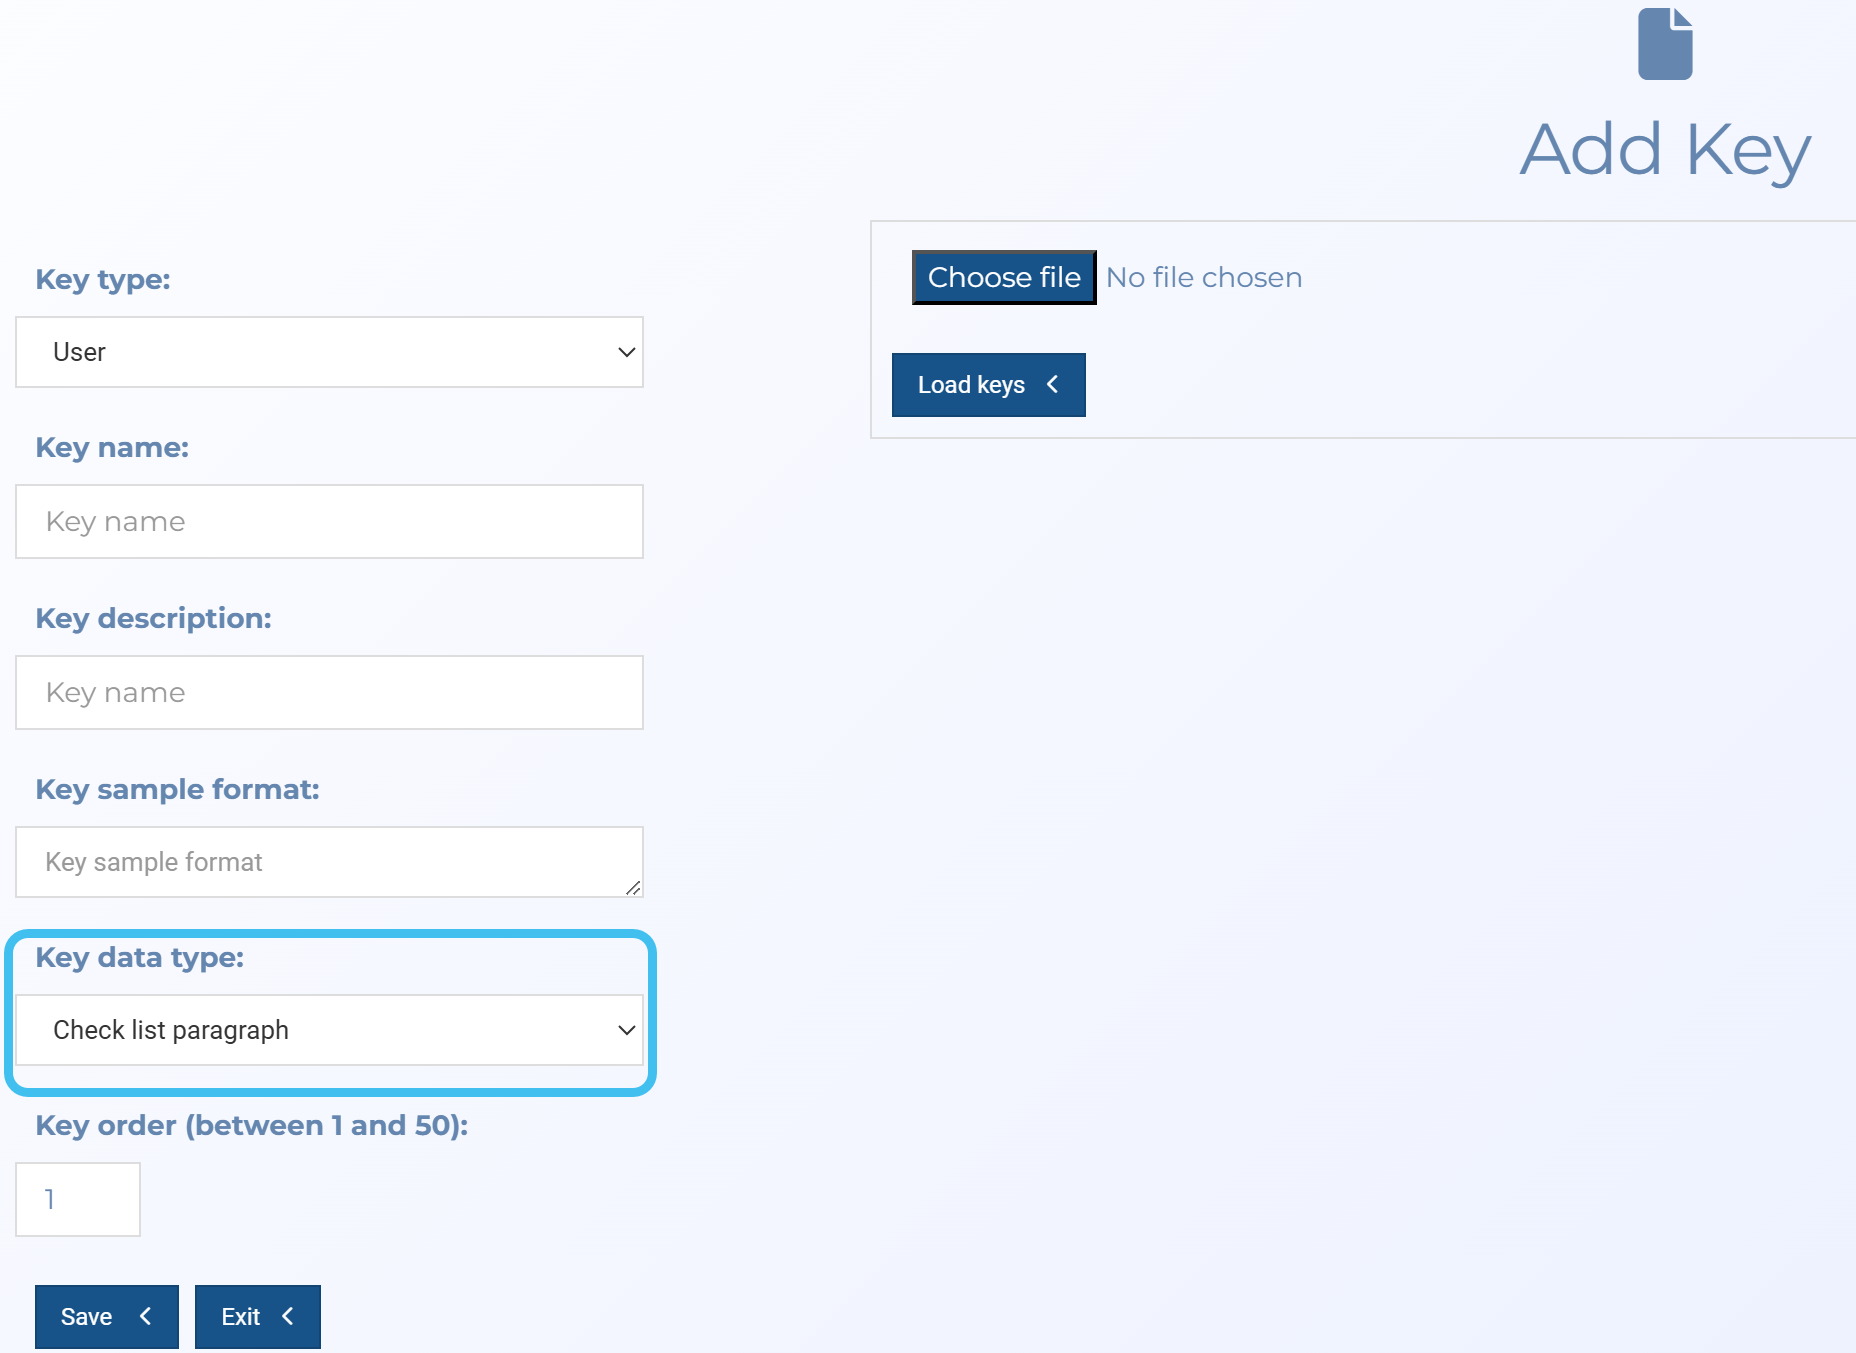
On the Add/Edit key screen a Check list paragraph option has been added to the Key data type menu.
-
On the Add case template screen the Check list paragraph key allows you to select the required check-boxes.
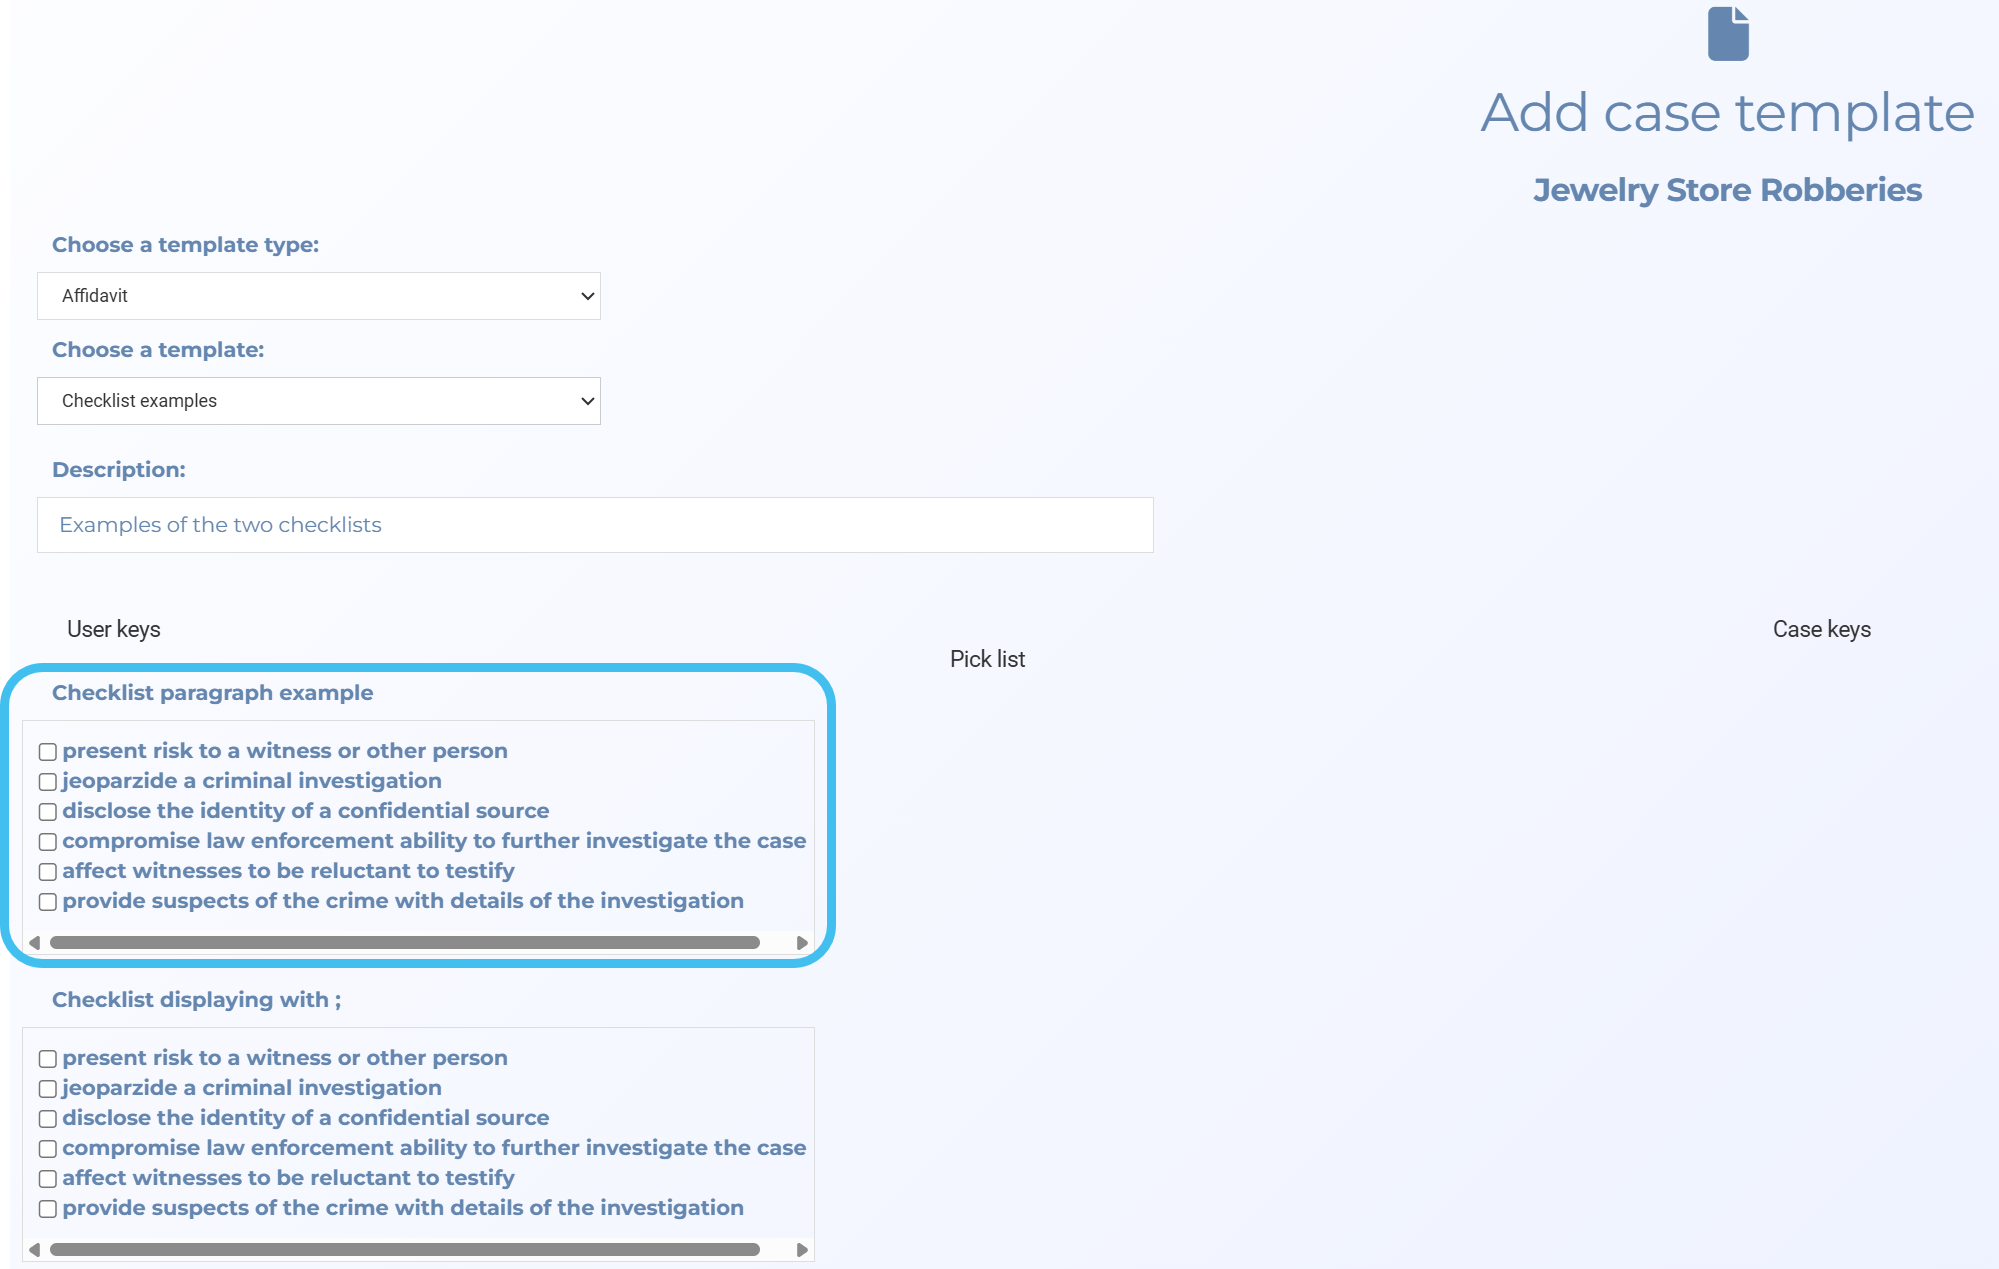
This outputs as:
-
-
-
On the Case template management screen you can now copy a template using
 . This is useful if you want to create a similar template. Once copied you can change the template name and edit the contents.
-
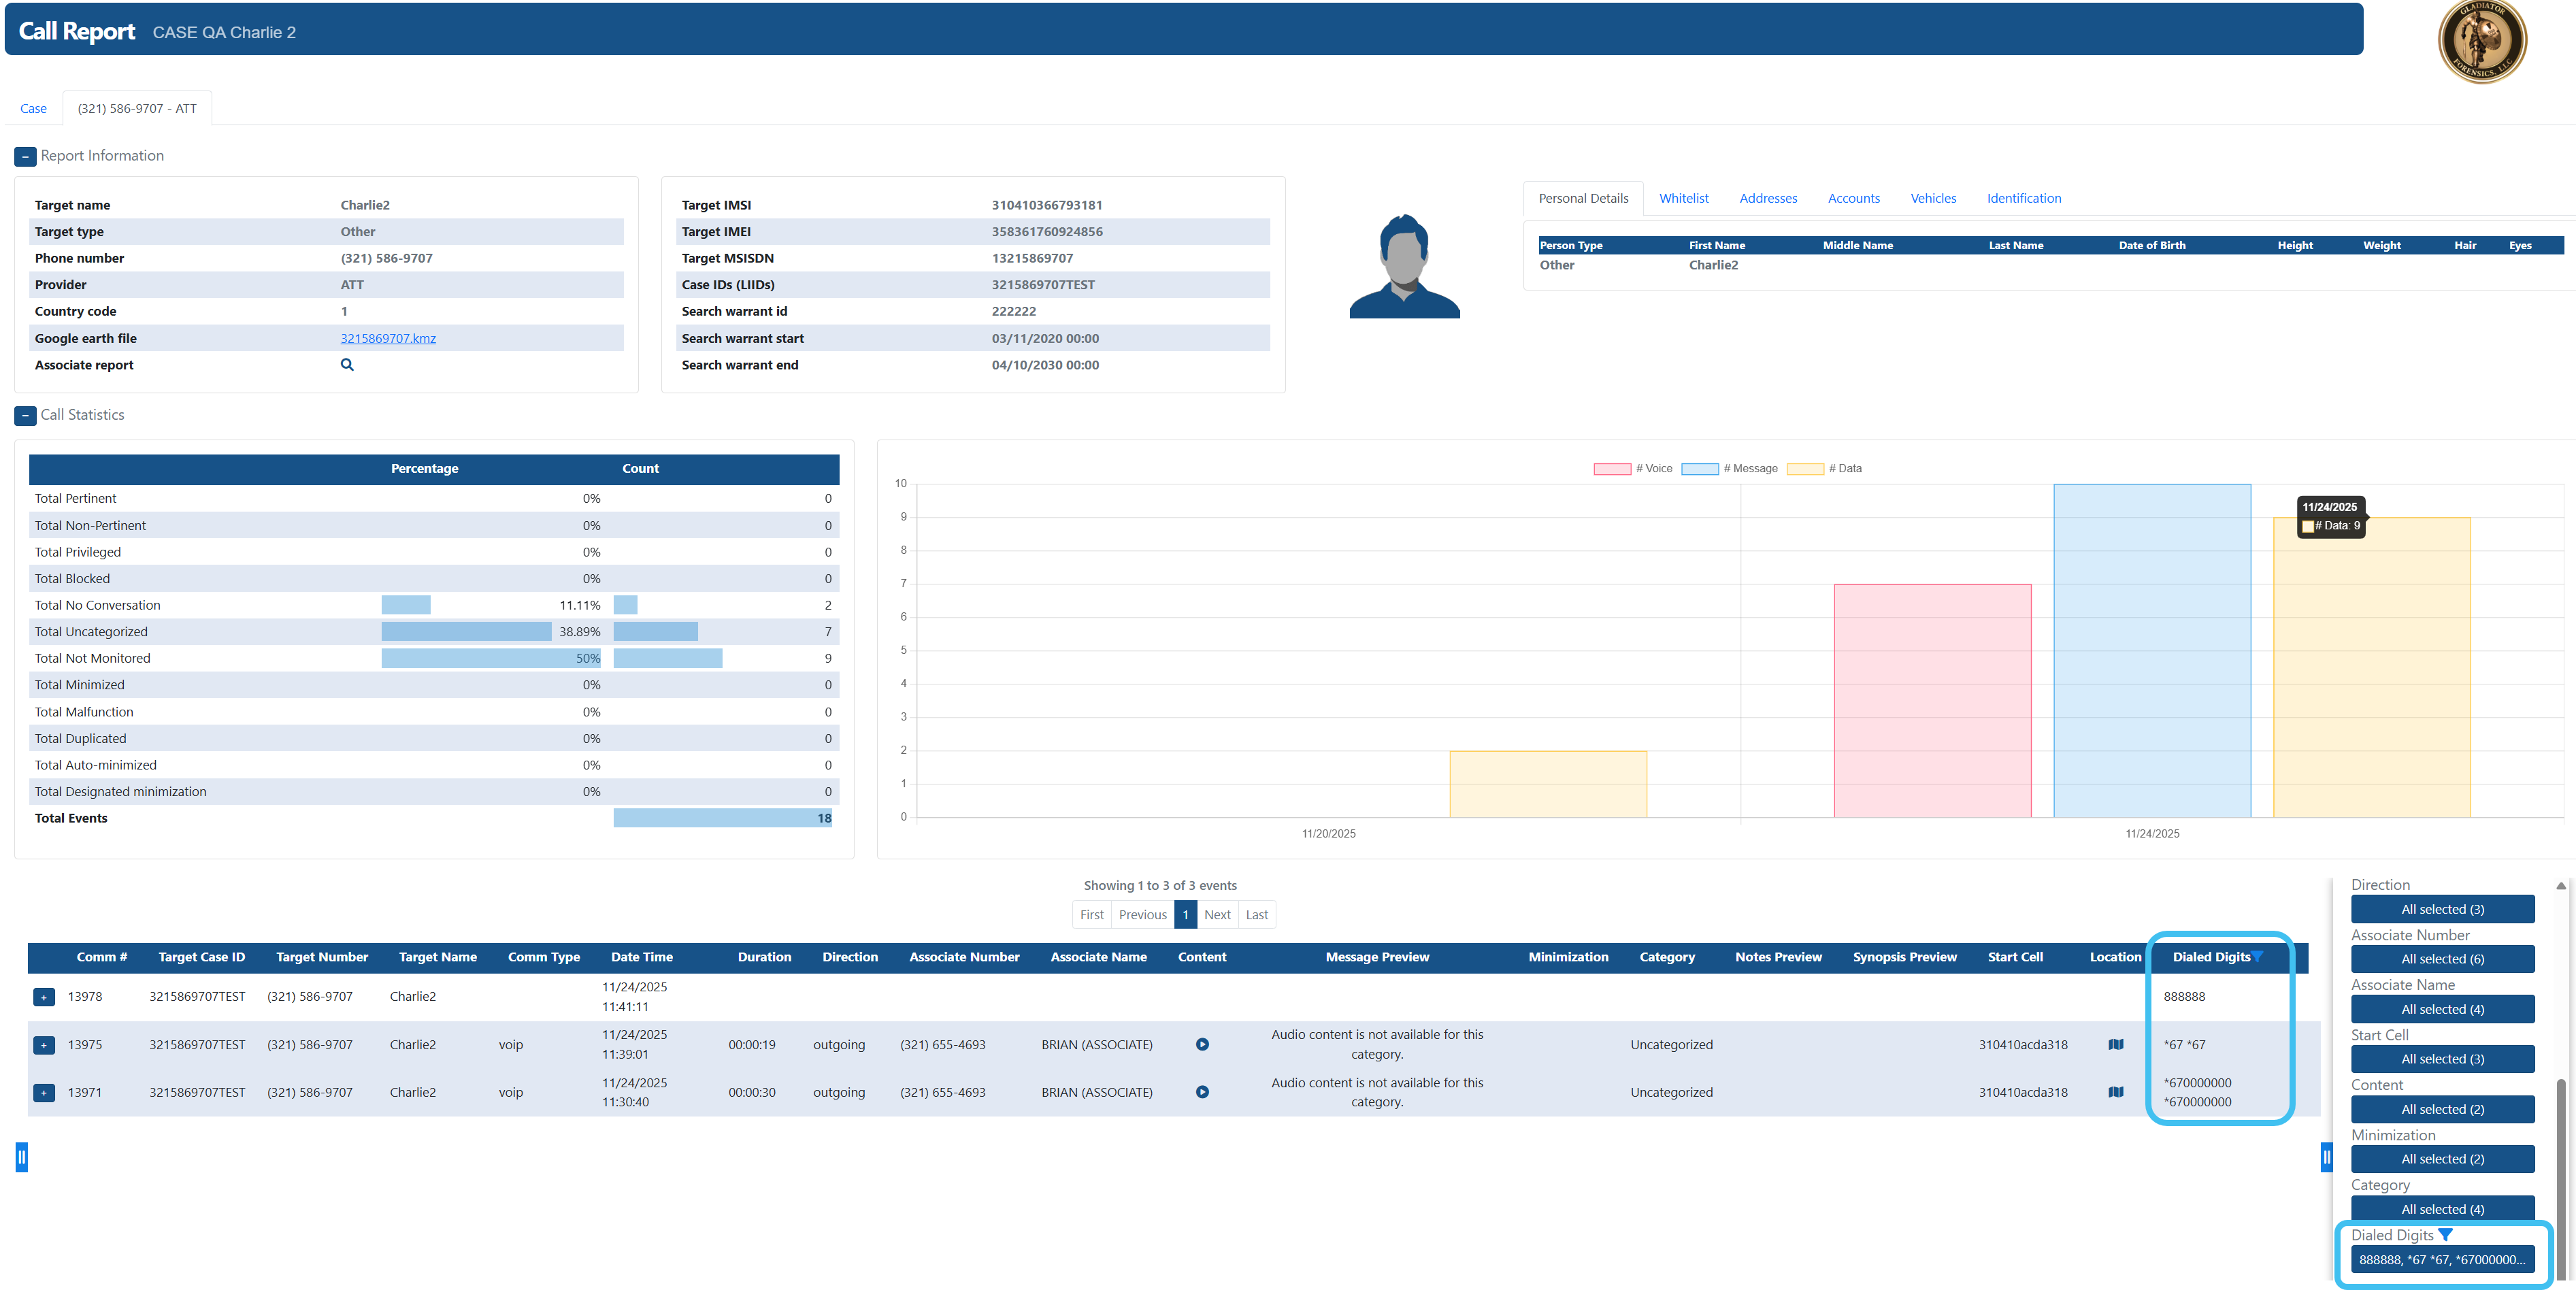
Dialed digits for both PRTT and T3 calls are now included in the Live target summary IQ packet as shown below, along with a new Dialed digits filter.
-
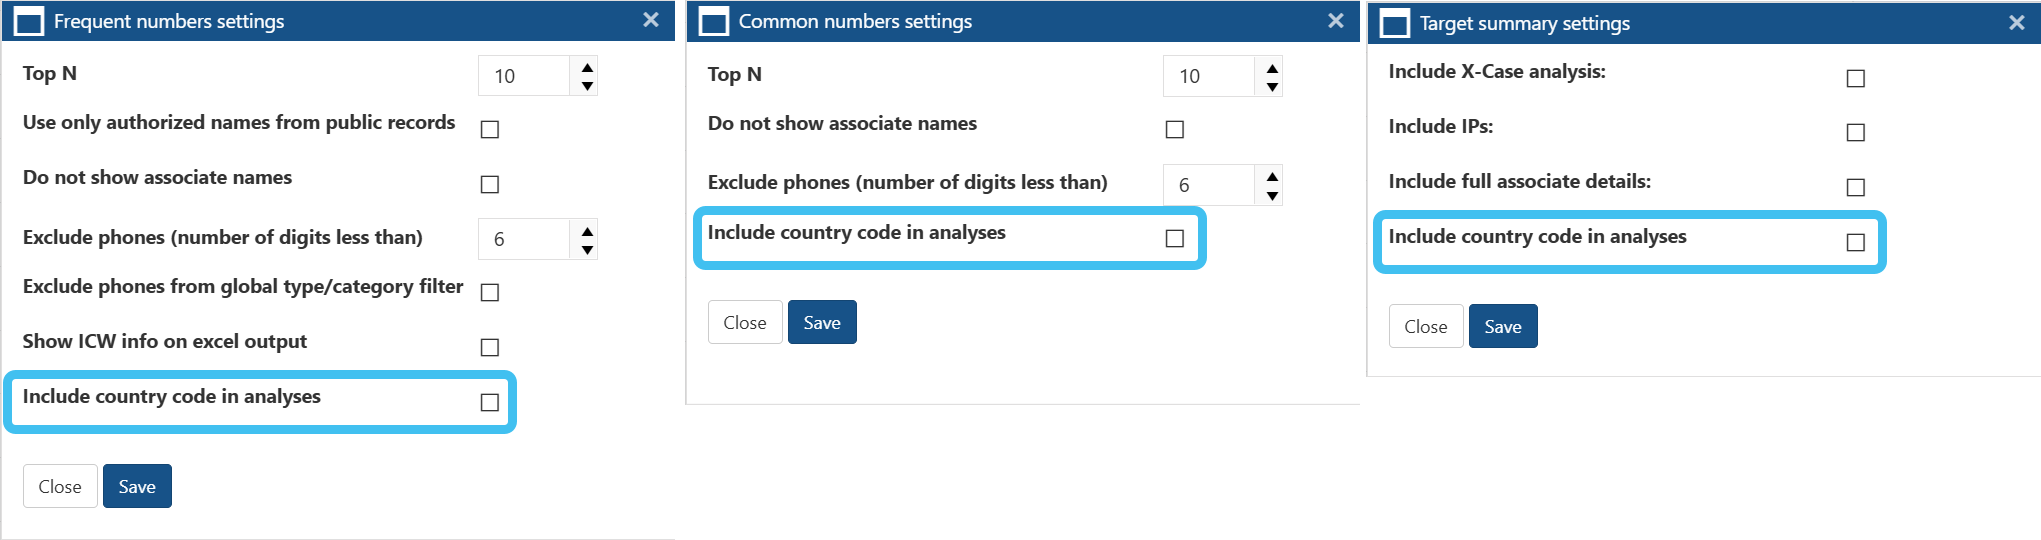
A new Include country code in analyses setting has been added to the Frequent numbers settings, Common numbers settings and Target summary settings dialog boxes. This setting allows you to choose whether or not to include the country code in the IQ packet results.
-
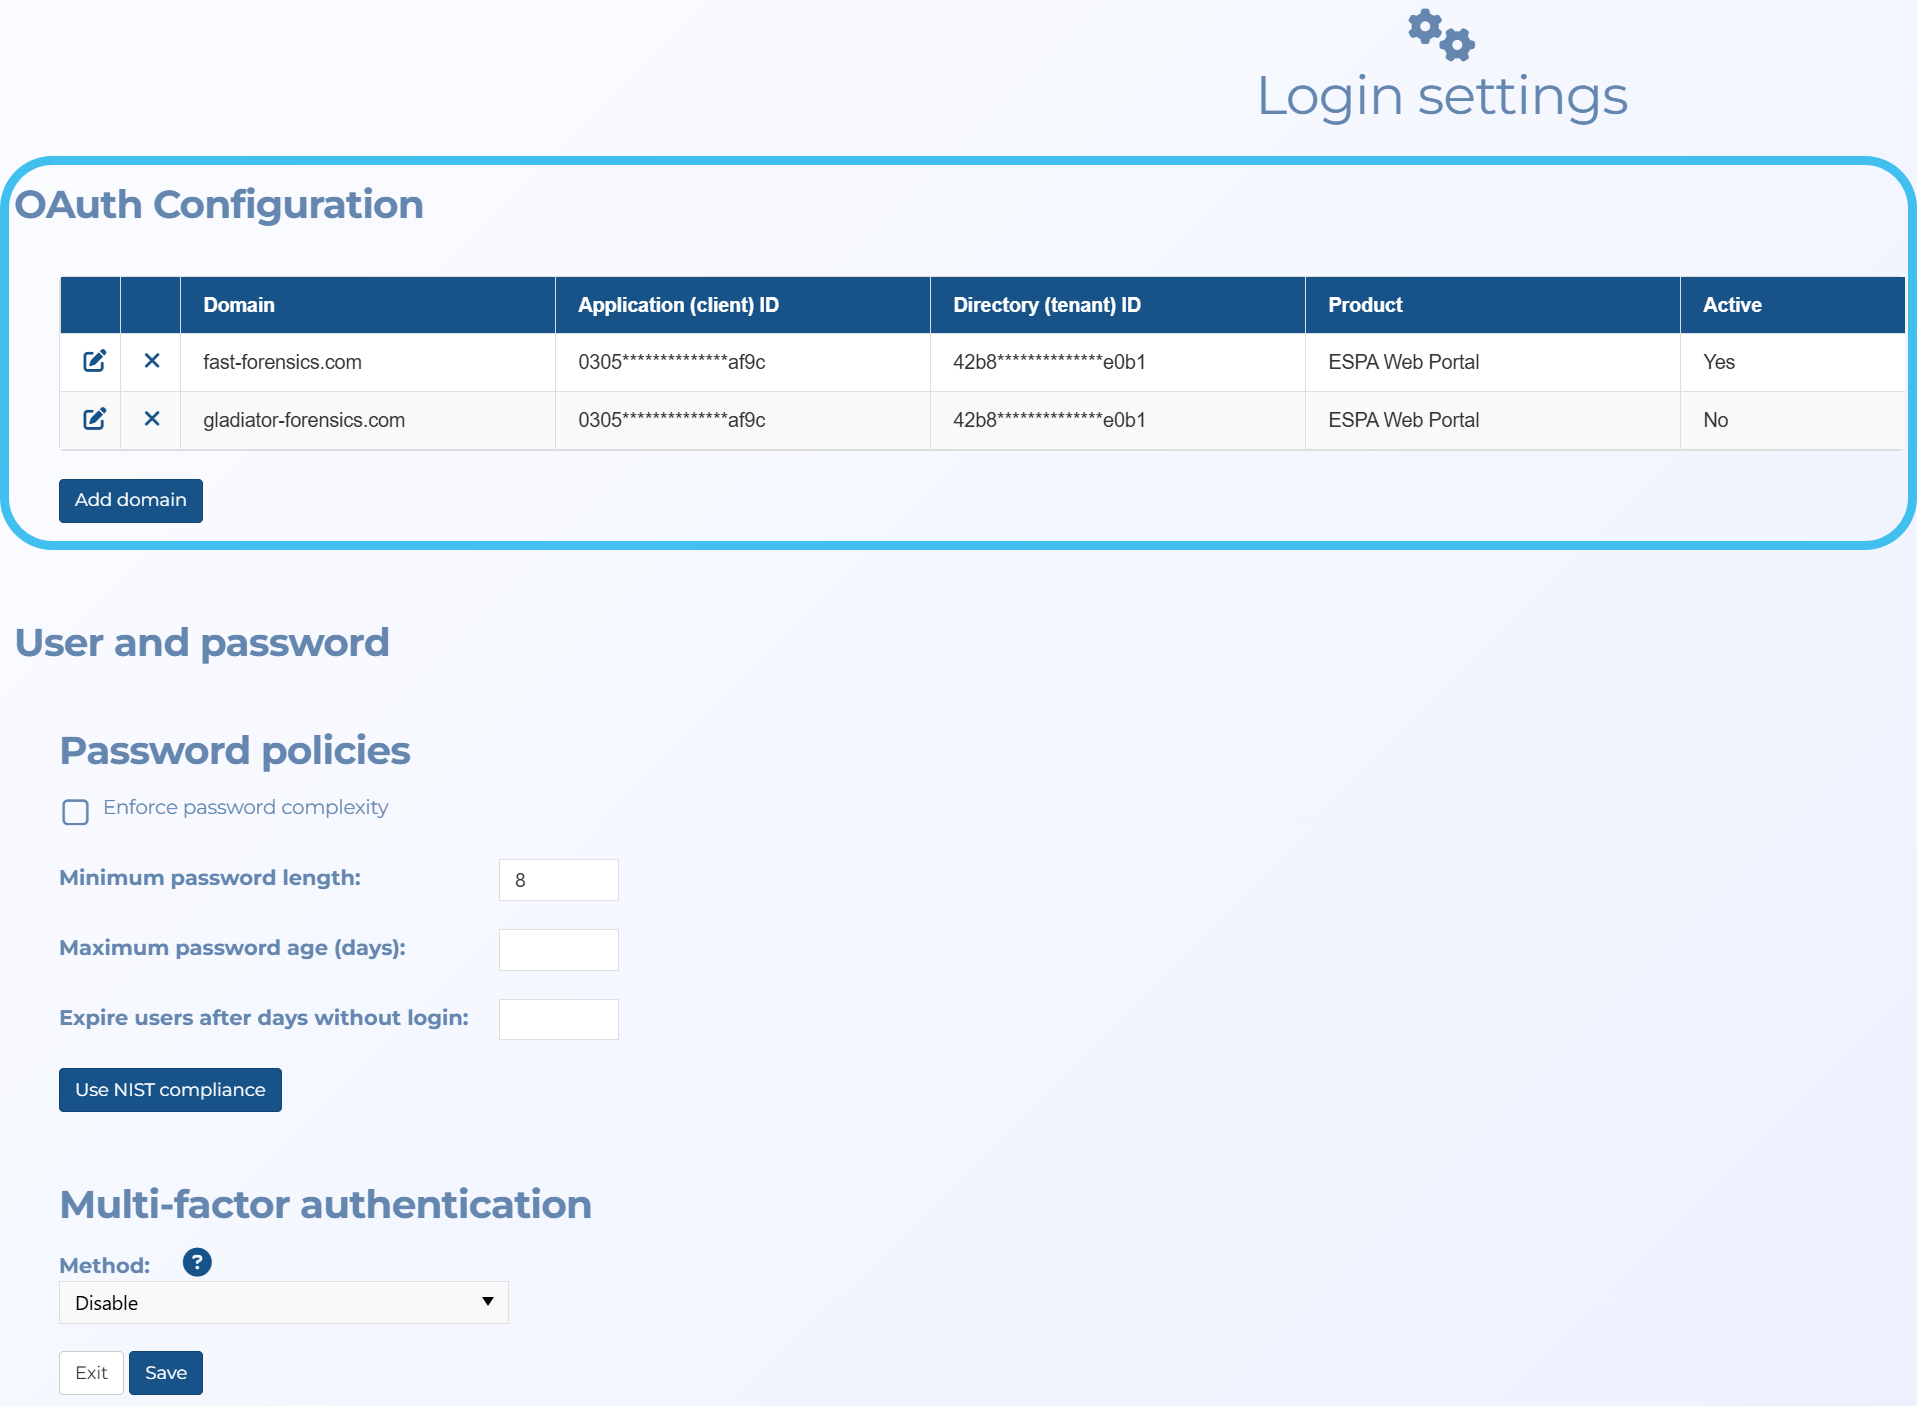
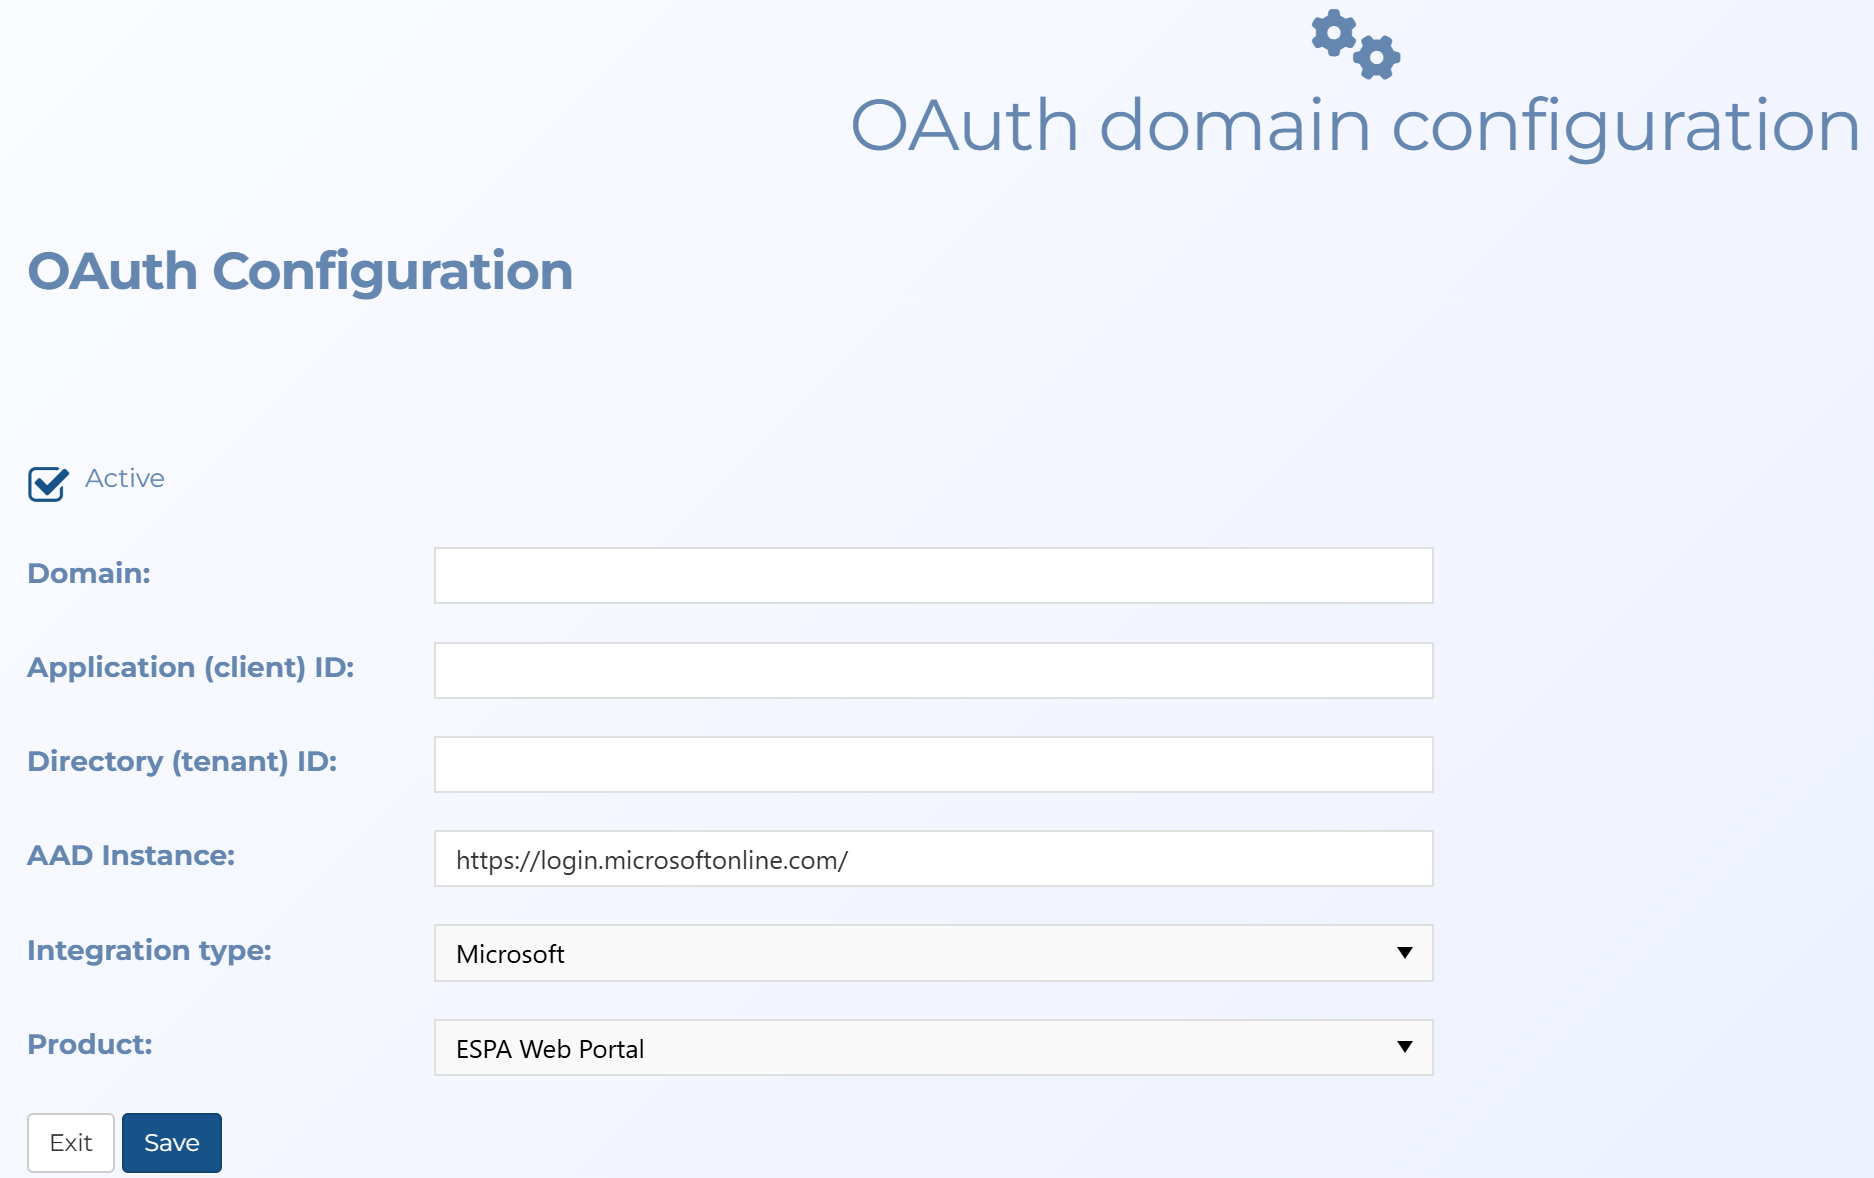
Open Authorization (OAuth) has been added as an option to signing into OSS-ESPA. When OAuth is active on an OSS-ESPA account, the user must sign into the required integration tool first, completing any authentication required by that tool, before signing into OSS-ESPA. Currently only Microsoft is supported. To support this new feature the Login settings screen has been updated to allow administrators to view all the OAuth configurations. The Add domain button opens the new OAuth domain configuration screen which allows you to add and manage the configurations.
-
When maintenance is scheduled on your OSS-ESPA account a message is now displayed a few days before to inform you when your account will be unavailable. If the date/time is inconvenient, please contact Gladiator Forensics support who can organize a more suitable date/time for you. If we do not hear from you the maintenance will proceed as detailed.
-
The new Search library setting, on the Determine the provider screen, allows you to select which library you want to use to find a phone's operator.

-
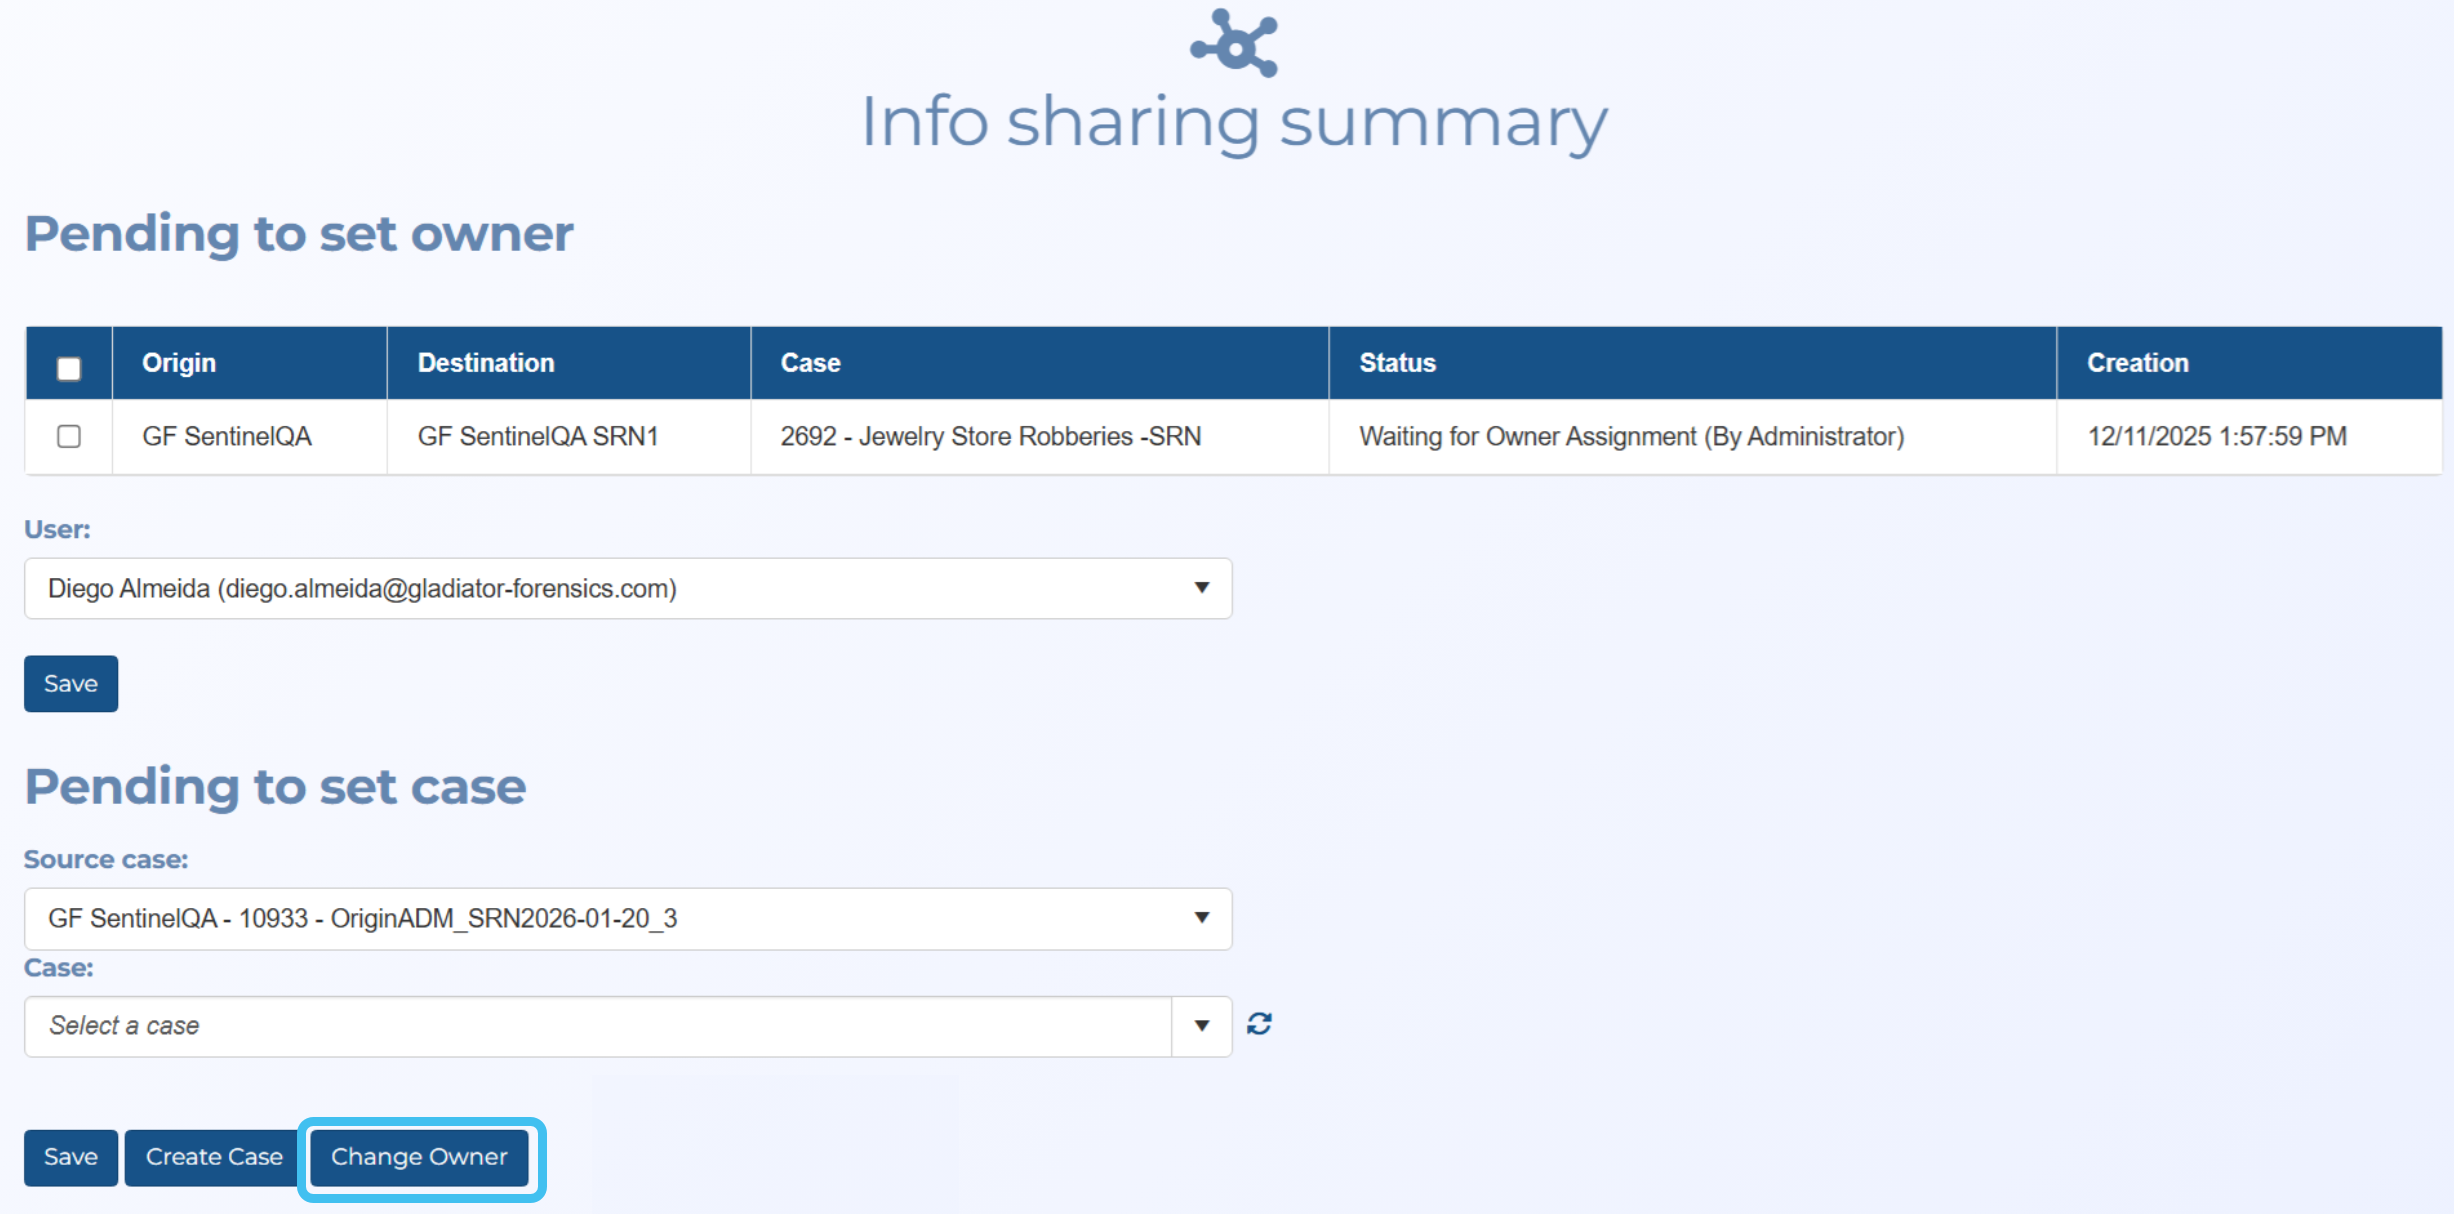
The new Change owner button, on the Info sharing summary screen allows you to change the case owner of the case in your OSS-ESPA account that the selected source case data is sent to.
-
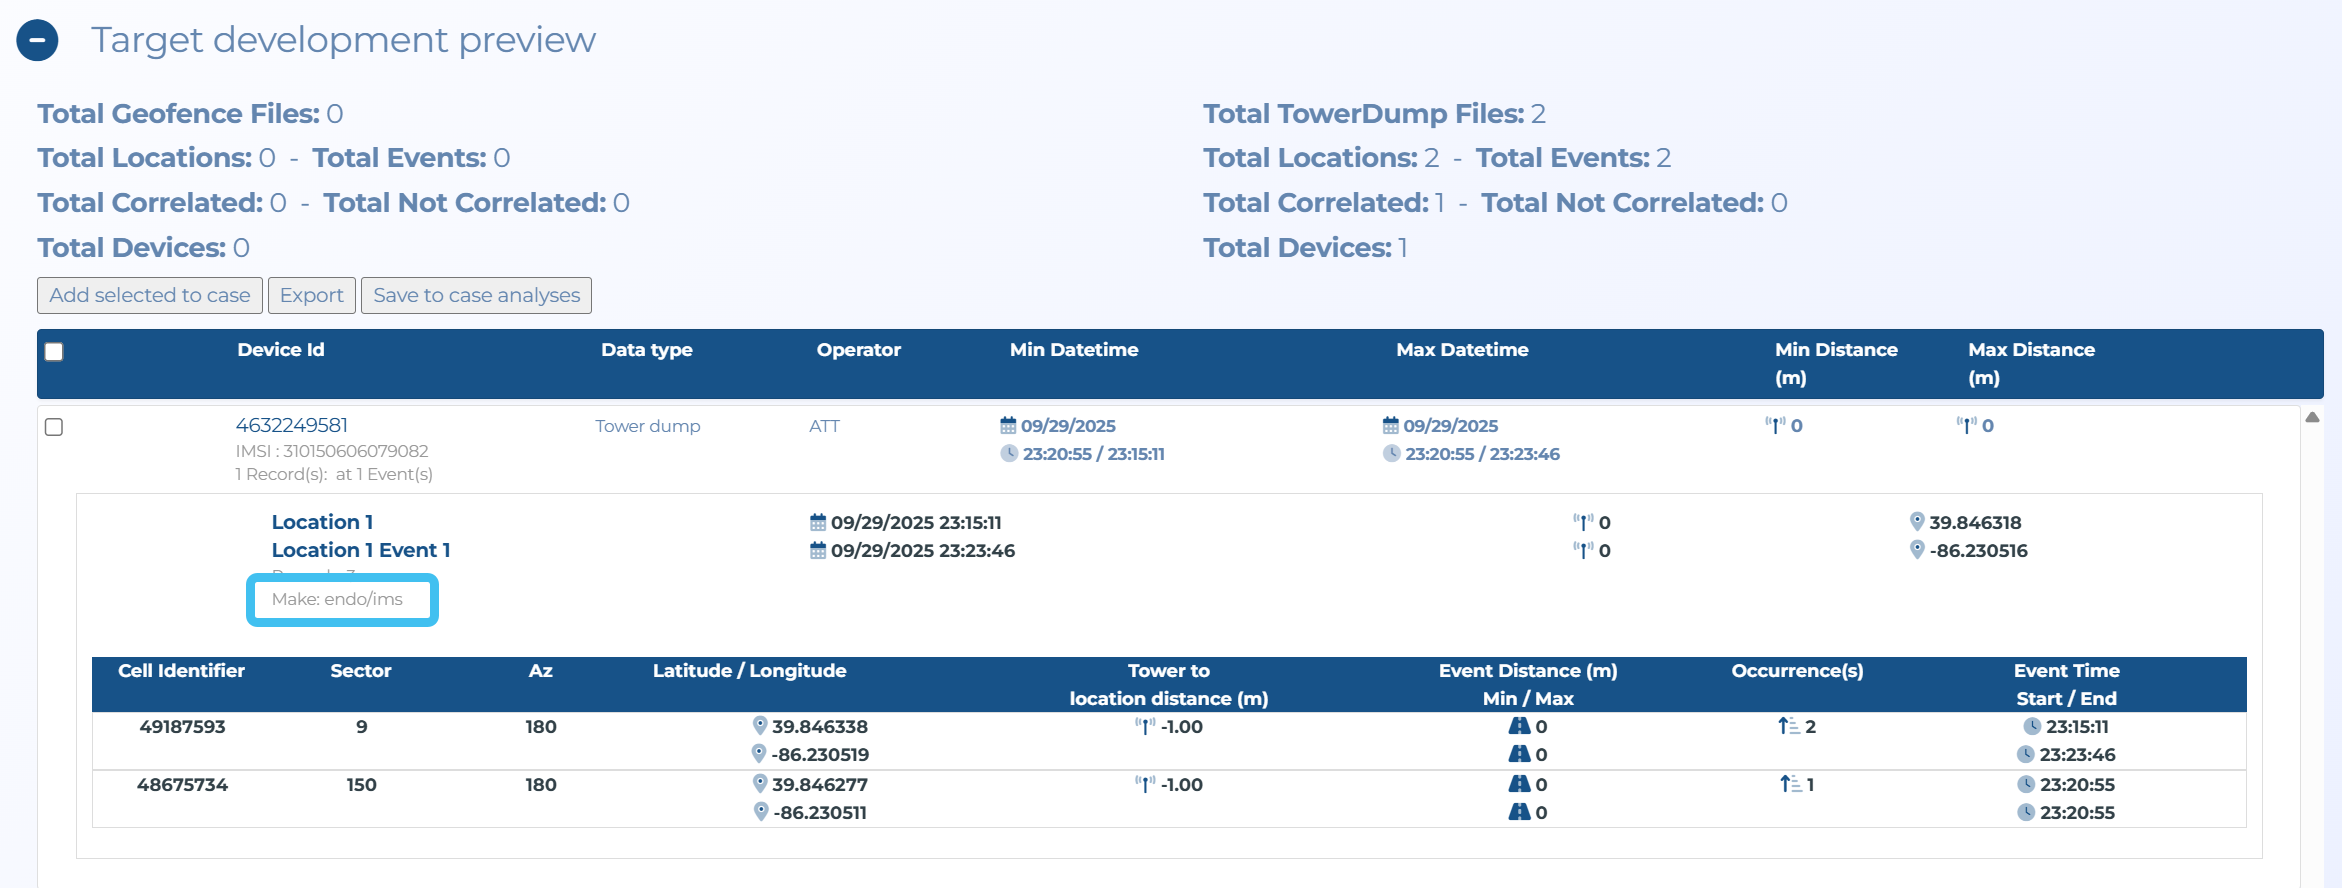
In target development, previously if a device had the same phone number and IMSI but had different makes they were listed separately. Now they are listed together with both makes displayed. You can filter on either make and the device is displayed.
-
On the Sentinel i-cases export data screen you can now select which files you want to export; previously there was no choice and all files were exported.
The timezone being used for the custom time range is also now displayed.
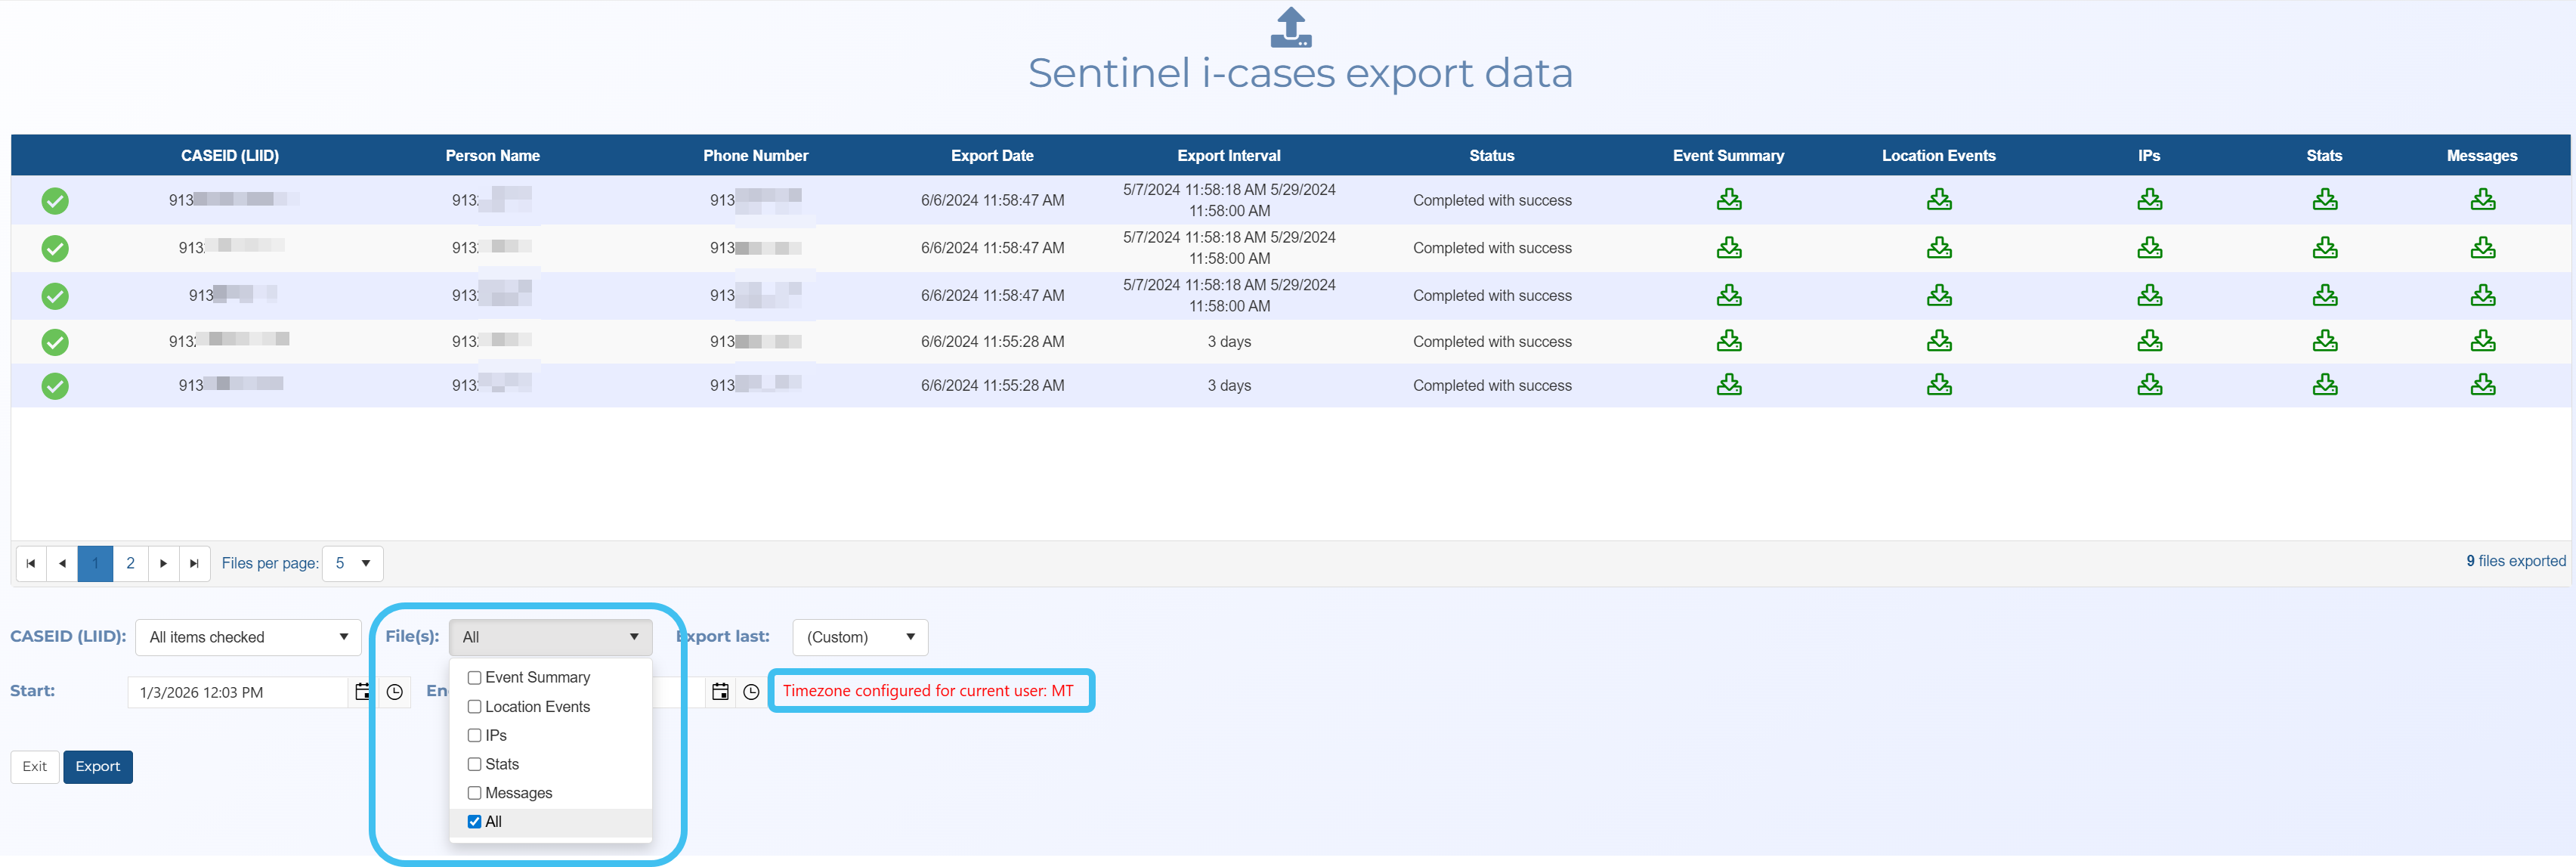
The Event Summary export has been updated and now additionally includes:
-
GPS pings including their radius, latitude, longitude
-
timezone information for all date/time columns
-
the converted cell site information, latitude, longitude, azimuth, and beamwidth for the Start and End cell sites
-
-
The Deconfliction search screen now performs a deep identifier search in your OSS-ESPA account which returns all people, cases, and communication data (if the search is related to the phone number). It also performs a search on other agencies' data that your administrator has configured agreements with and lists the other agencies where the identifier was found.
In Local system deep searches click
 then in the Search summary, click the item of interest to display the search results. You can also click on the info cards for further person details. For a target you can select a case name to view the phone's communications within that case, or for associates you can select the check-box to open their communications at the bottom of the screen.
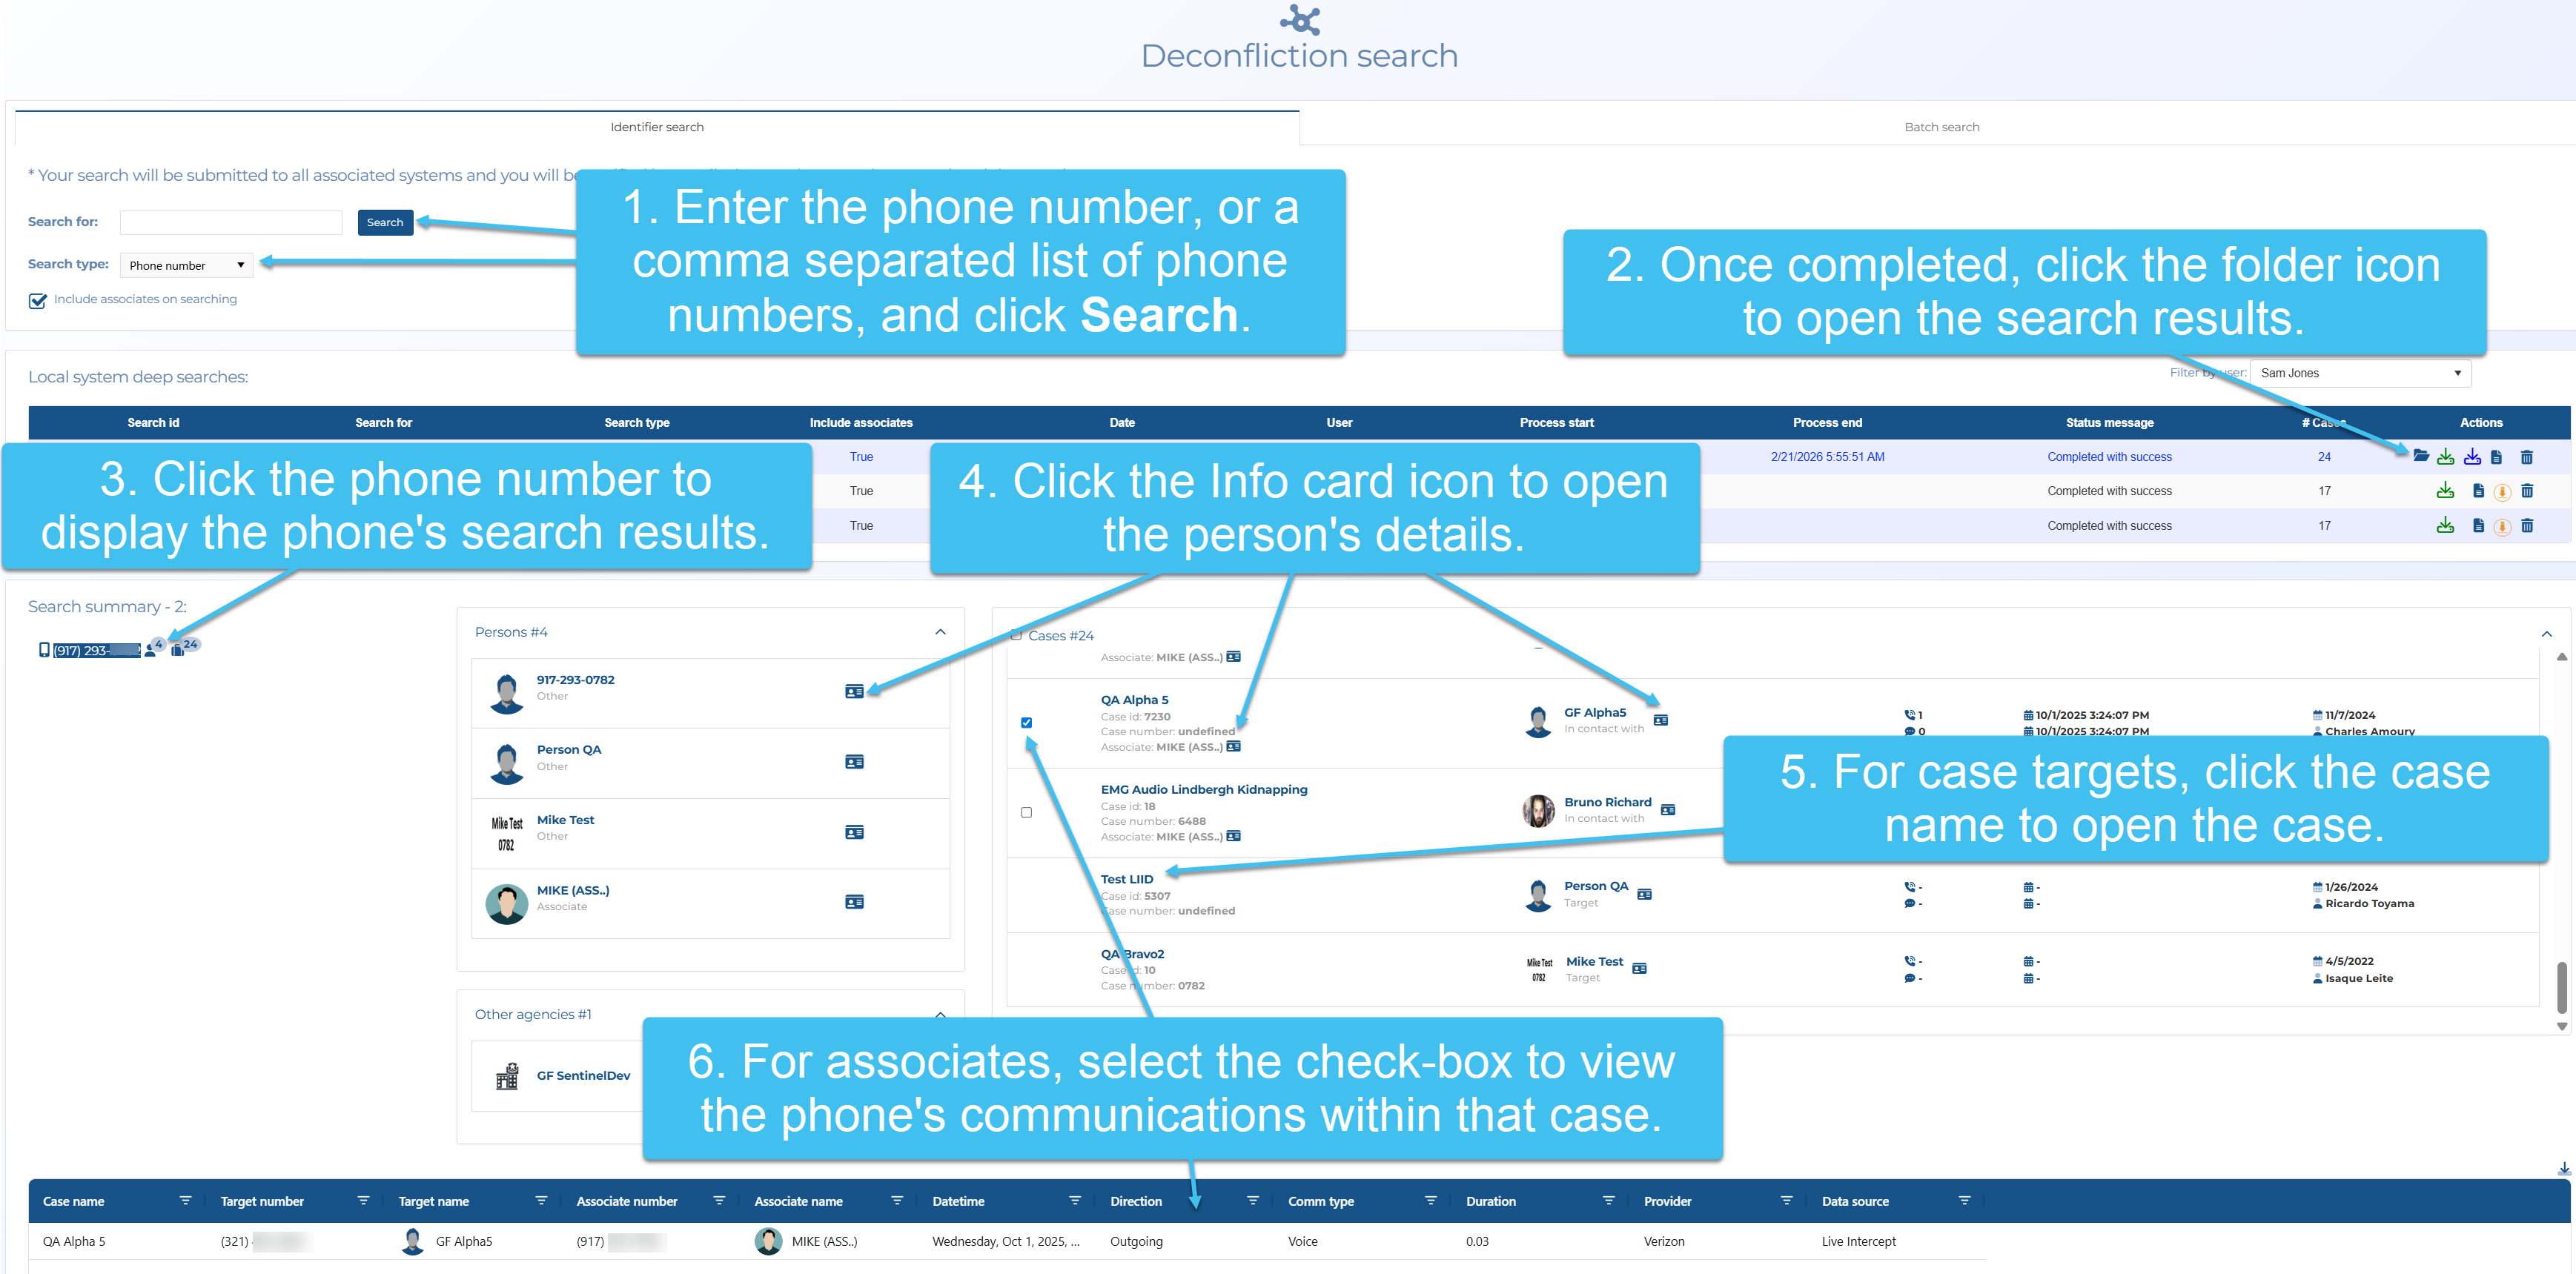
In addition to the search results displayed on the screen, you can also click
 to download an html file of the X-Case analysis and other agency matches, and click
  to download a csv file of the calls.
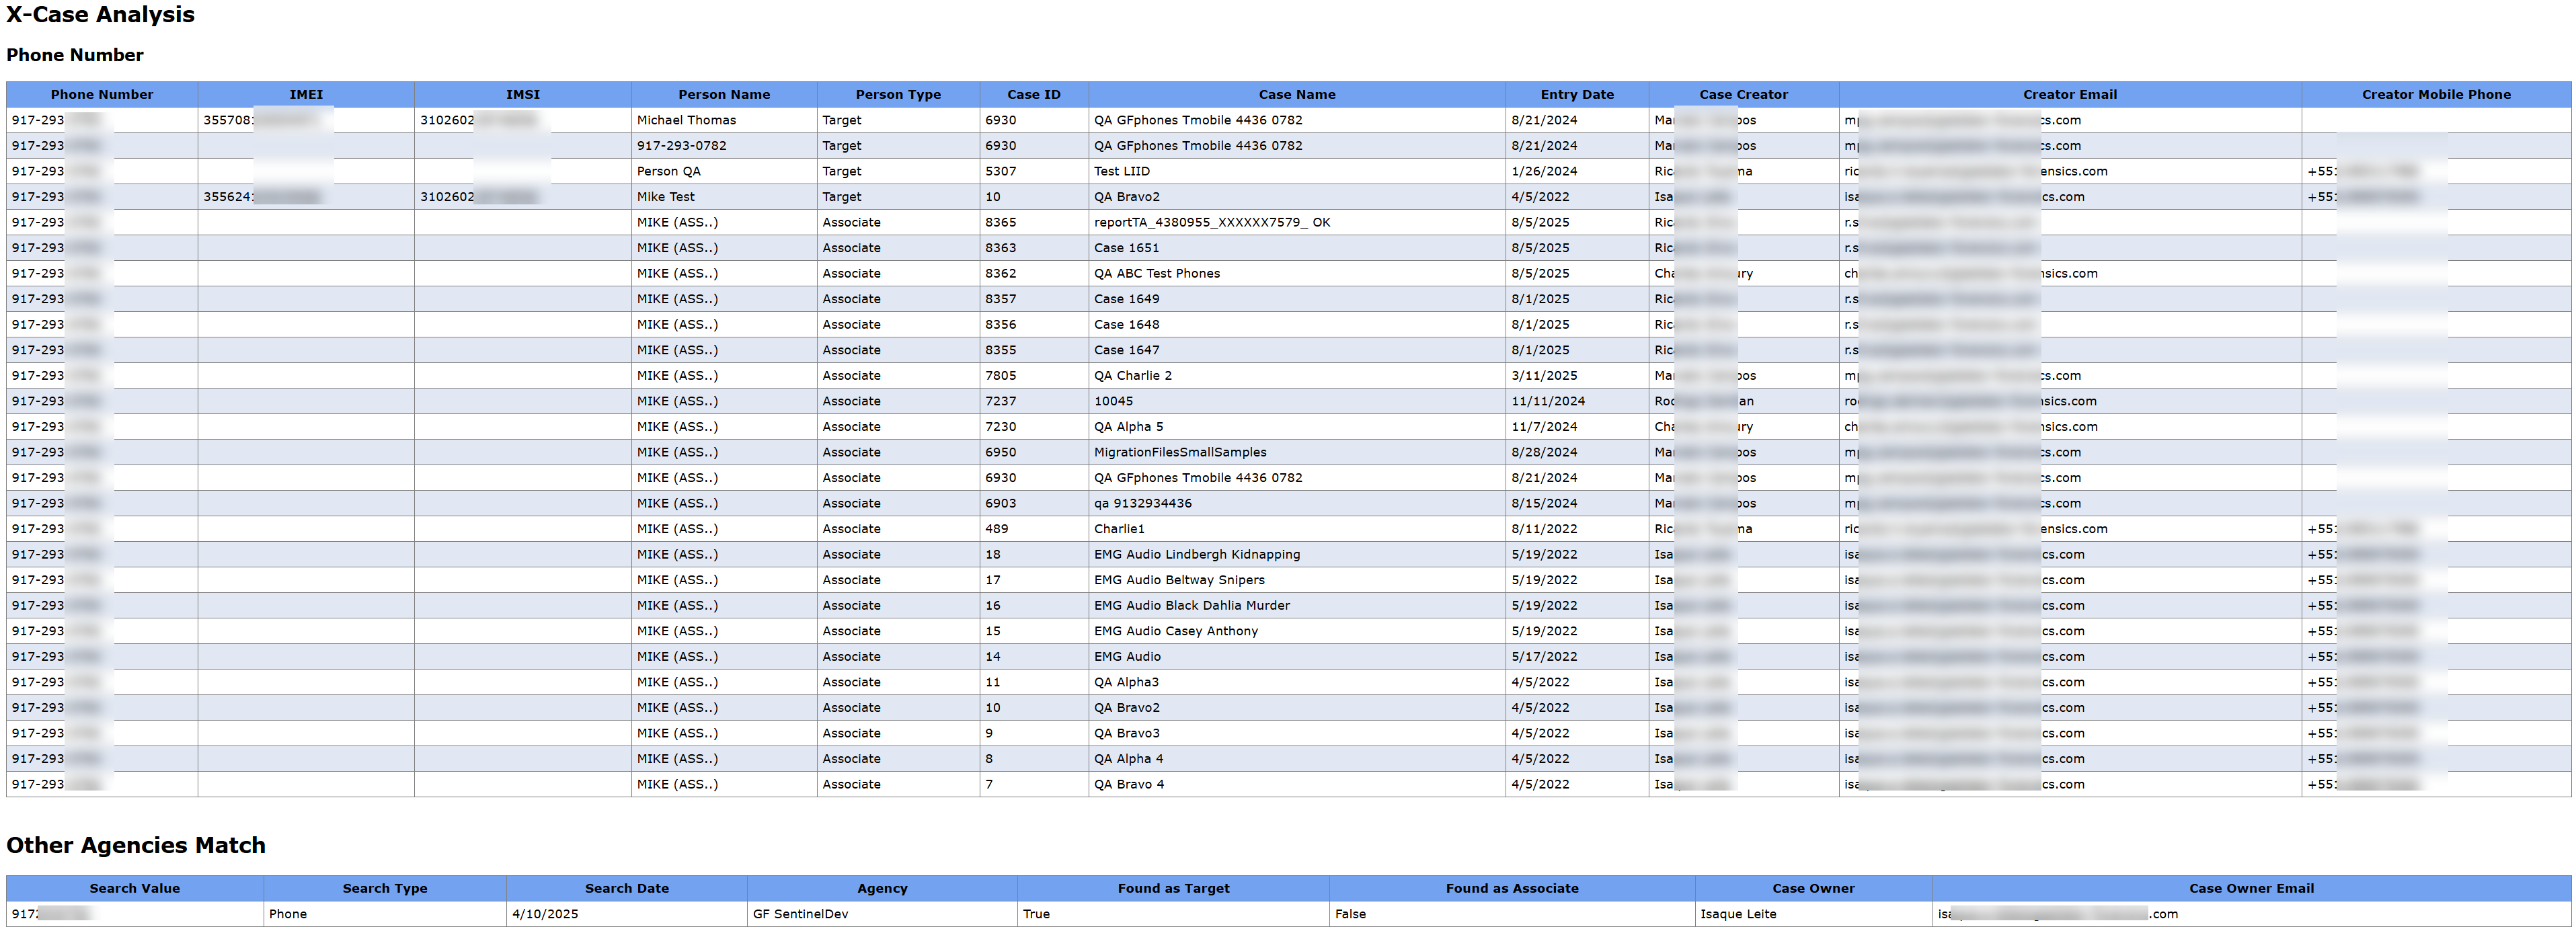

For information refer to Performing a deconfliction search.
-
A Batch search tab has been added to the Deconfliction search screen. This allows you to perform a search on multiple identifiers at once as you could previously do on the Batch X-Case deconfliction screen but in addition it provides the benefits of also including the new deep search described previously. The Batch X-Case deconfliction screen has therefore been removed.

-
We have now completed the development of our new GAR backpack. This new lightweight version provides more customization options to suit your capability needs and budget.
You choose what technologies you want to be able to survey. This variant does not compromise on quality and is built with the latest generation TSMS8 receiver, ongoing manufacturer lab certified calibration and all the same operational capabilities as the previous iteration.
-
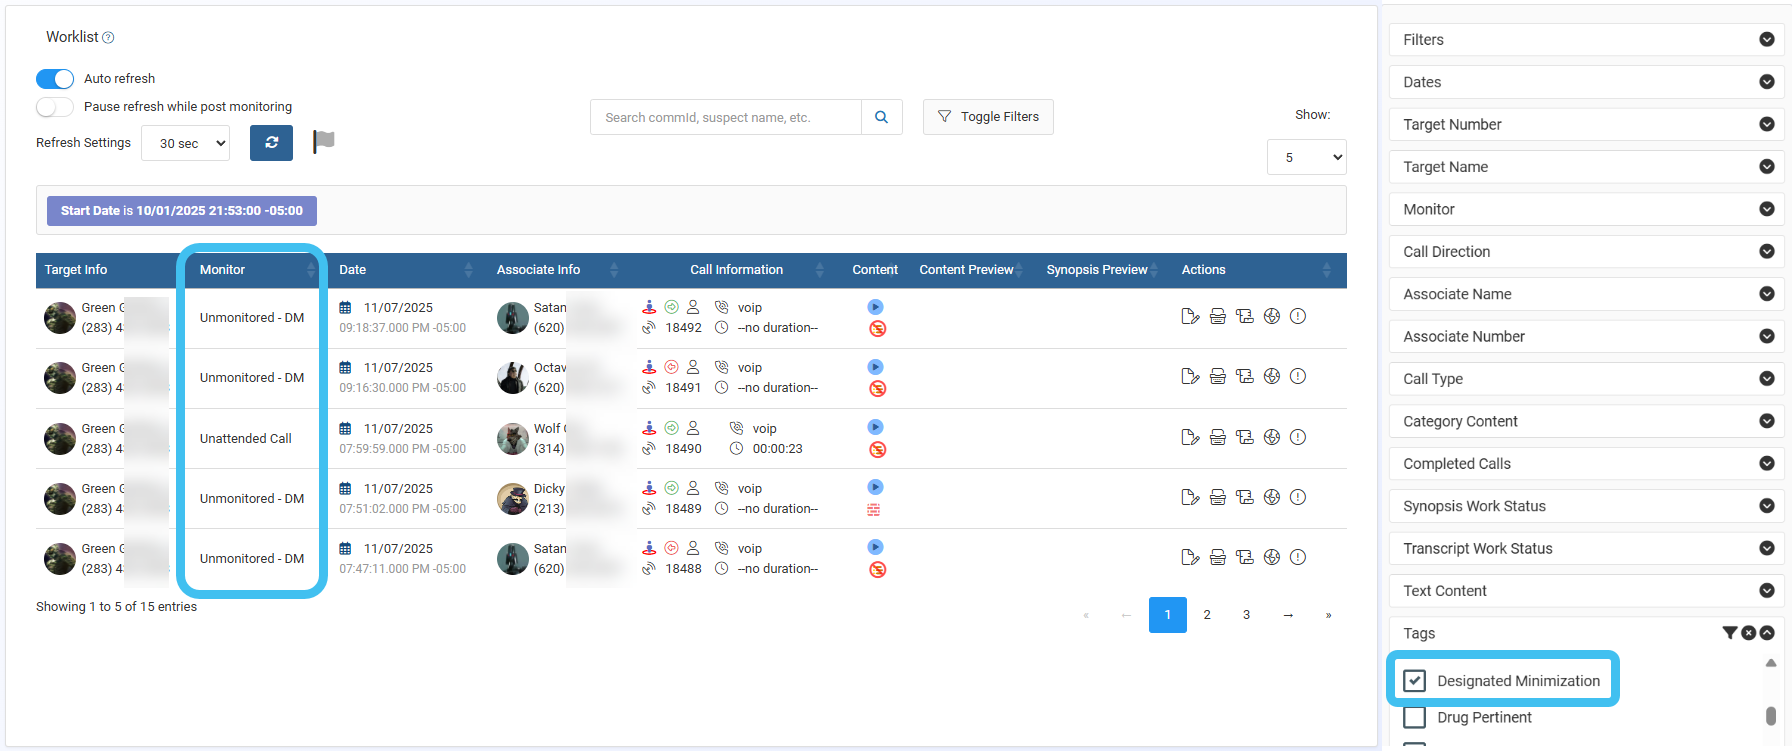
Designated minimization can now be set on a per queue basis using the Create new monitoring queue and Editing queue screens. Previously you could only specify this on a global basis using Designated Minimization on the Queue management settings screen. Any setting made on the queue overrides that made using the global setting.
You can use designated minimization if you want to specify a time range when you typically do not monitor calls, perhaps over night, and would prefer that the calls were automatically minimized. The benefit of doing this is that it informs the judge and the court, that during a certain period, calls are not monitored so they do not then query the reason for unattended calls. Once selected you must enter a start and end time. Note, if there is a monitor logged into the queue during this time then the call is still currently automatically minimized.
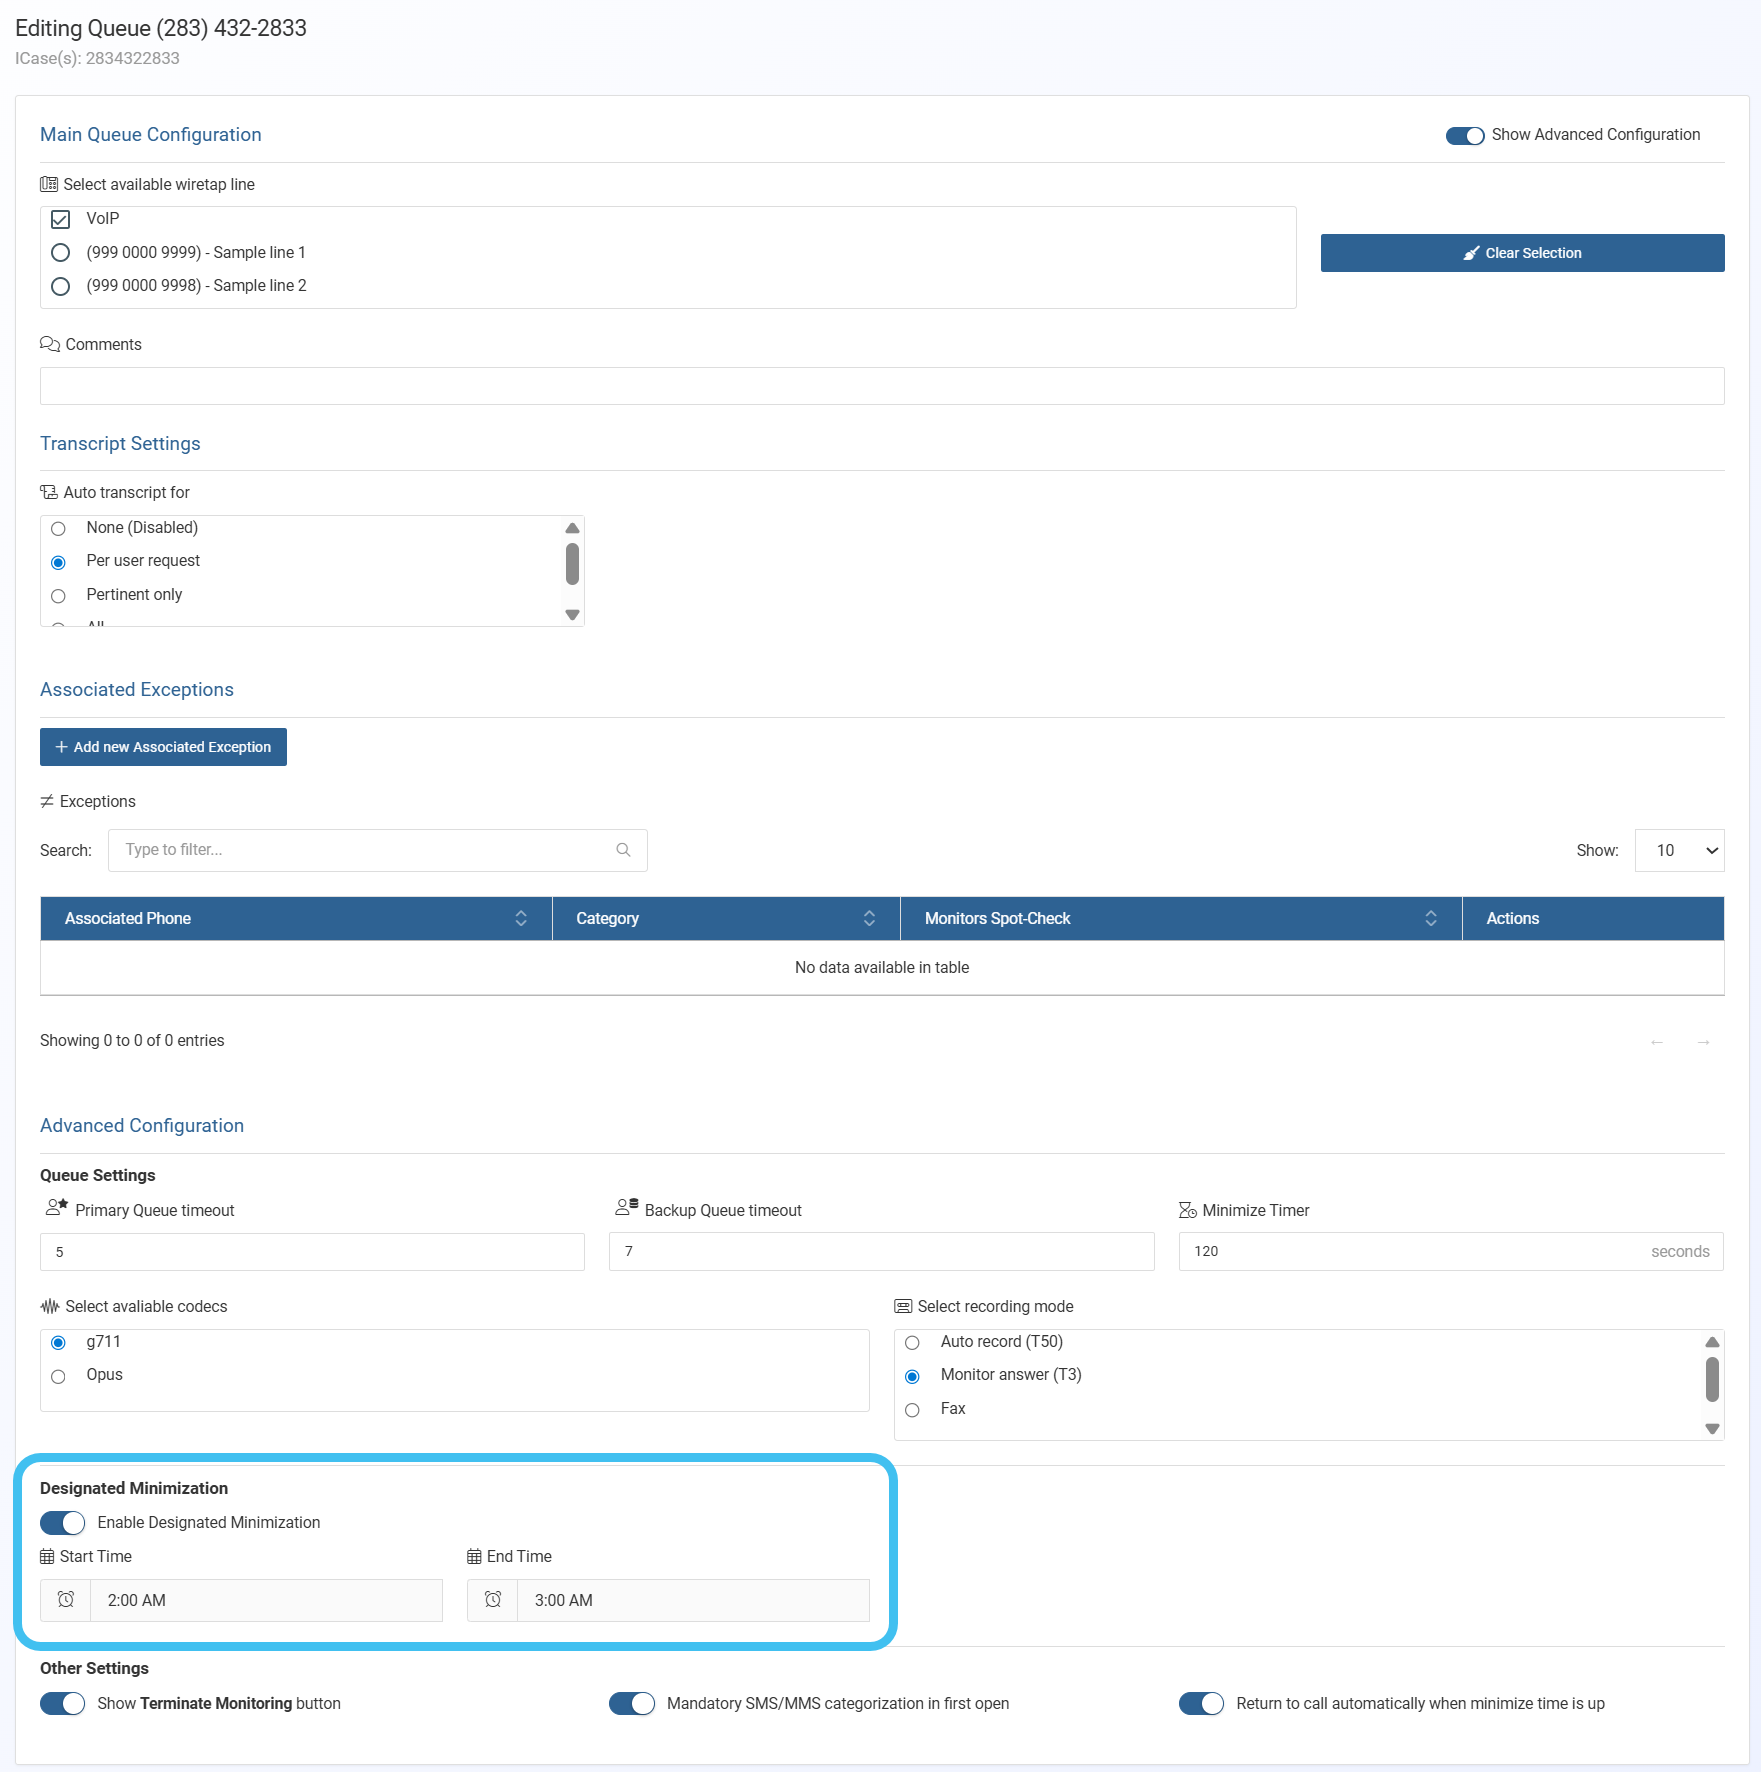
For designated minimized calls, the Live monitoring screen displays the monitor as Unmonitored - DM and a tag of Designated Minimization is applied to the call.
-
T3 social media live monitoring is now supported. To support this new feature:
-
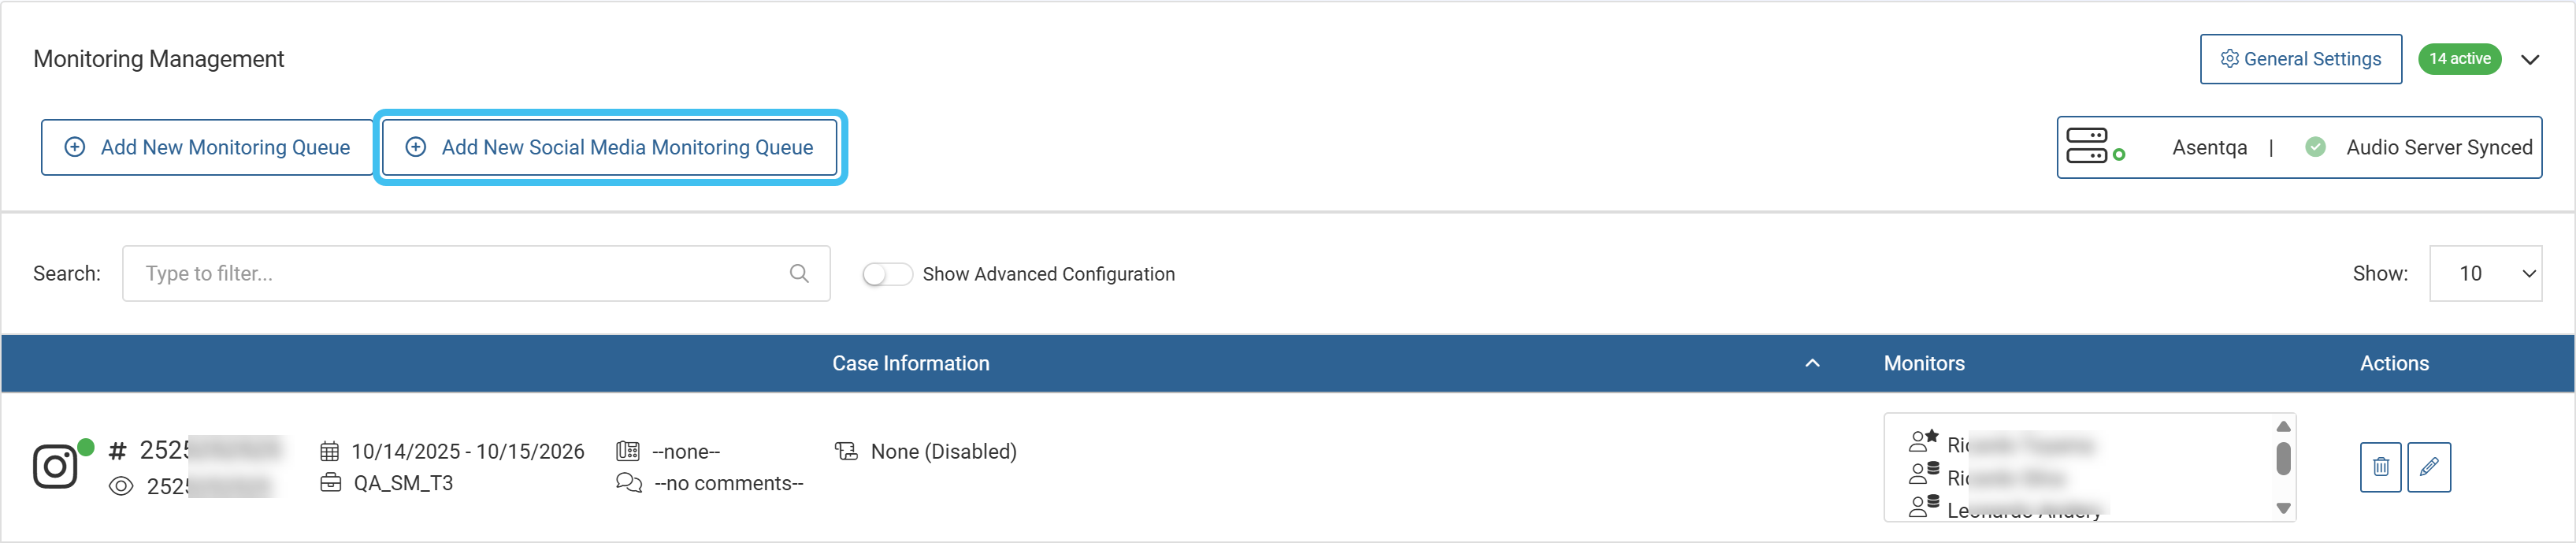
You can now create queues specifically for social media by clicking the new Add New Social Media Monitoring Queue on the Queue management screen. Then on the new Create New Social Media Monitoring Queue screen you can select the case, the social media account, and configure the monitors by selecting their priority order of primary or backup. There is only one permission type that allows monitoring of all media types.
NOTE: For the social media account to be available to select, you must select Enable intercept content for the account on the People and devices screen.

-
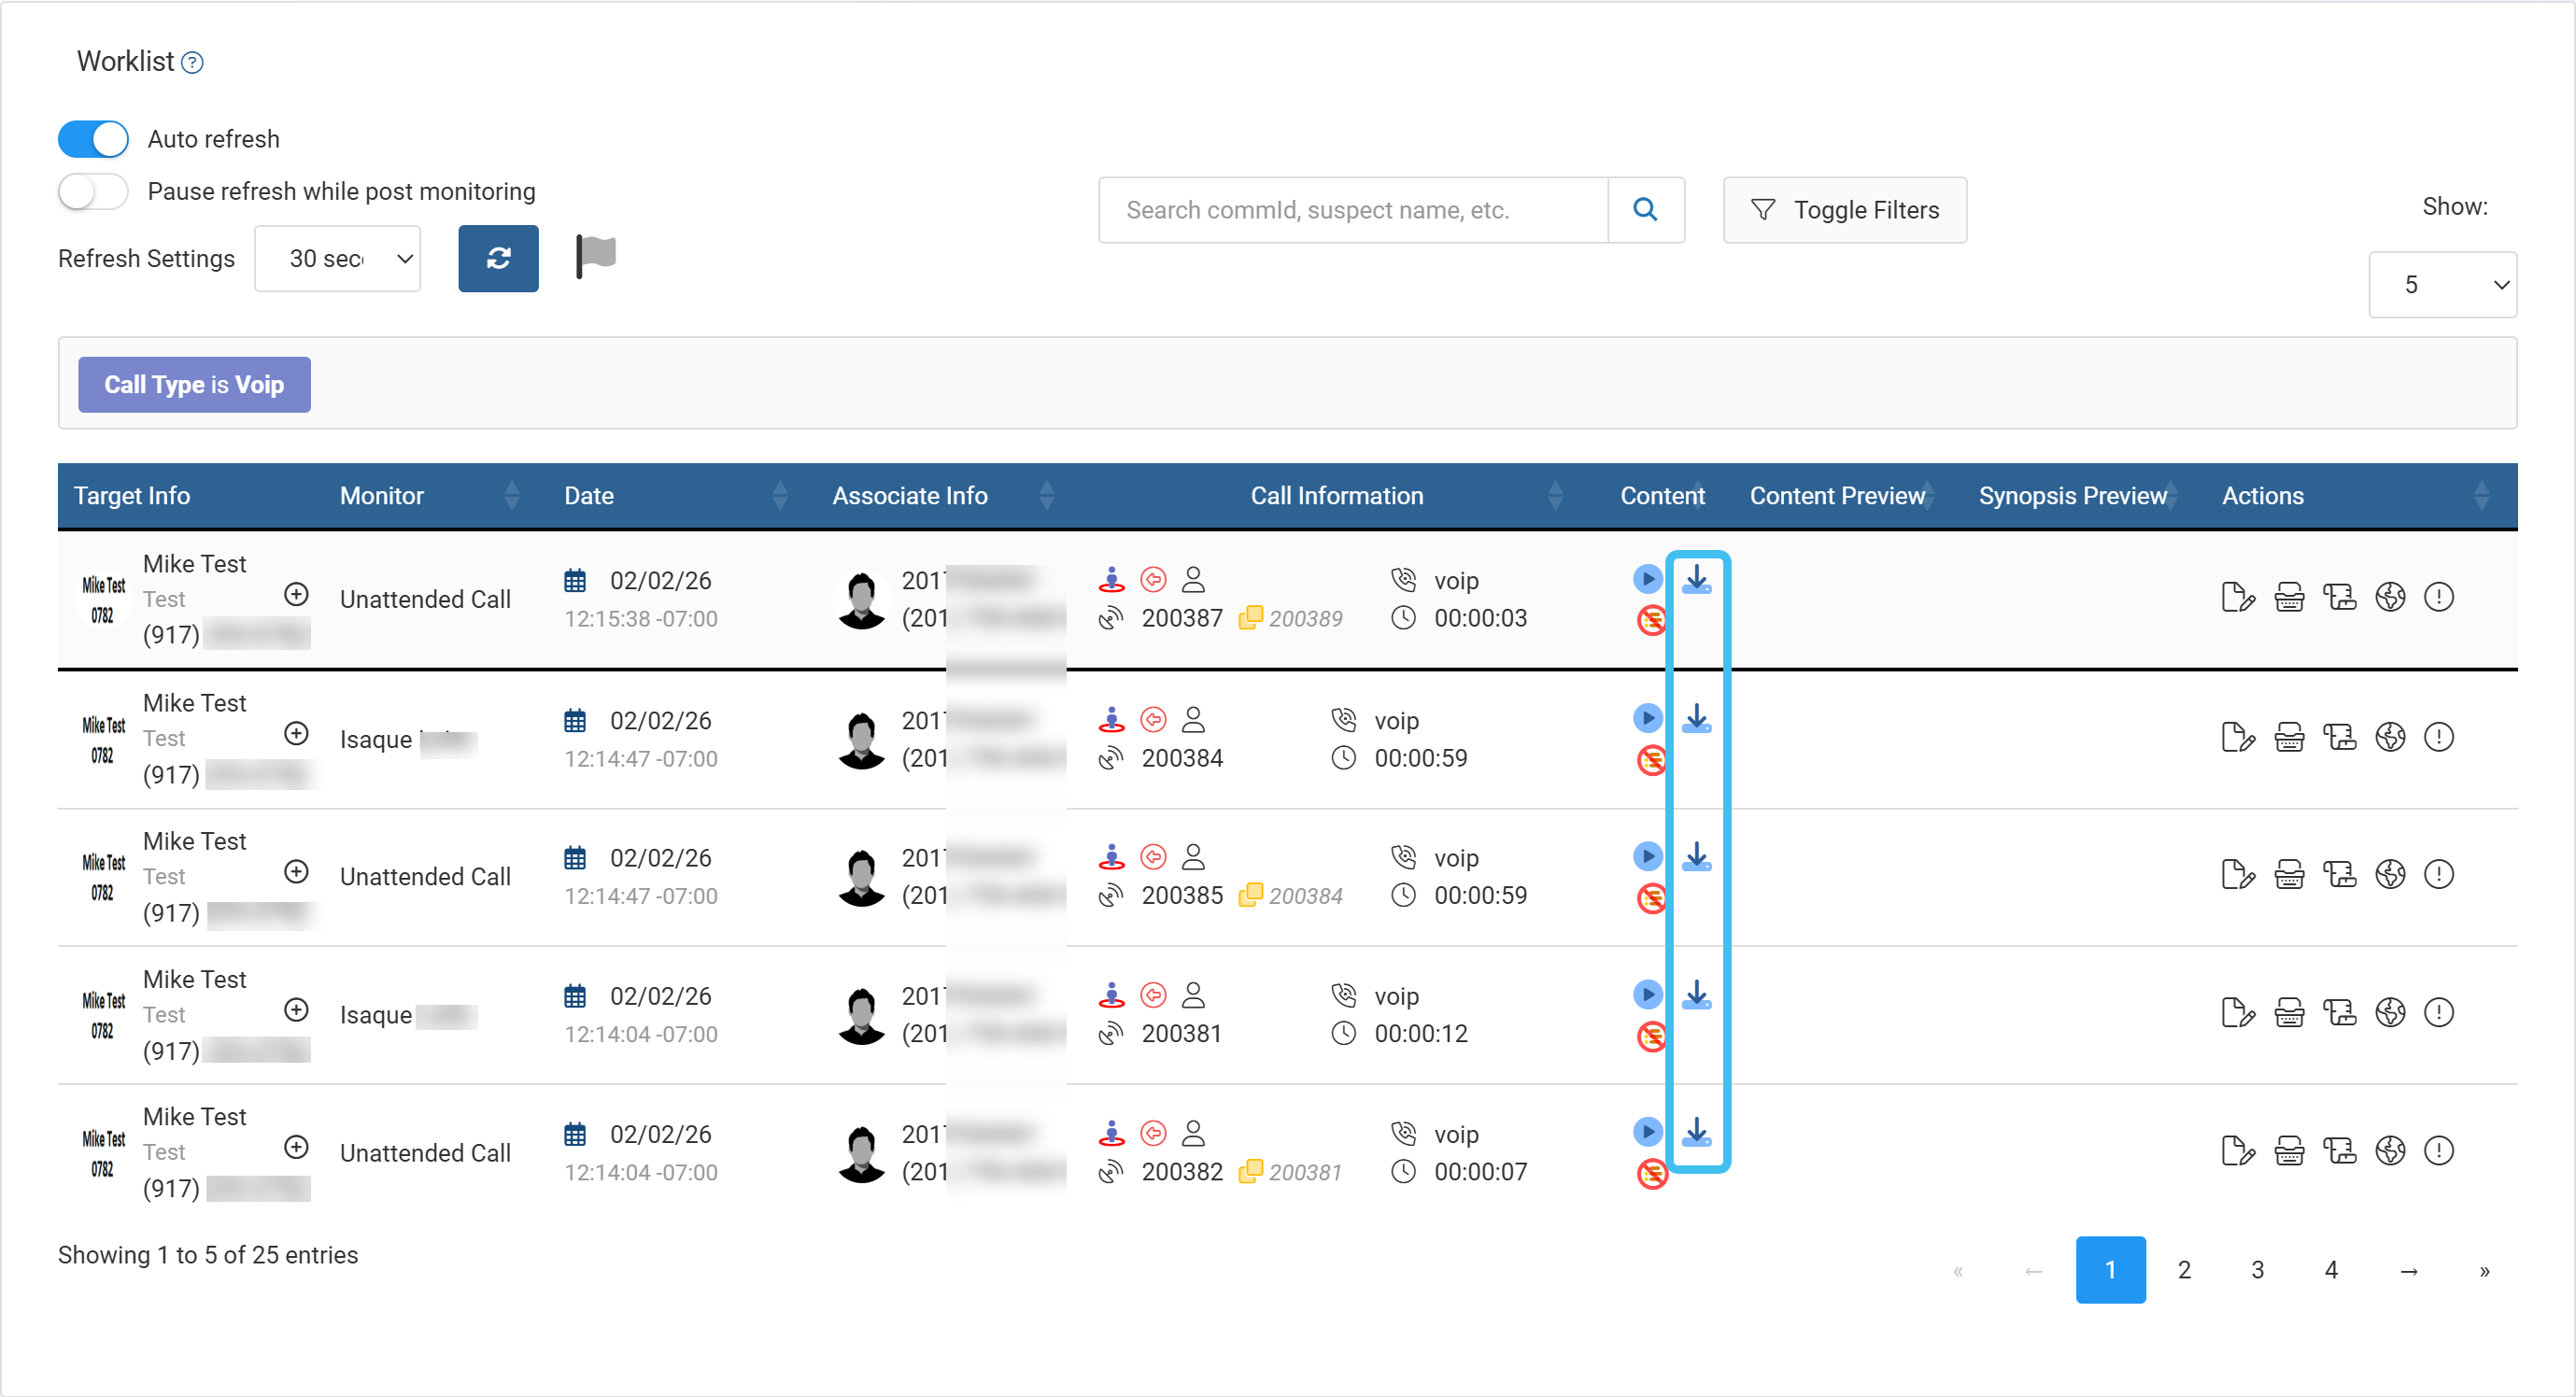
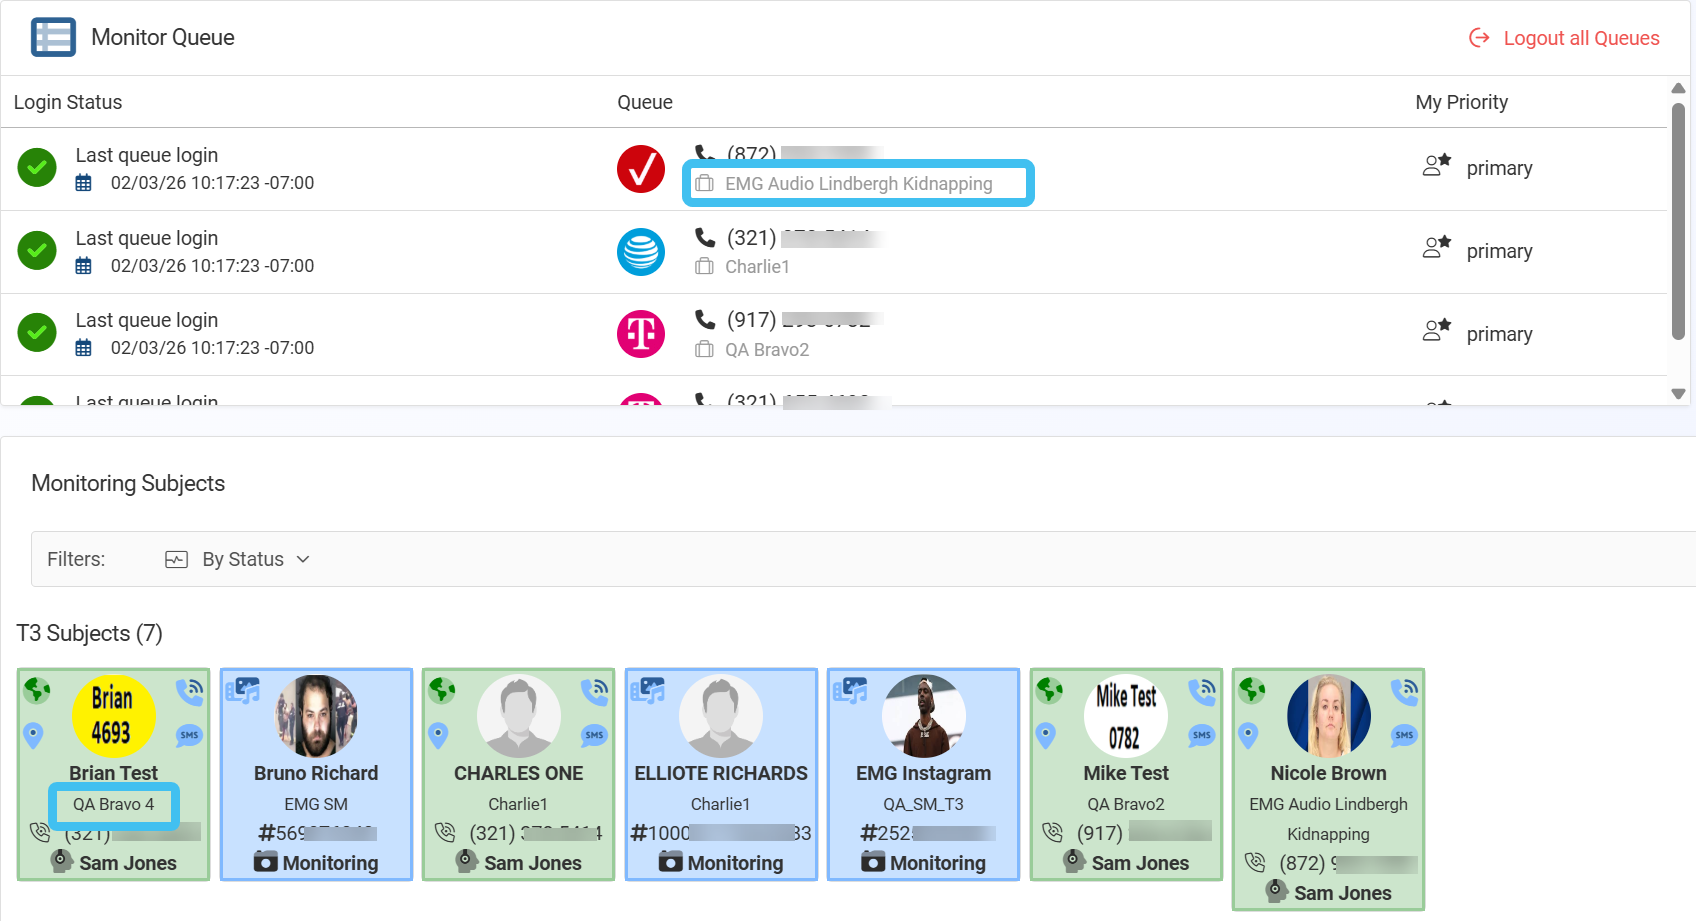
On the Live monitoring screen, if you are assigned to a social media queue, the T3 subject automatically displays without any need to log into the queue. The top-left icon indicates that it is a social media account, the person's name and their account is displayed, along with Monitoring as shown below. On both the Live monitoring screen and the Evidence management and reporting screen, social media is listed with a Call type of Unified message, and you can view the content by clicking
 in the Content column, the same as you would do to view texts.
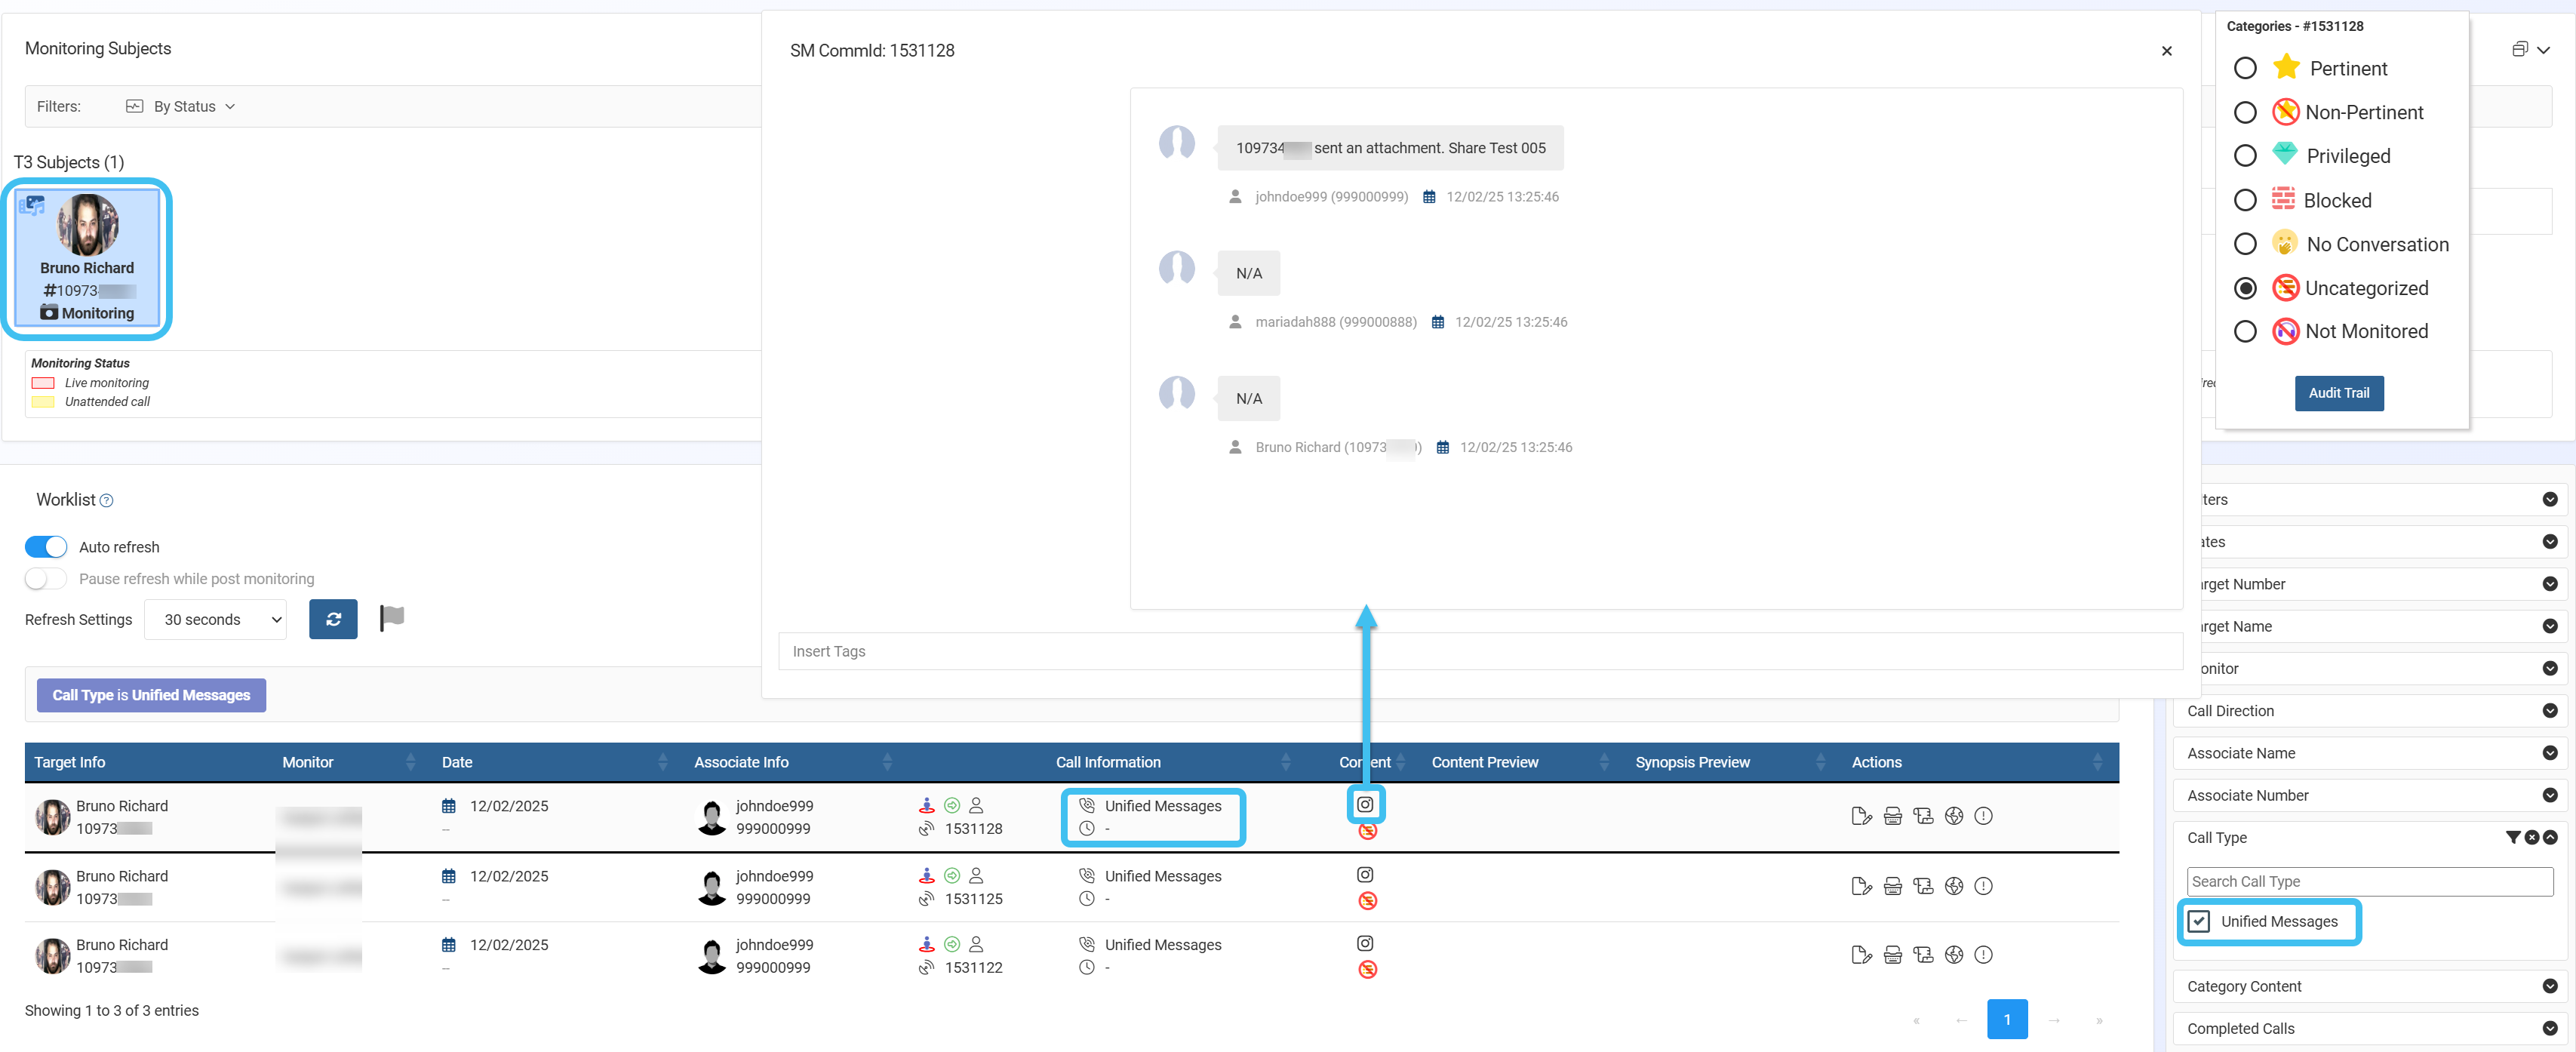
-
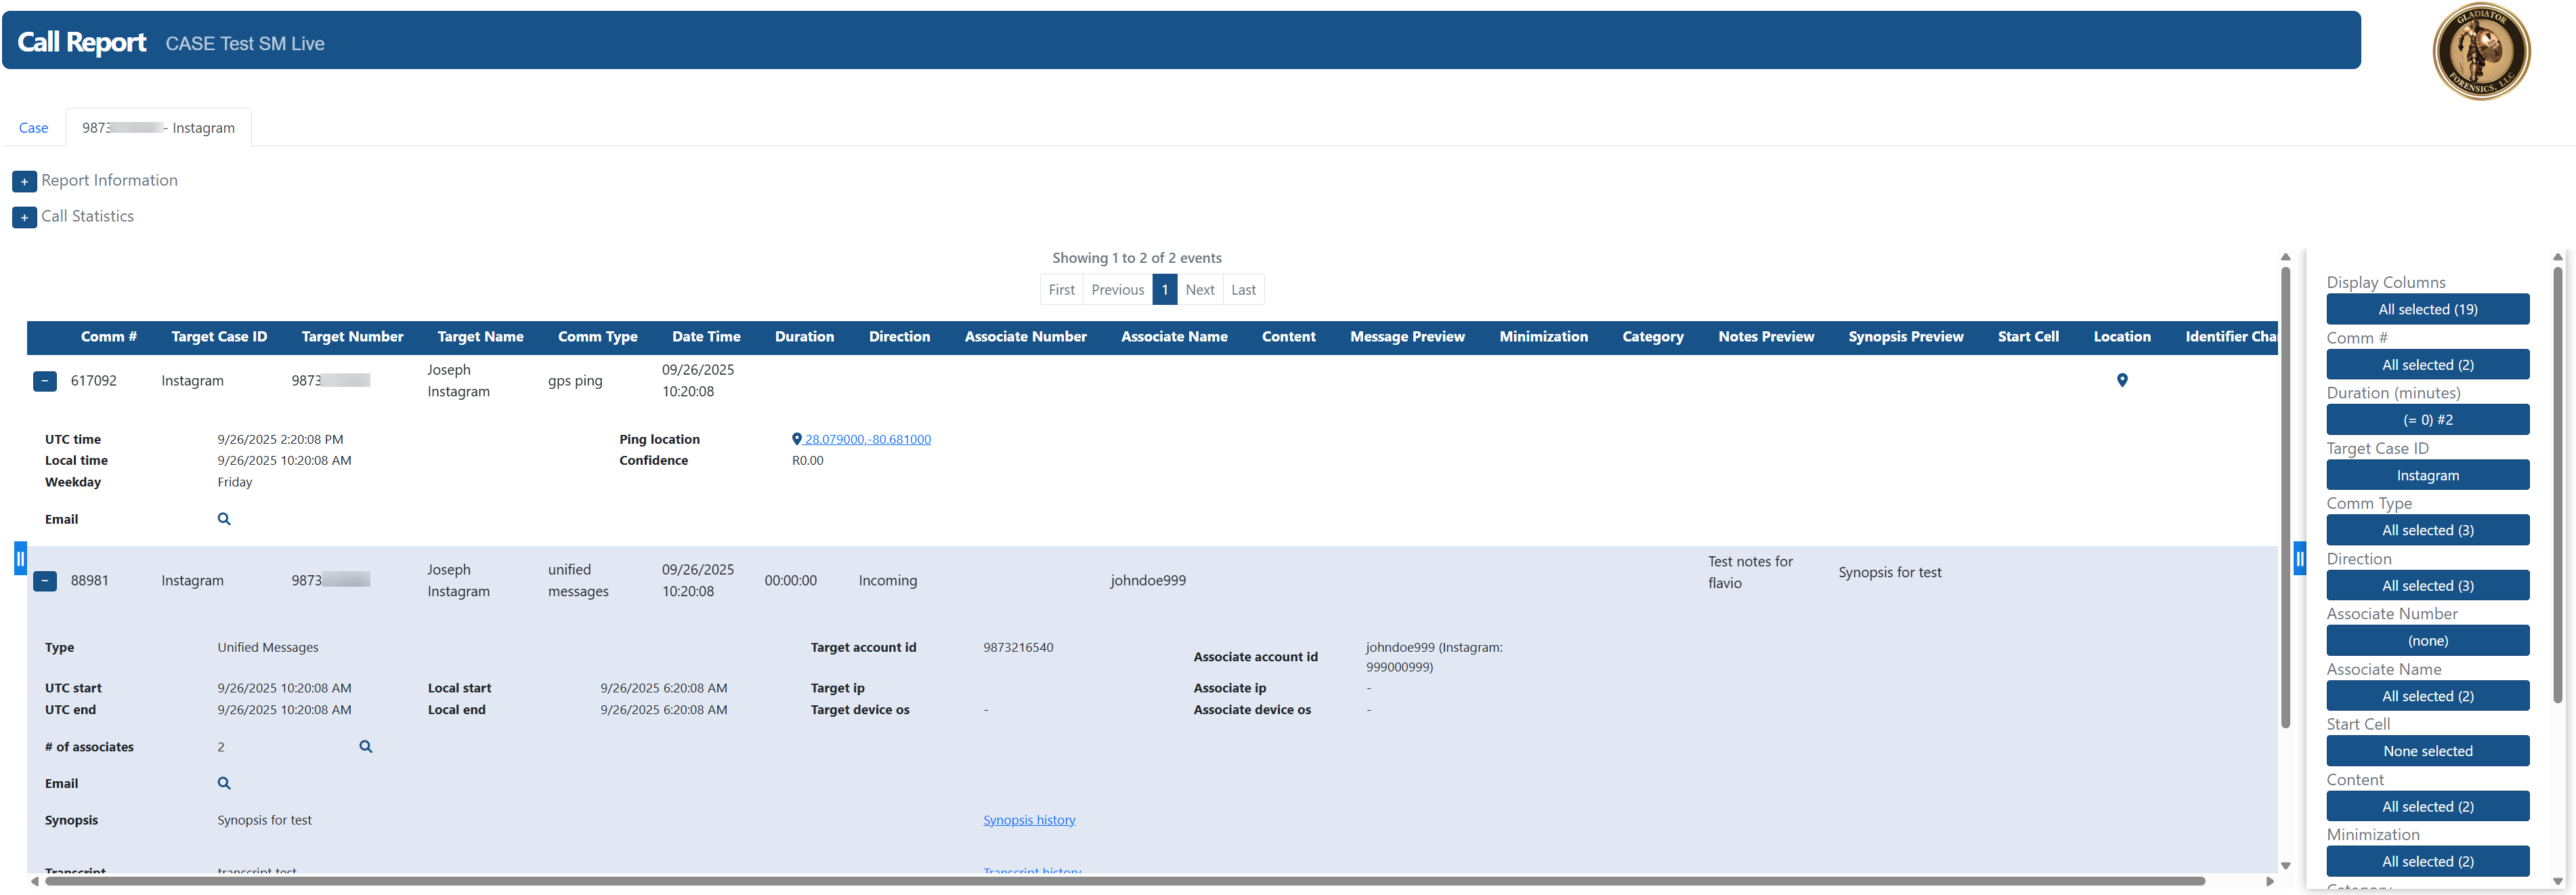
Reports generated from the Evidence Management and Reporting screen now include T3 social media data as shown below.
-
-
Previously, for all monitors, all the T50 subjects in their OSS-ESPA account were displayed by default. Now, monitors are only displayed the T50 subjects whose queue they are assigned to, as has always been the case with T3.
-
For T50 SMS events the content preview can now be viewed; previously a
 icon was displayed and the content could not be viewed.
 -
An Allow download audio setting has been added to Sentinel's Administrative settings screen. When selected, user's with the monitor administrator permission can download audio from intercepted T3 voip calls on both the Live monitoring screen and the Evidence Management and Reporting screen.
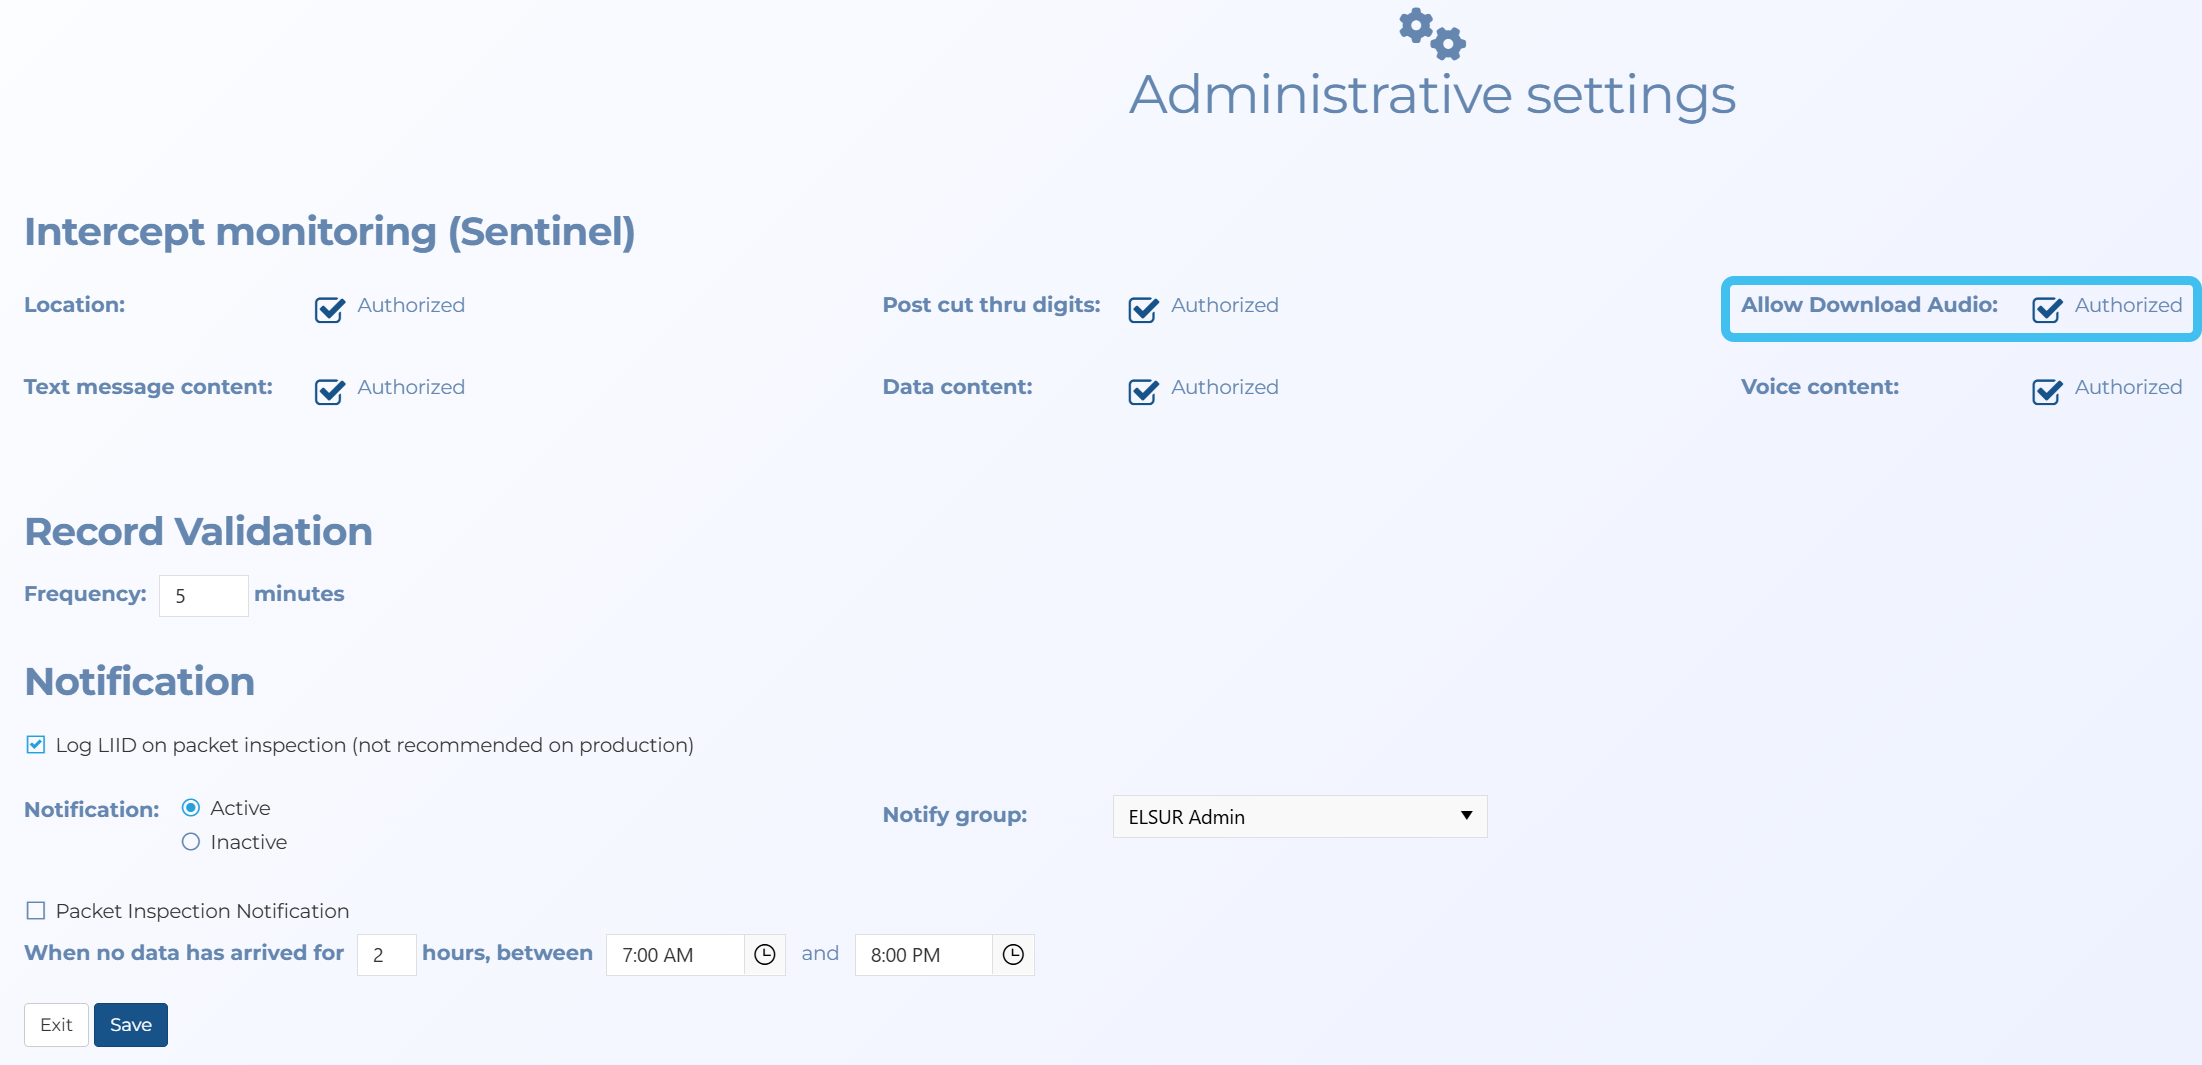
For information refer to How to allow audio downloads.
-
On Monitor queue and Monitoring subjects sections of the Live monitoring screen, the case name is now displayed below the target name.
- Administrators can now create Evidence Management and Reporting templates that can then be selected by users to quickly create their reports. To support this new feature:
the new Evidence Management and Reporting settings screen, opened from the main menu by clicking Admin settings then Evidence Management and Reporting, allows administrators to define which report options are included in each template. The screen allows administrators to create, edit and delete templates. The templates can either be fixed or user configurable. If they are configurable they act as a starting point for users who can select the template then adjust the report options as required.
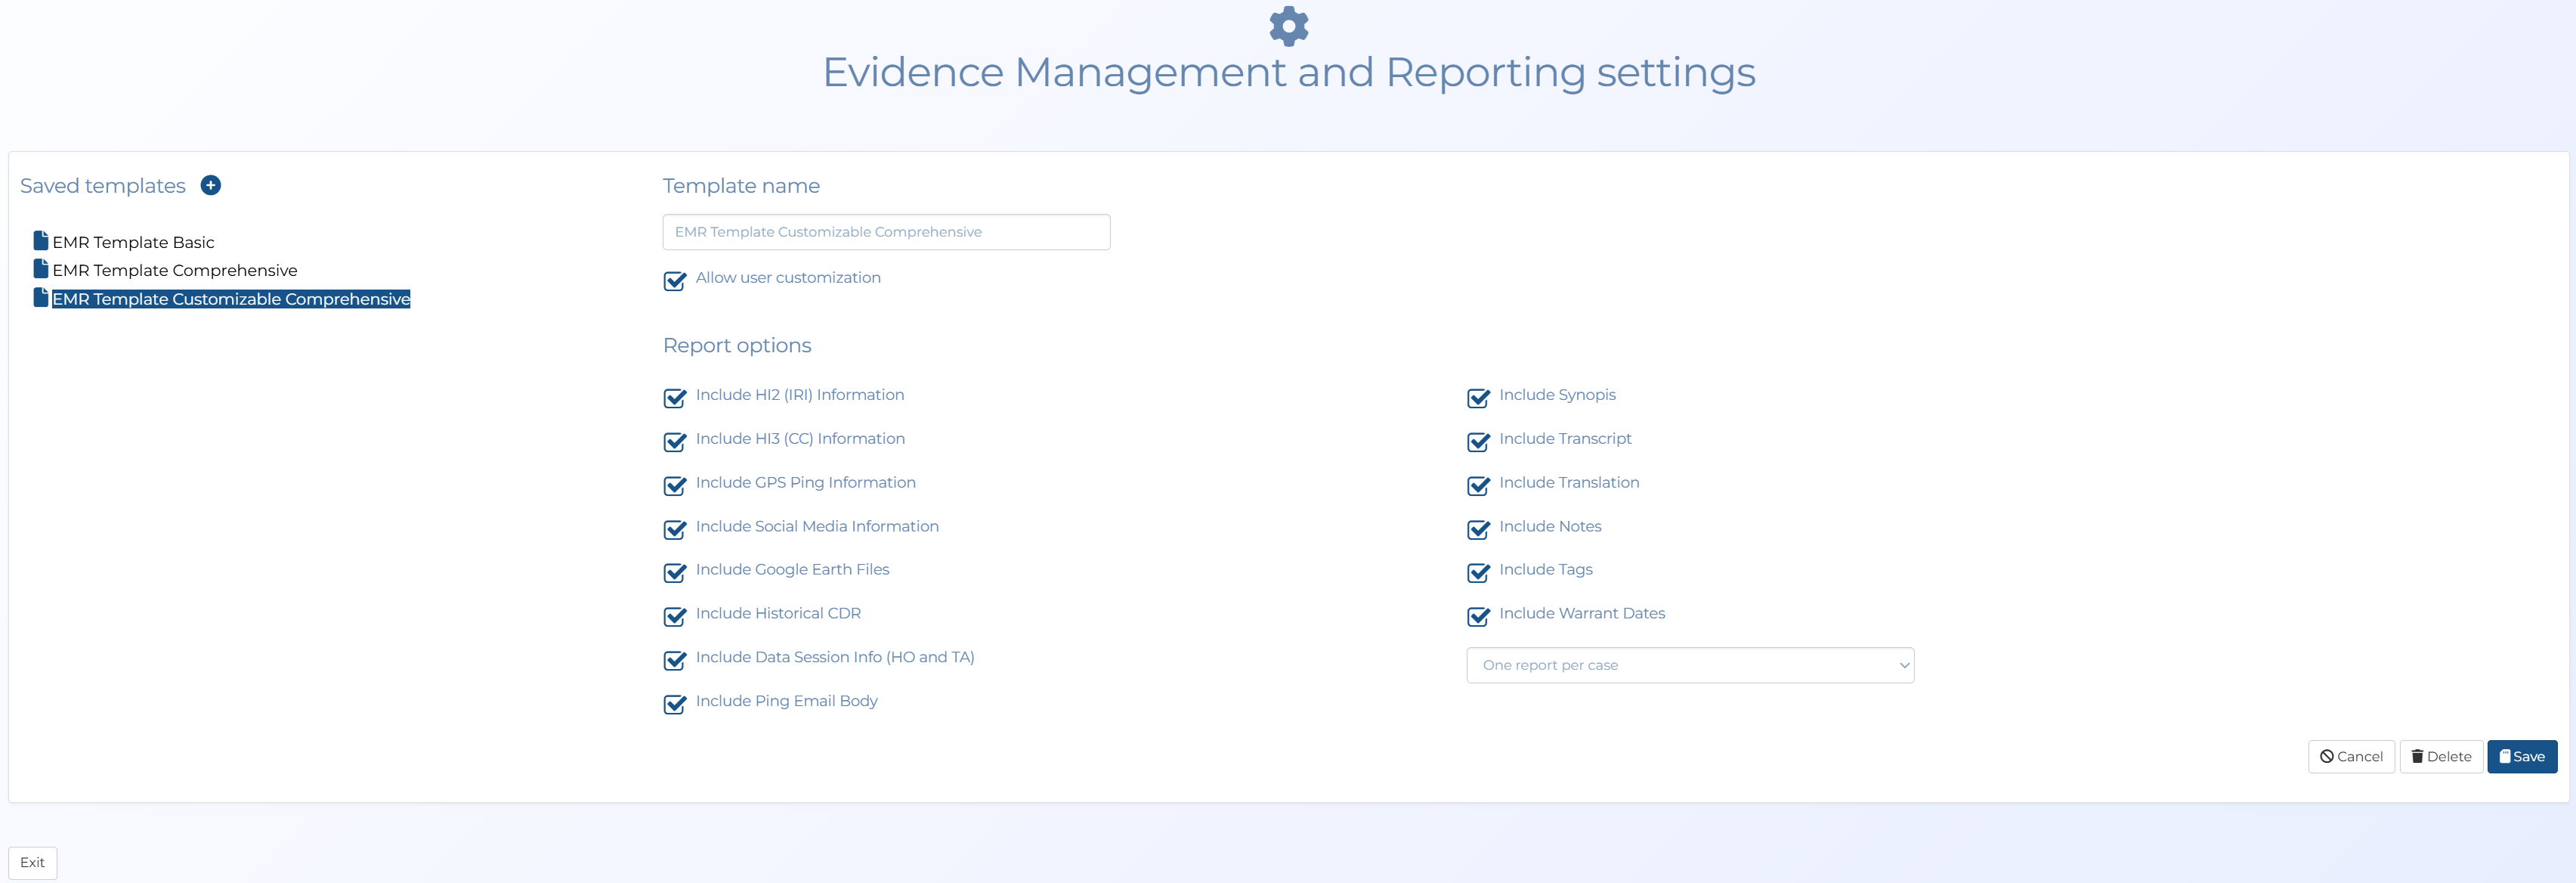
the new EMR Template setting on the Evidence Management and Reporting screen allows users to select a predefined report. If the report options are then greyed out it means the selected template does not allow the content included in the report to be customized.
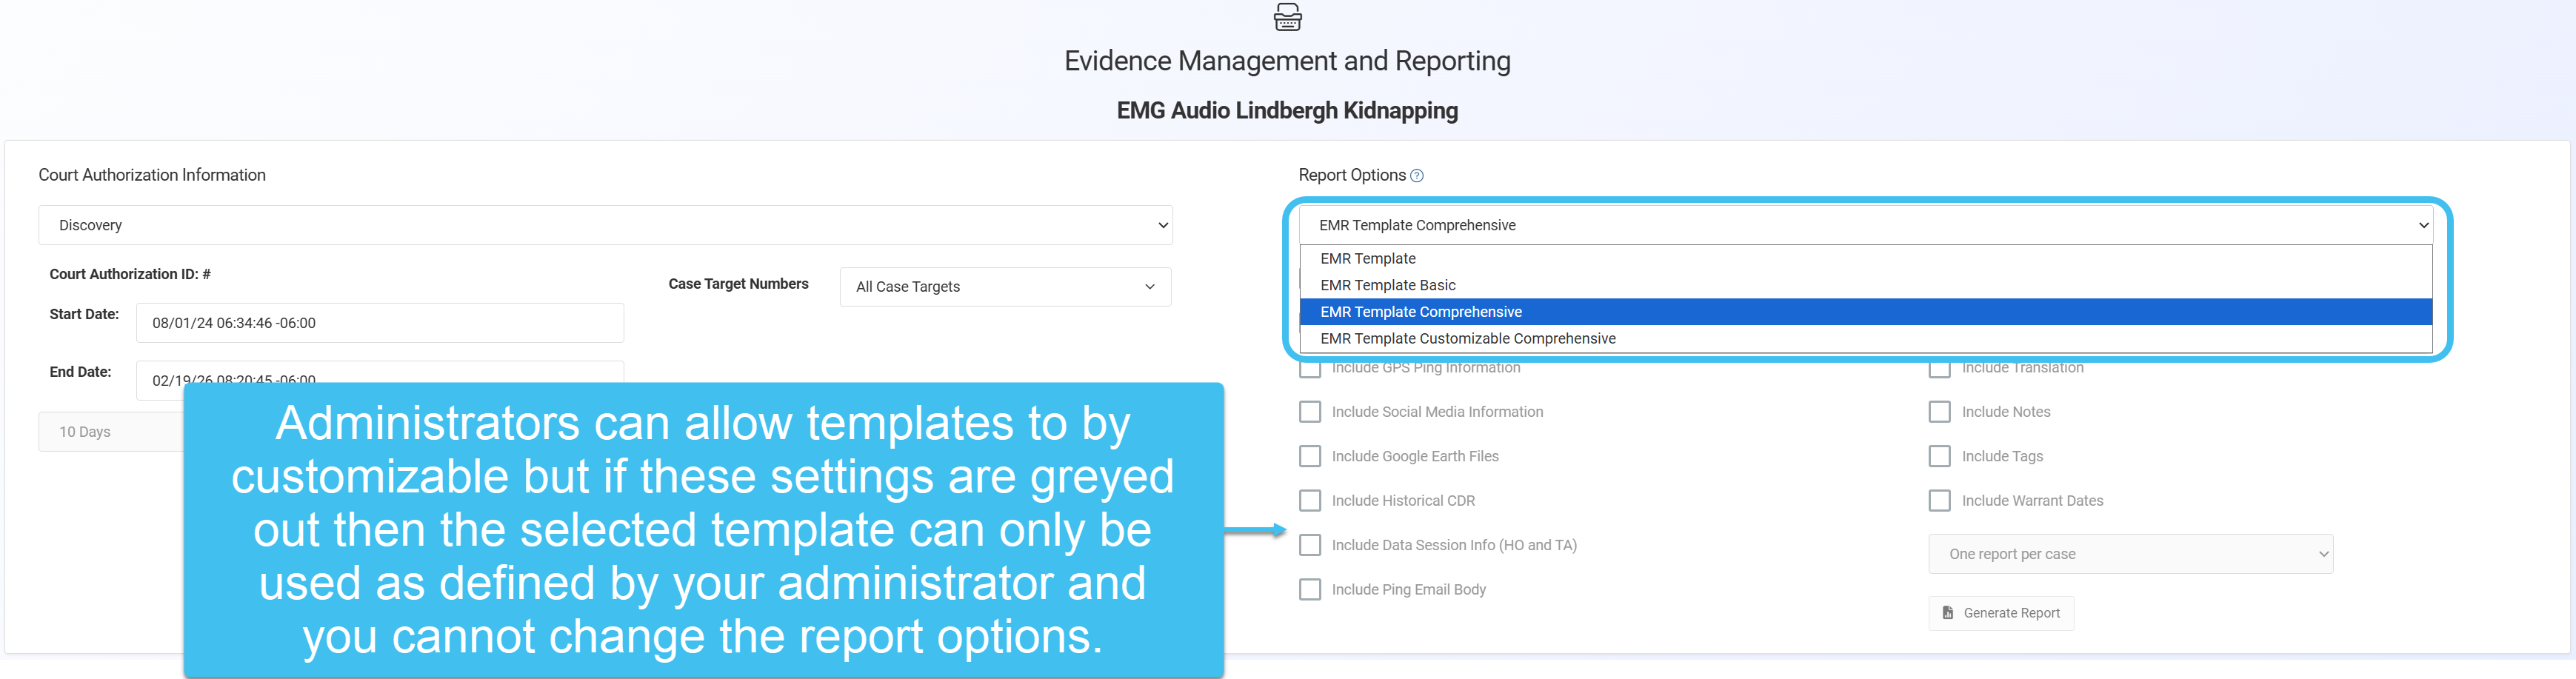
For information refer to Managing Evidence Management and Reporting templates.